
Using Proportion in Your Photography
Learn about the 5th Principal of Art- Proportion. I’ll run through 10 different proportion grids that you can use to position elements within your images.
Prefer to watch this tutorial in video format? 😏
In this tutorial, I'm going to walk you through the fifth Principle of Art, which is proportion. Proportion is similar to space in that it’s about area, but now we're going to take it one step further and talk about how to divide up that area.
How big are individual elements within a shot in relation to one another, and how do we position them to make it appealing to the eye?
10 Different Proportions for Composition
I’m going to run you through 10 different proportion ratios that you can implement in your photography. Sort of like a series of “templates” that you can use to compose shots.
And fun fact- mirrorless cameras have many of these templates pre-arranged within the viewfinder. If you fiddle with your menu, you should be able to set them up for when you’re composing shots. With that said, let's start from the top.
The Rule of Thirds

The rule of thirds is arguably the most popular photography rule of all time. Chances are, even if you're not a photographer, you've heard it mentioned at some point. It pertains to every genre of art- painting, drawing, textiles, and even pottery.
The rule of thirds grid essentially divides an image into nine distinct sections. Three vertical lines and three horizontal lines, all spaced evenly apart. The lines that go across the screen meet at four central power points in the image.
These so-called power points are where you want to position your subject for maximum effect. This rule generally works well with scenes that don't have much going on, and you just need a way to position a main element in the shot to make it slightly more appealing than the average shot. That’s why if you're a beginner, the rule of thirds is a great place to start.
The first example of this that I want to show you is this image:

This image, demonstrating the rule of thirds, was taken at Balneario Municipal El Aserradero in Mexico.
As you can see, the delipidated bridge is about at the one-thirds vertical line, and we have a boat with a person positioned at one of the power points in the shot (where two imaginary 1/3 lines intersect.) This rule is being utilized to its maximum effect.
However the rule of thirds doesn't just apply to people; you can also use it with landscape elements. For example, check out this shot taken at a waterfall in Honduras. As you can see, we have the waterfall at one of the power points and a fern at another power point in the shot:

This image, demonstrating the rule of thirds, was taken at Pulhapanzak Waterfall in Honduras.
The Golden Spiral
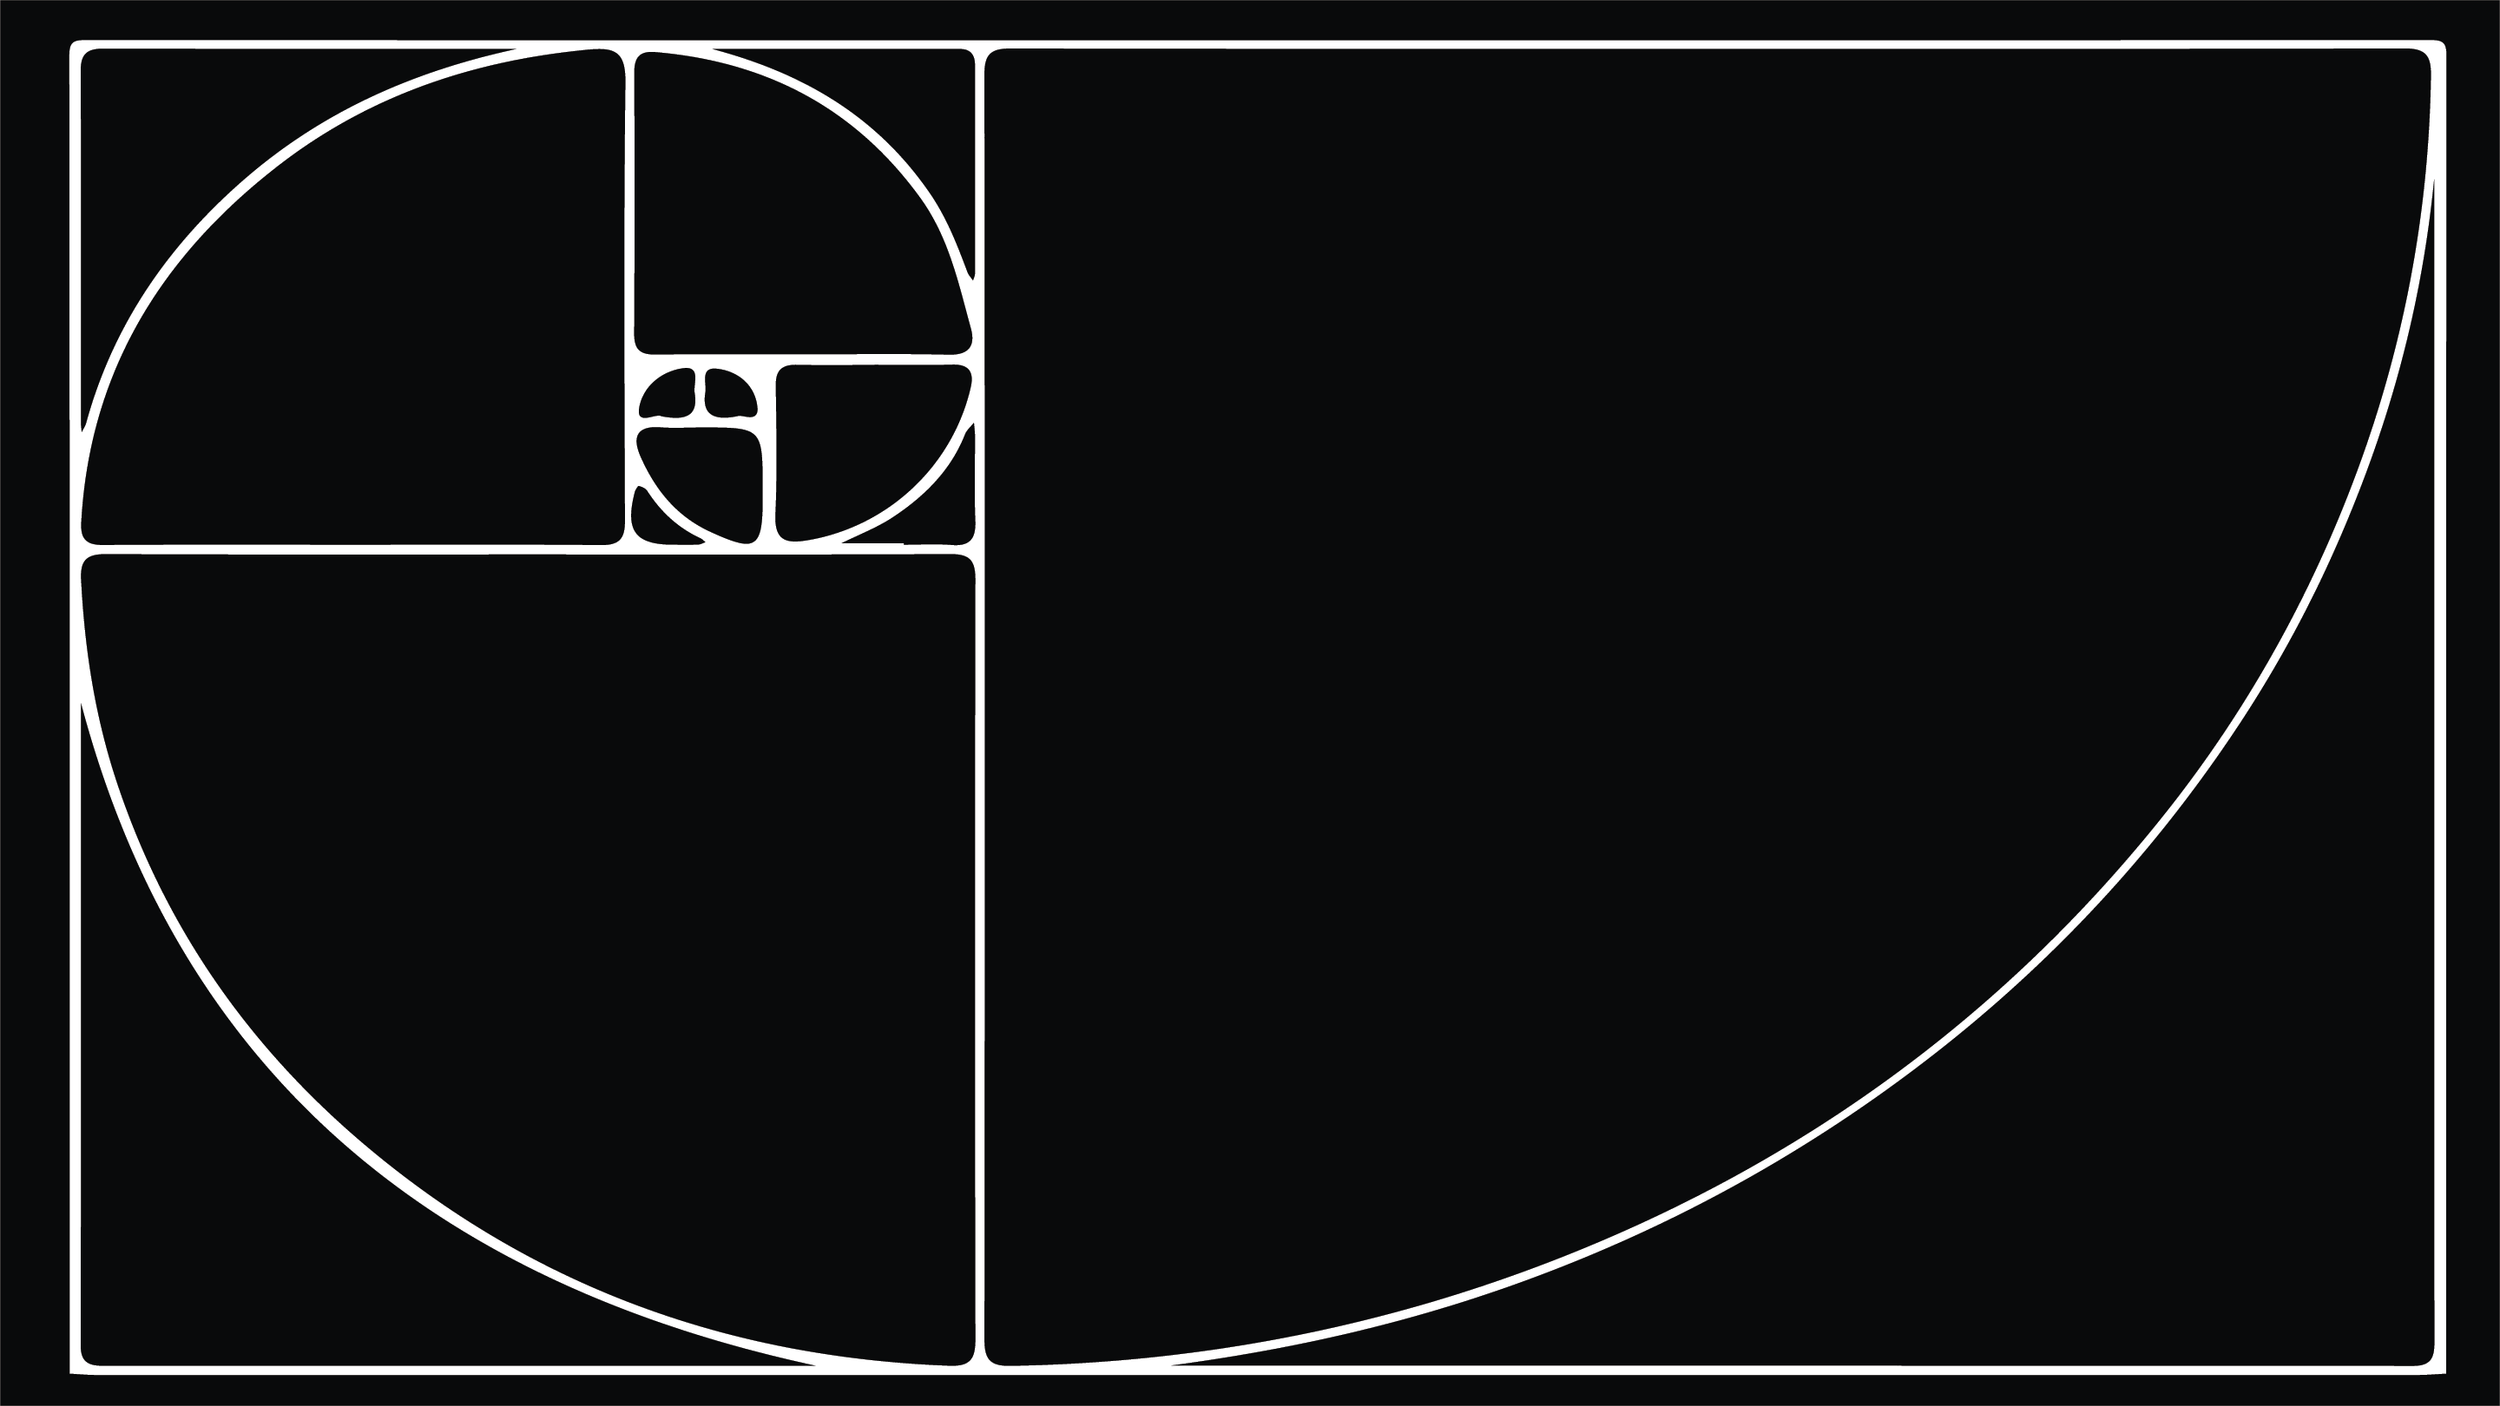
The next proportion I want to cover is the golden spiral. In some circles, it’s also known as the Fibonacci sequence. This proportion is interesting because there's a significant amount of math and science that explains why it's appealing to the eye.
We’re not going to get into that, because it's fairly complicated, but there are plenty of YouTube videos out there if you want to learn the real science behind it. All you need to know is that it is appealing to the brain.
It’s best used to add depth to an image, and pull the eye slowly into a shot. For example, on this photo, you can see I'm standing on a rock, and if you overlay the golden spiral, you can see a spiral formation that pulls the eye deeper into the shot:

This photo, which utilizes the golden spiral, was taken at Jumbo Rocks in Joshua Tree National Park, California.
Golden Triangles
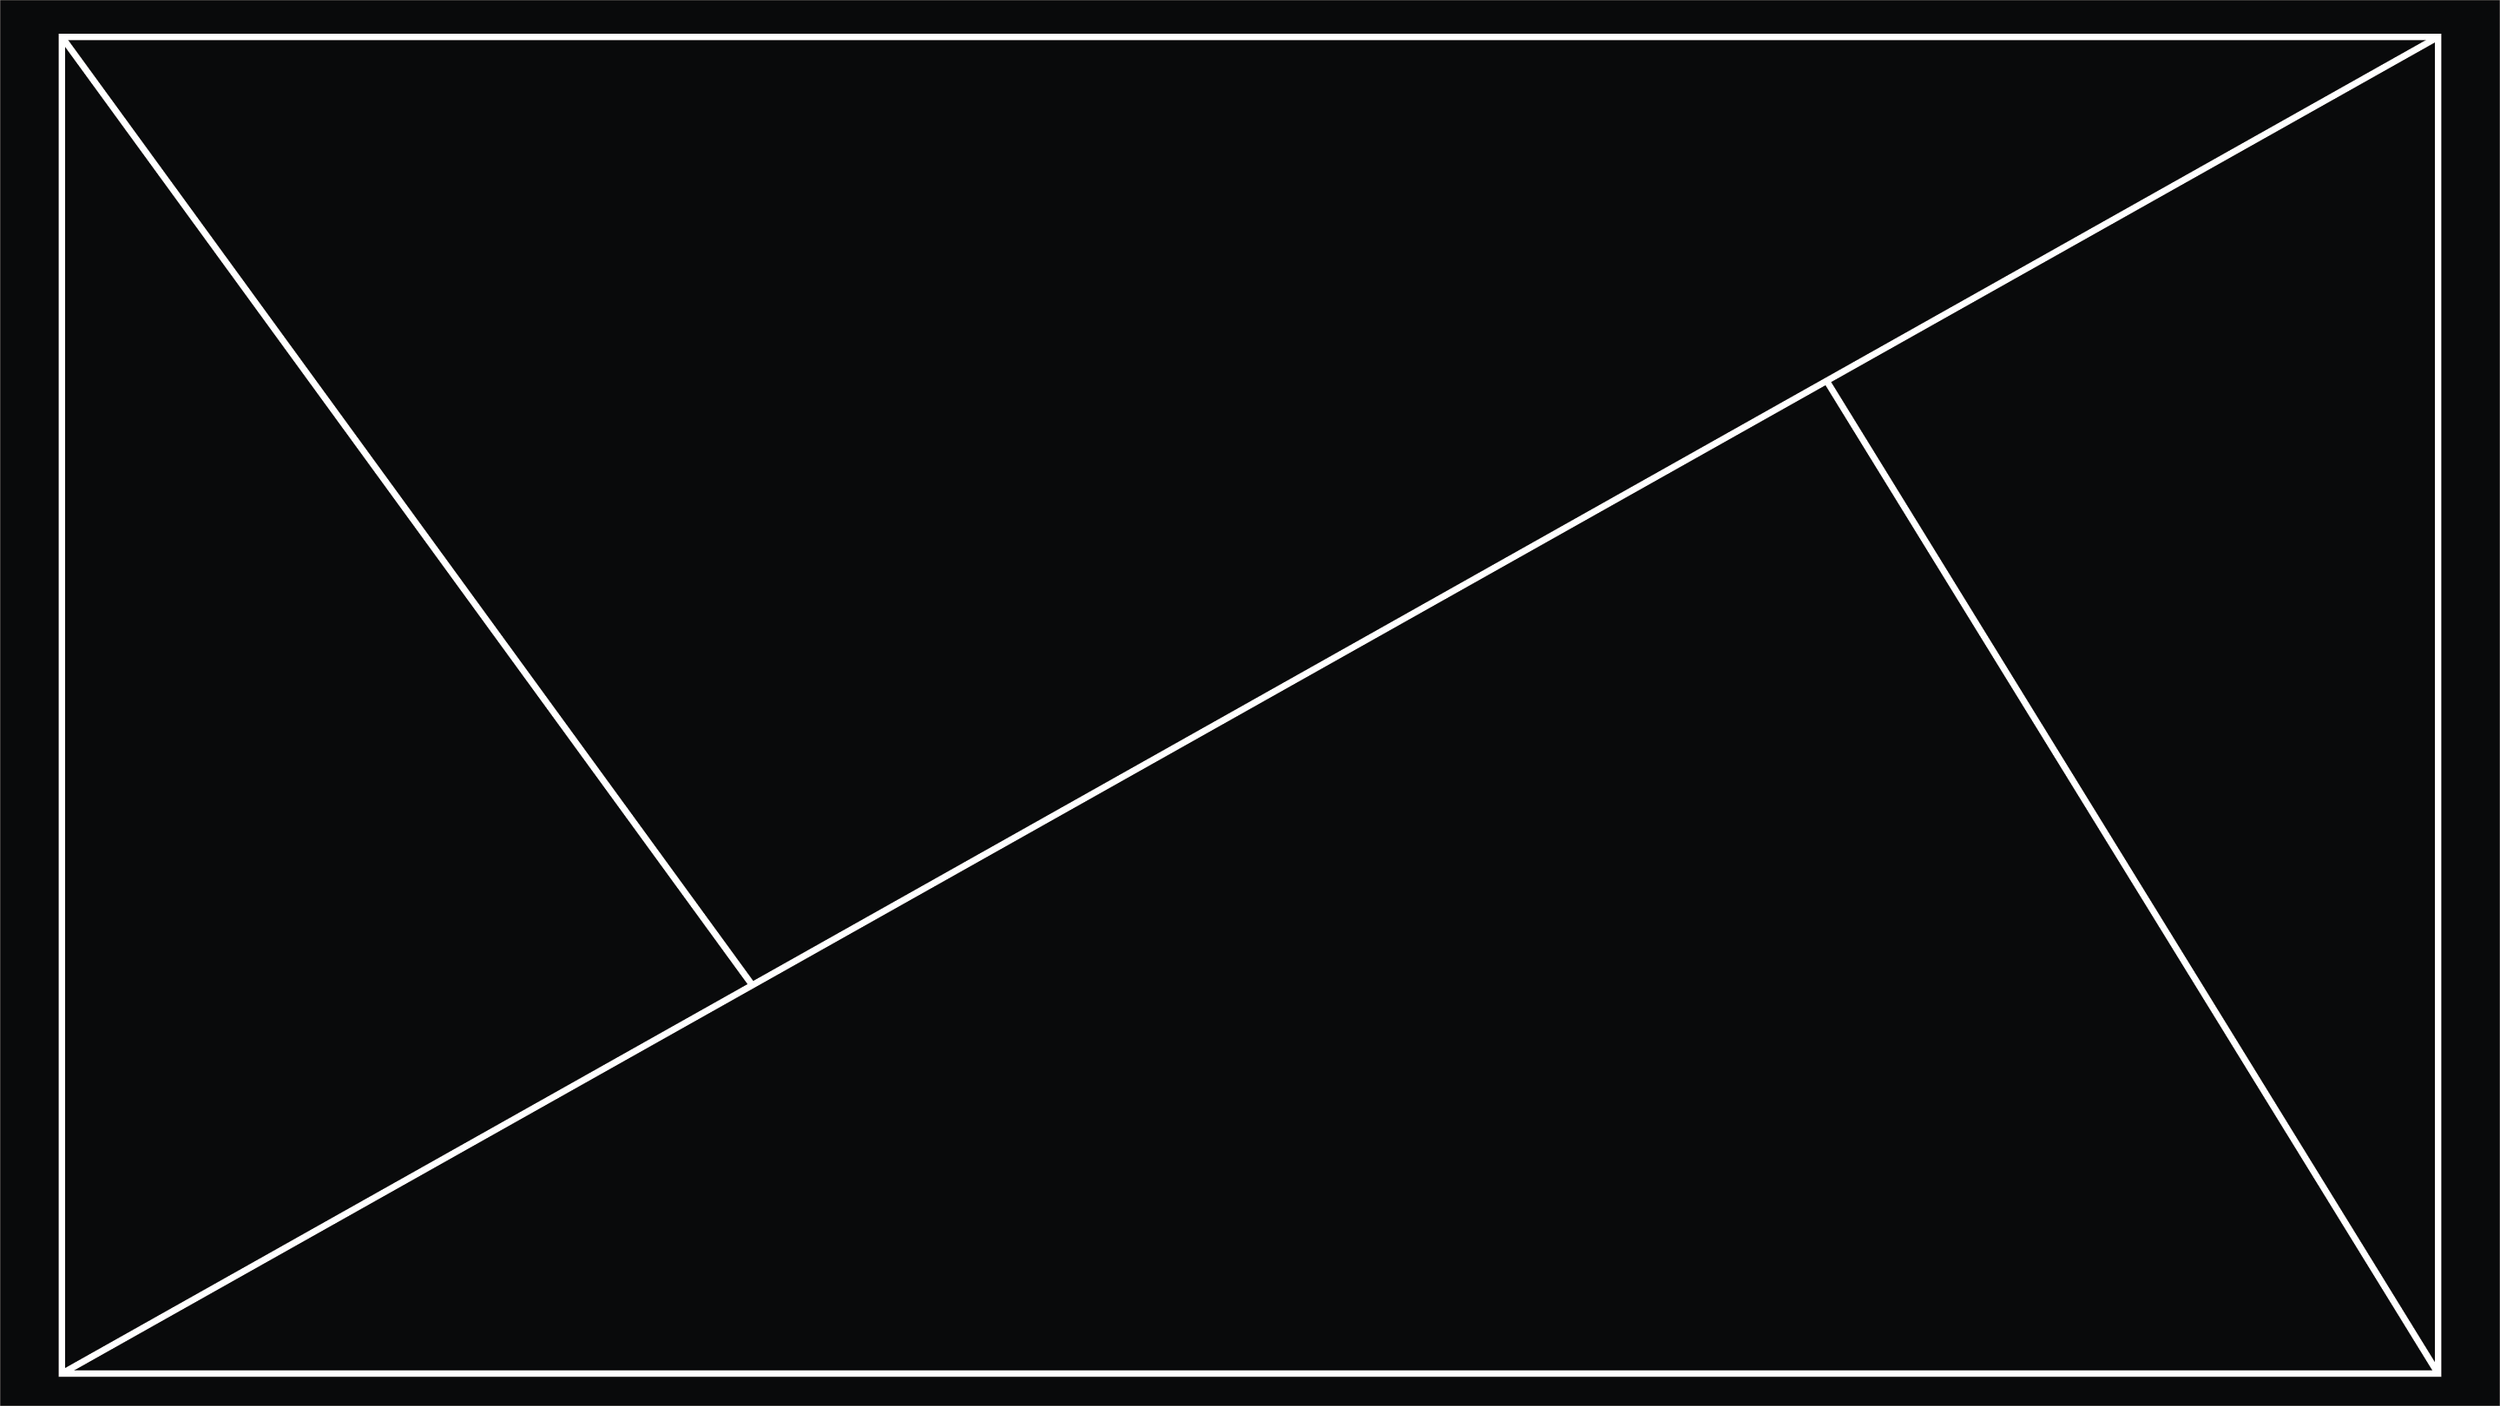
While we’re on the subject of gold, let’s talk about the golden triangles. This proportion consists of four different triangles within a shot, and when they meet in the middle, they form a 90-degree angle.
Generally, you want to fill these triangles with either positive or negative space, or you want to put a subject where the triangles meet in the center of the shot. For example, check out this shot of the Golden Gate Bridge:

This photo which demonstrates how the golden triangles are used was taken at the Marin Headlands in California.
In the bottom right corner, we have a darker, negative part of the image, and on the left side, we have a beautiful sky with the Golden Gate Bridge and a perfectly framed boat in the corner. We're using the triangle to divide the image in half.
Another example is this image of an agave plant. The main agave plant in the foreground is positioned at one of those power points, and if you overlay the golden triangles, you can see how it works perfectly:

This second example of the golden triangles was taken at Fábrica La Rojeña near Tequila, Mexico.
Vanishing Point
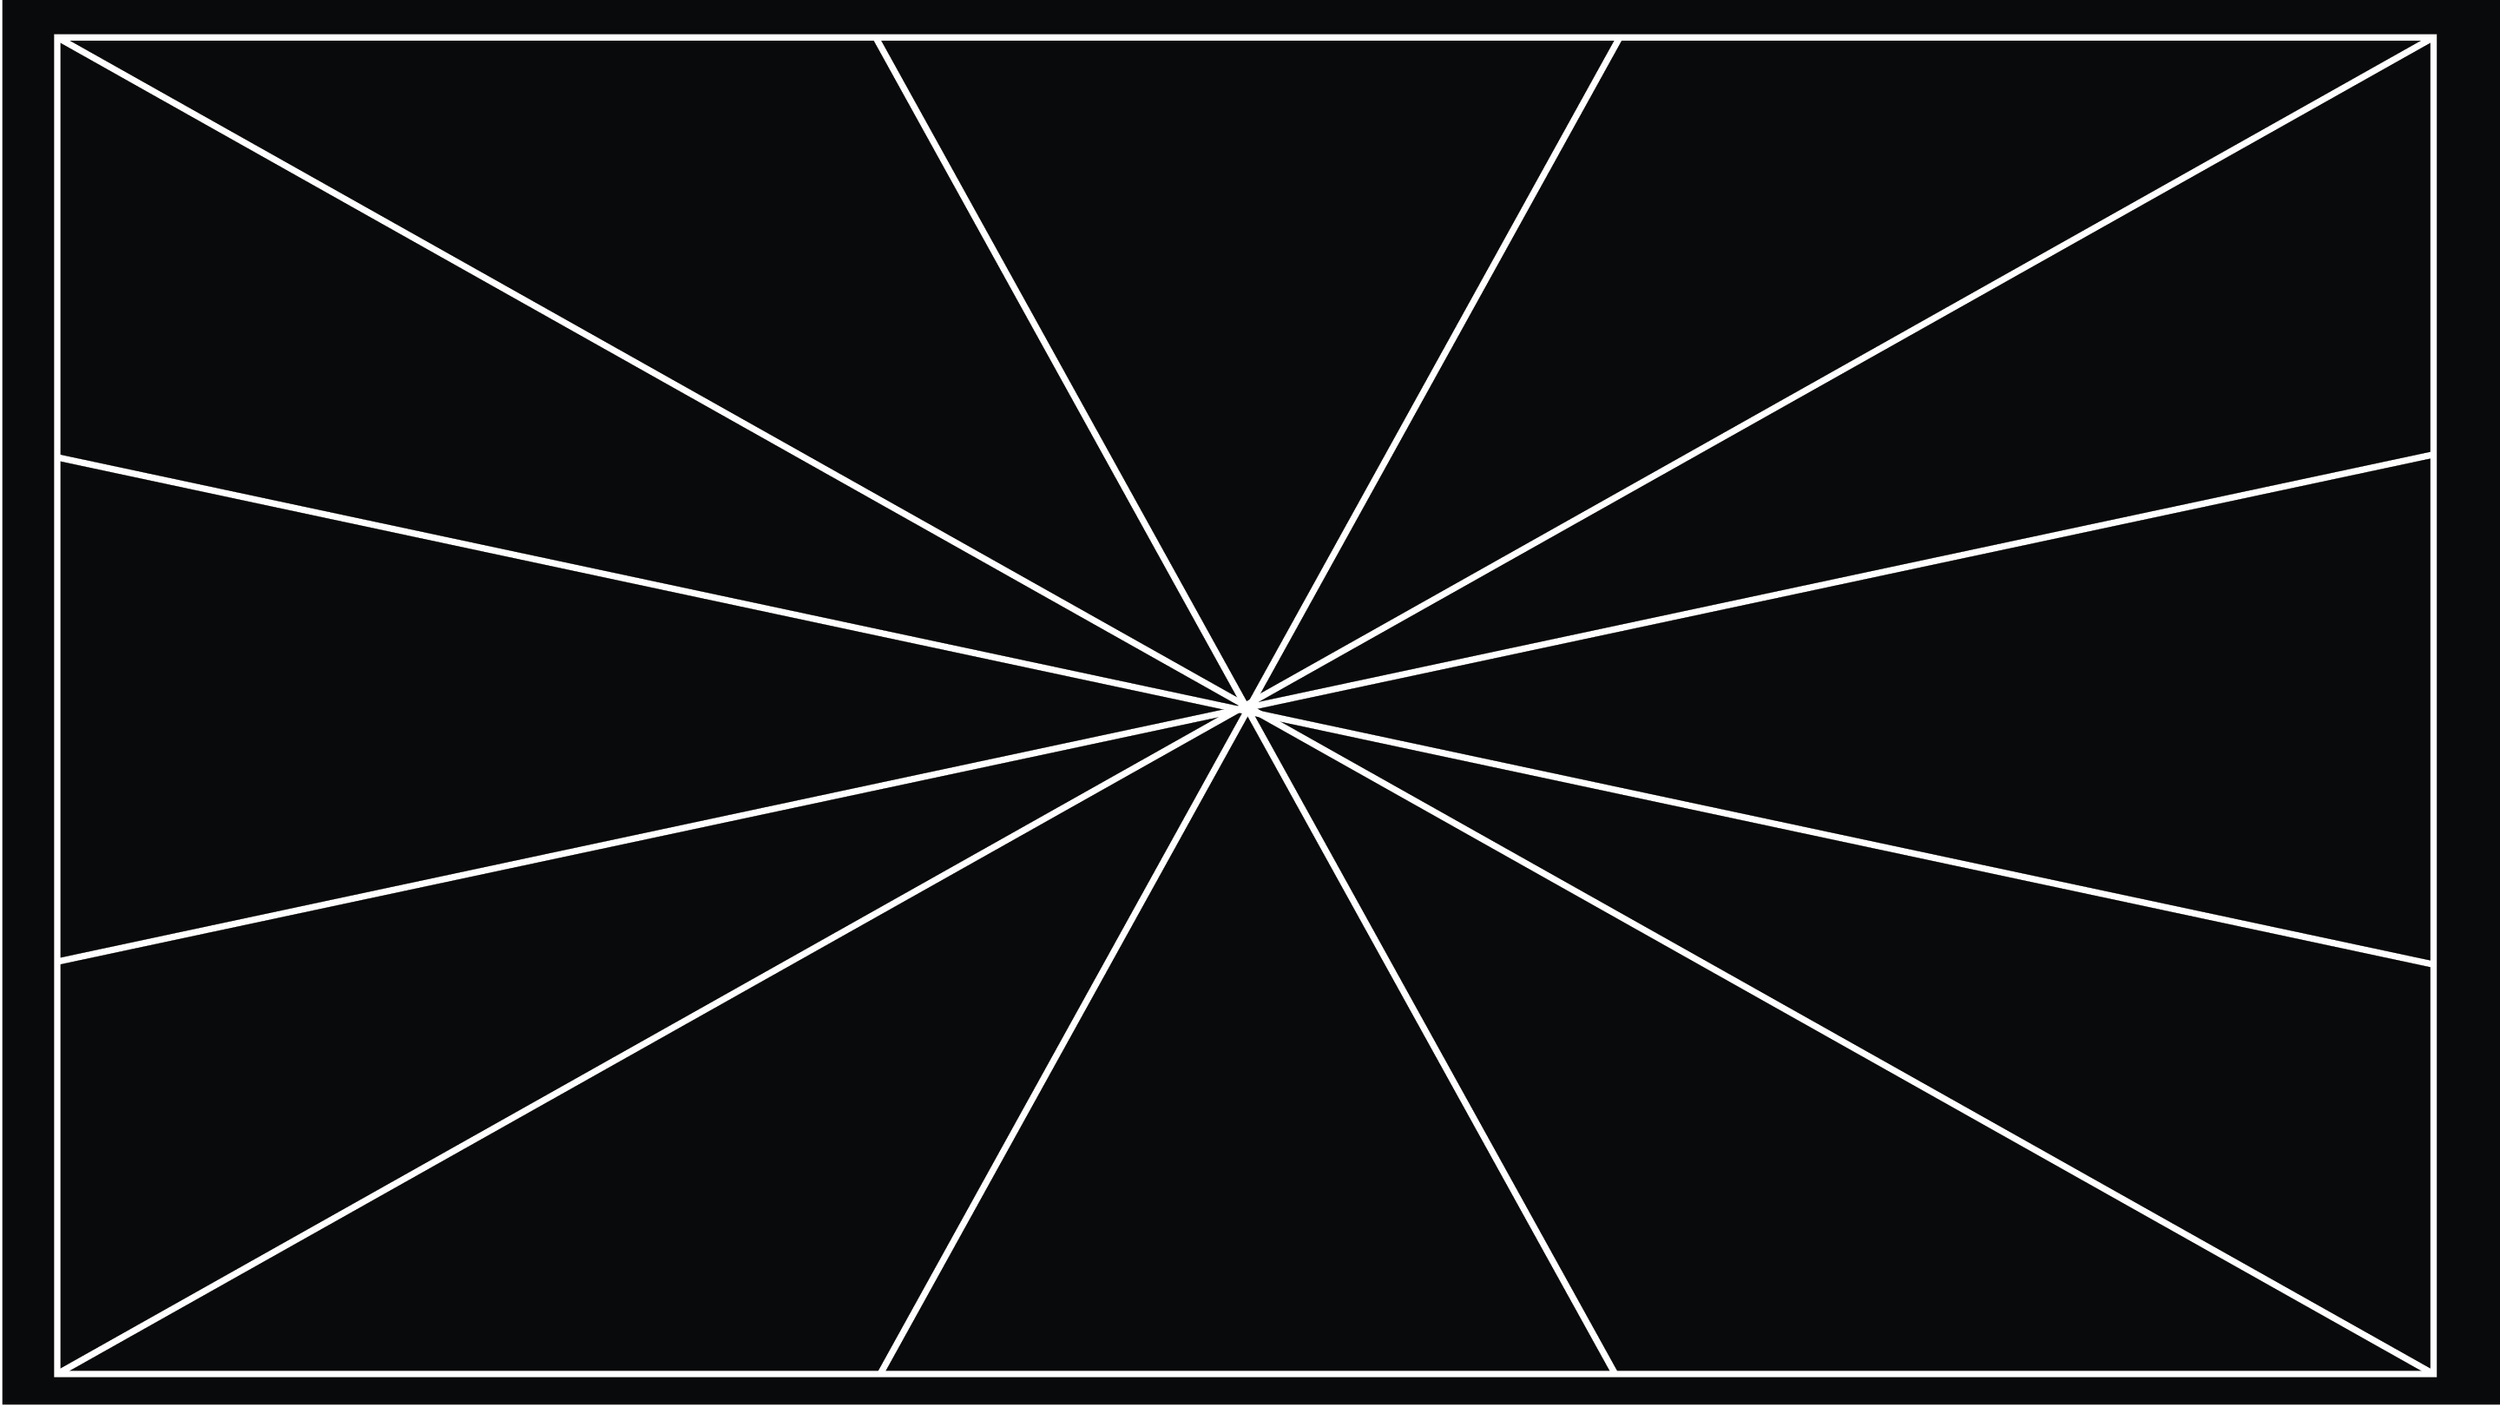
Let’s talk about a vanishing point proportion. This is where elements in the shot get smaller and smaller as they lead to an ultimate vanishing point. At the vanishing point, the eye isn’t supposed to see anymore, which leaves the shot open to the viewer's interpretation.
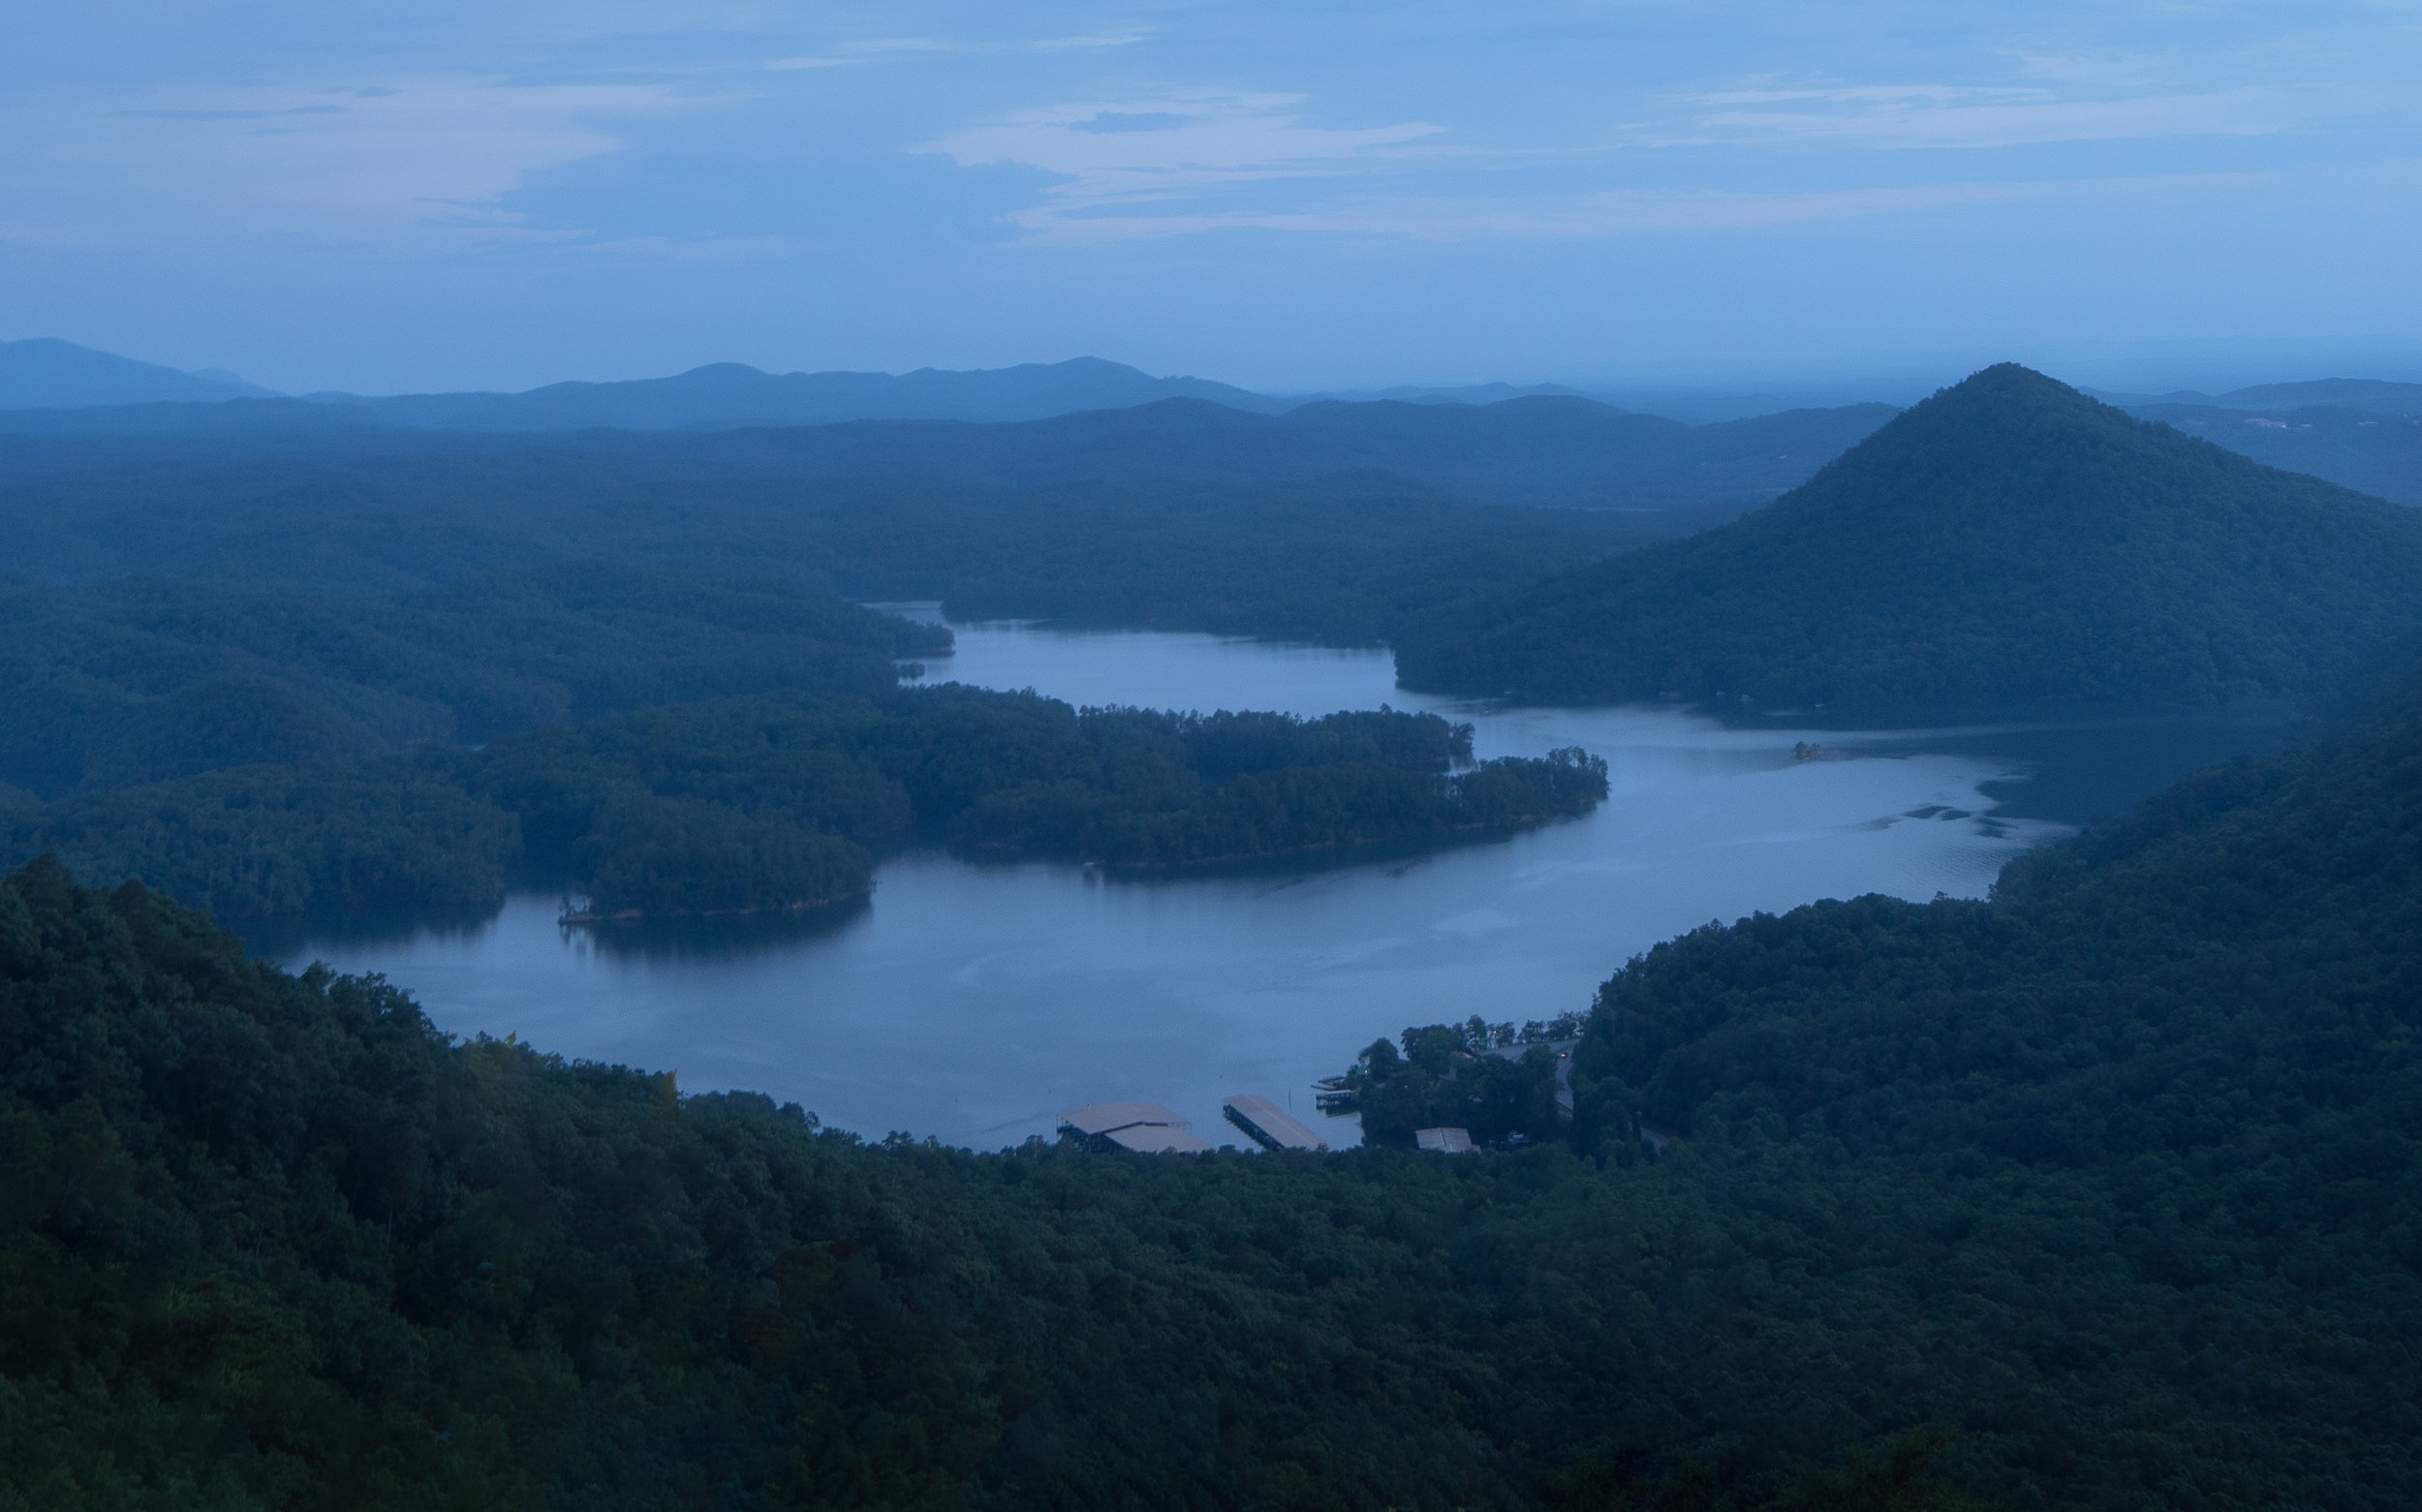
Vanishing points are a great way to add mystery to a shot and demonstrate the size of certain objects. For example, check out this shot taken in a misty forest in Oregon:
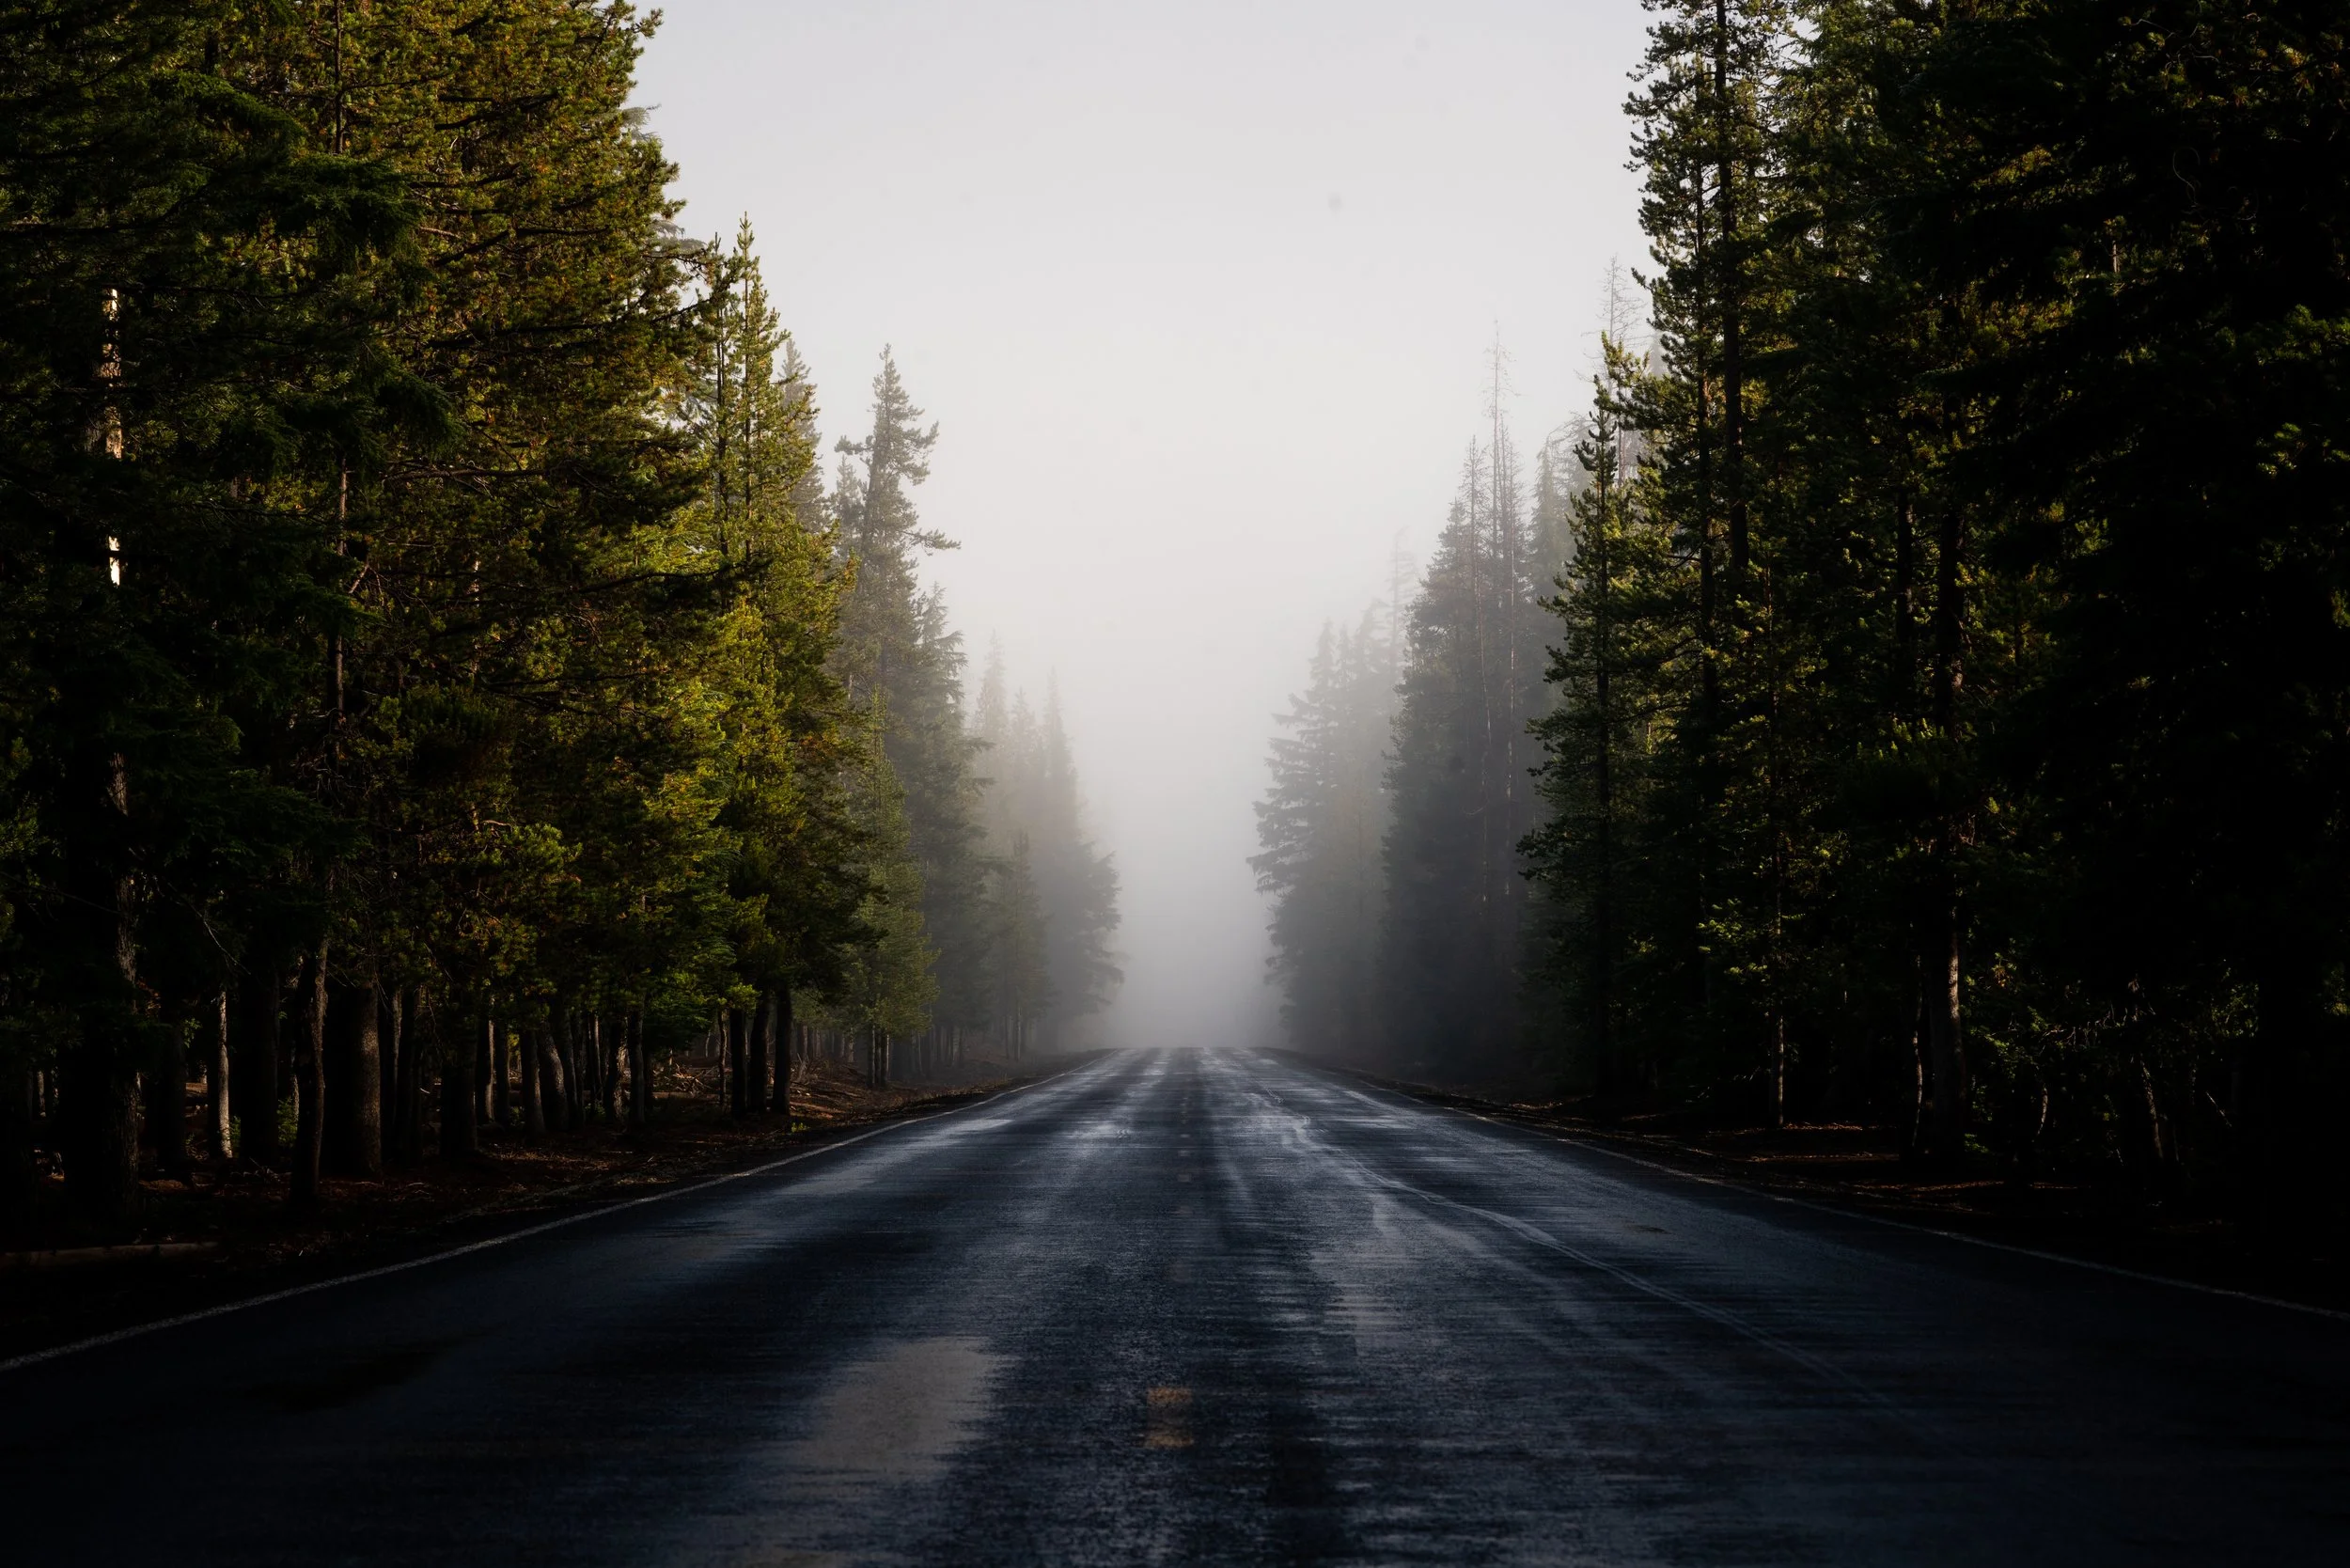
This photo of a vanishing point was taken at Crater Lake National Park in Oregon.
As you go further down the road, it leads to an inevitable mist, with trees receding into the distance. The vanishing point doesn’t always have to be in the middle, though. Check out this shot of a glowing railroad:

This photo, which demonstrates a vanishing point composition on a smaller scale, was taken in Boulder, Colorado.
The rails get further and further into the distance, providing a nice leading line for the eye. Keep in mind that the goal of a vanishing point is not to lead to something specific; but to keep the scene going forever, giving the impression of infinity within a shot.
V Arrangement
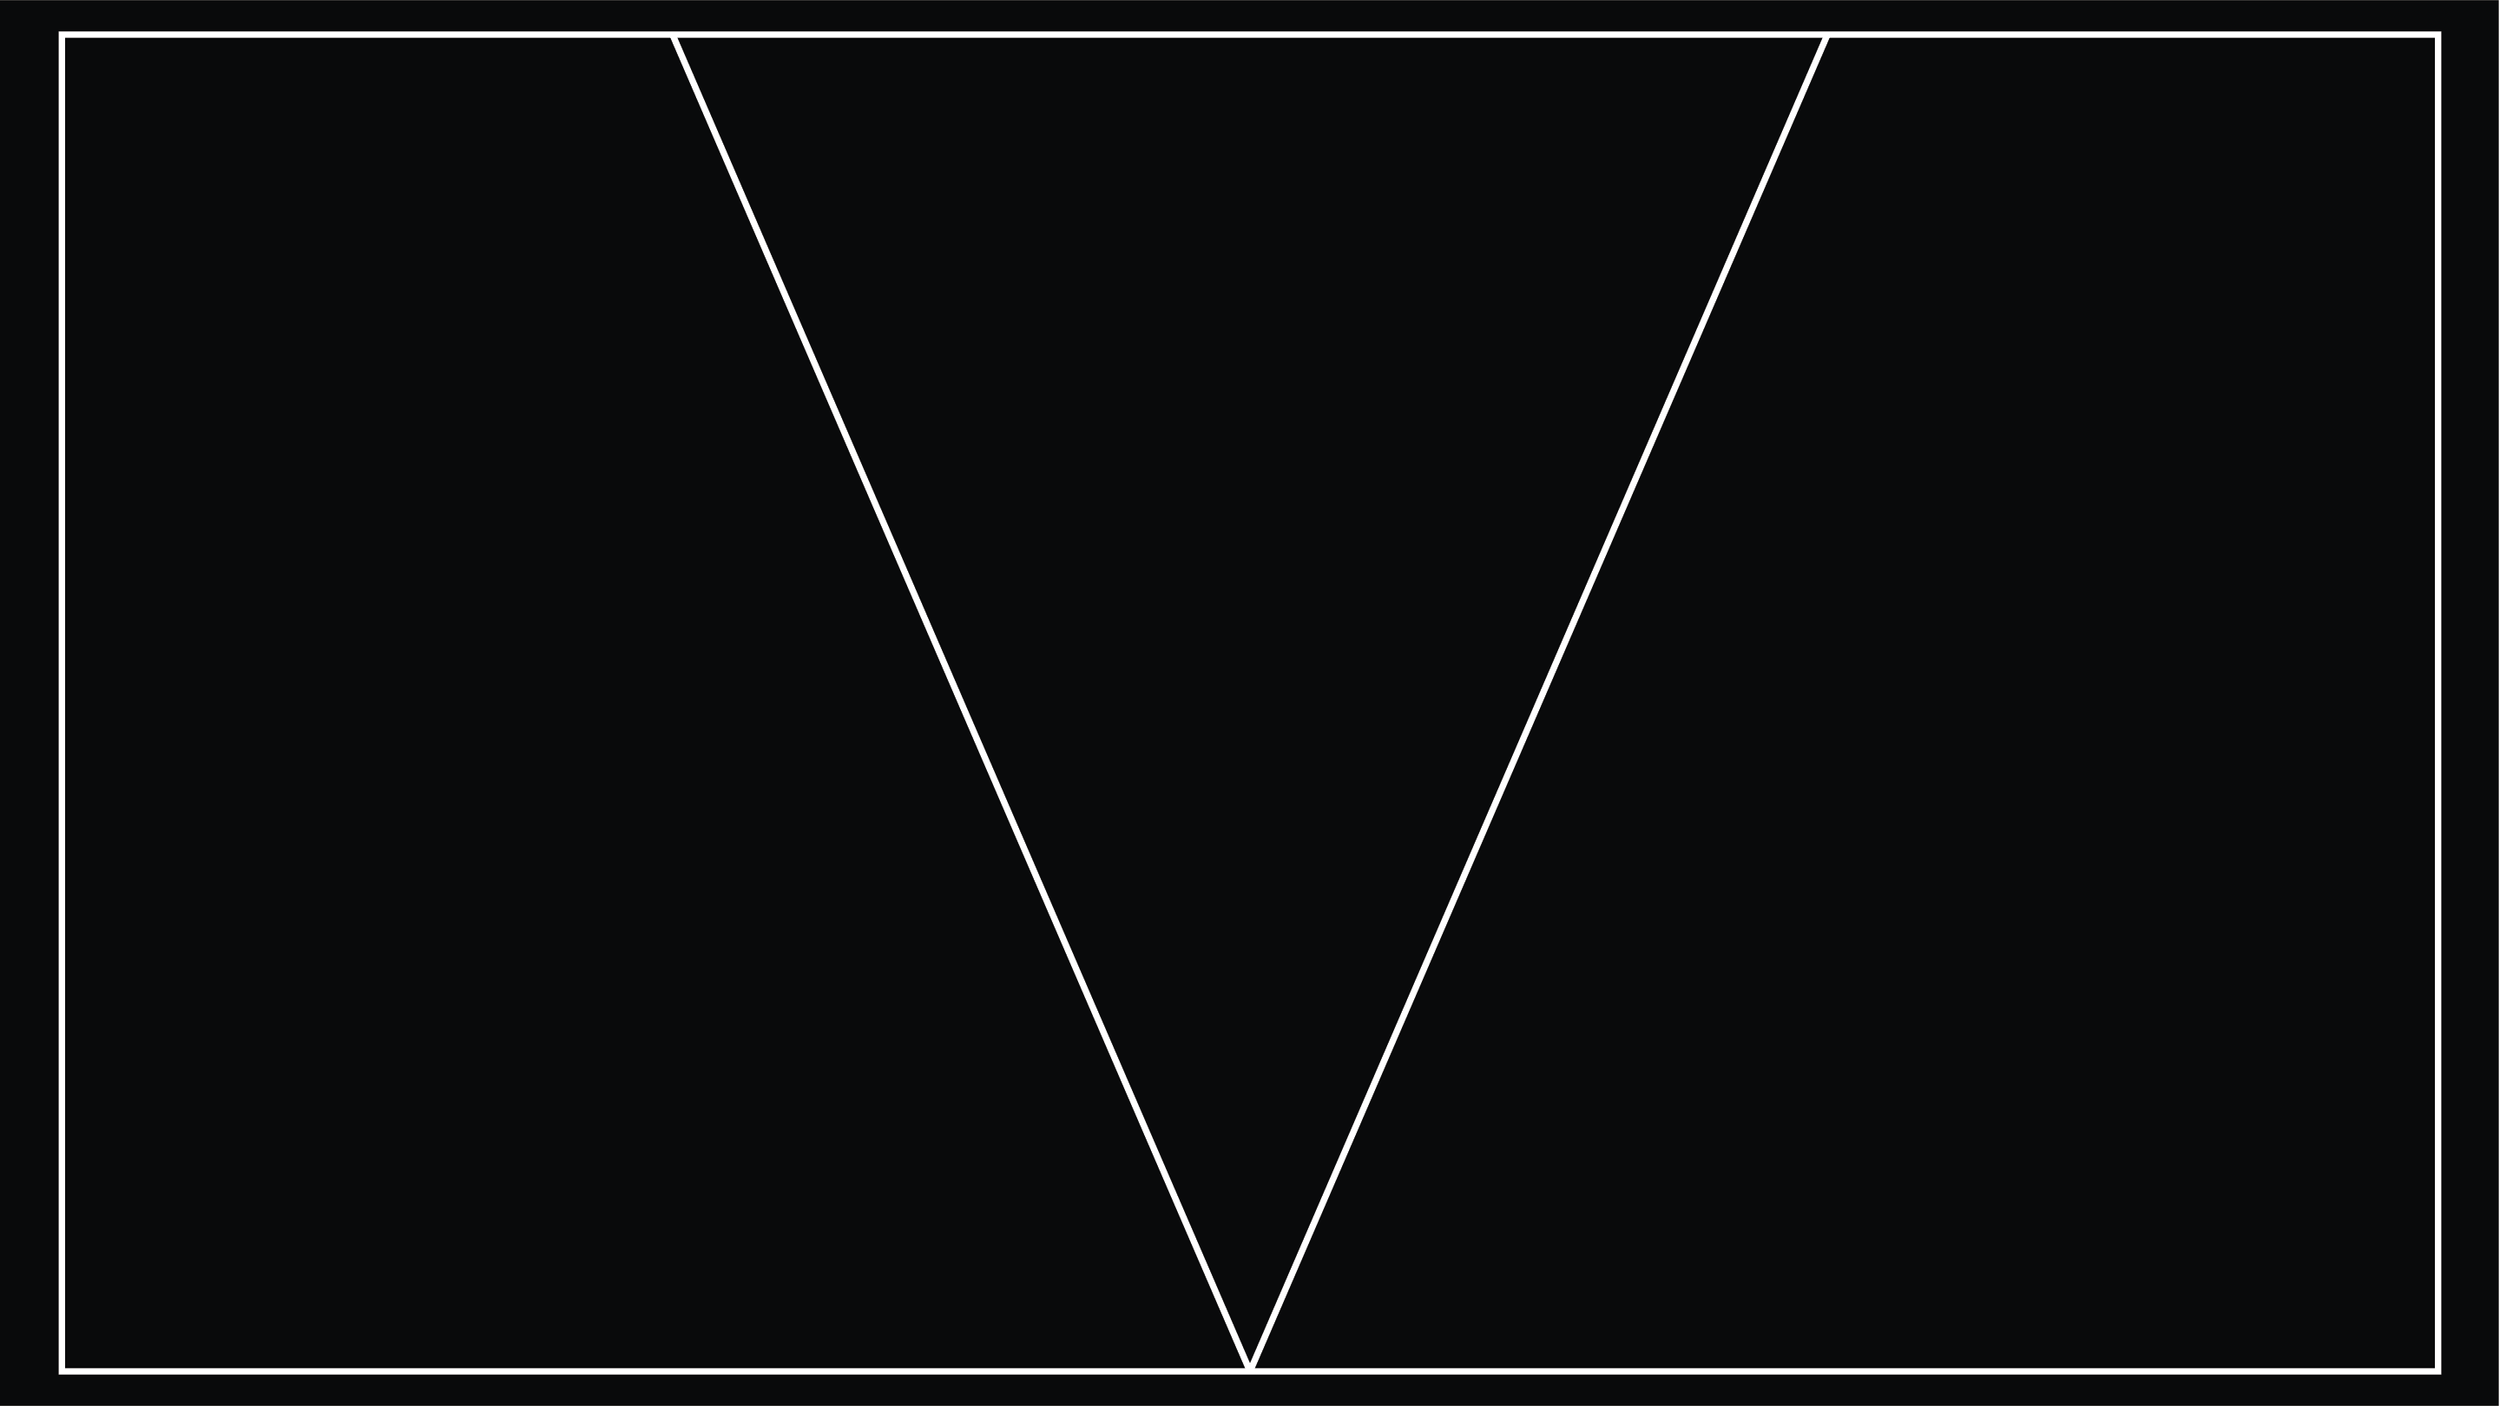
Now we’re going to get into the various arrangements. These are all fairly straight forward, as they essentially involve finding a certain letter with a scene and making it the entire composition. We’re going to start with the v arrangement, which involves finding a V shape, either upward or downward, within your shot.
The v arrangement is a great way to pull the eye to the top or bottom of the scene. For example, in this shot, we have rocks positioned in a V shape that lead the eye toward hazy mountains in the background:

This photo, which contains a v arrangement, was taken at Pulpit Rock in Colorado Springs, Colorado.
L Arrangement

Next let’s talk about the L arrangement, which is similar to the V except now we're looking for an L within the shot. Check out this image of a heron at a sunset in Louisiana. On the left side and bottom of the image, we have dark spots that create a nice L, giving the image a structure that frames the scene:

This photo, which has an L arrangement in it, was taken at Martin Lake in Louisiana.
S Arrangement
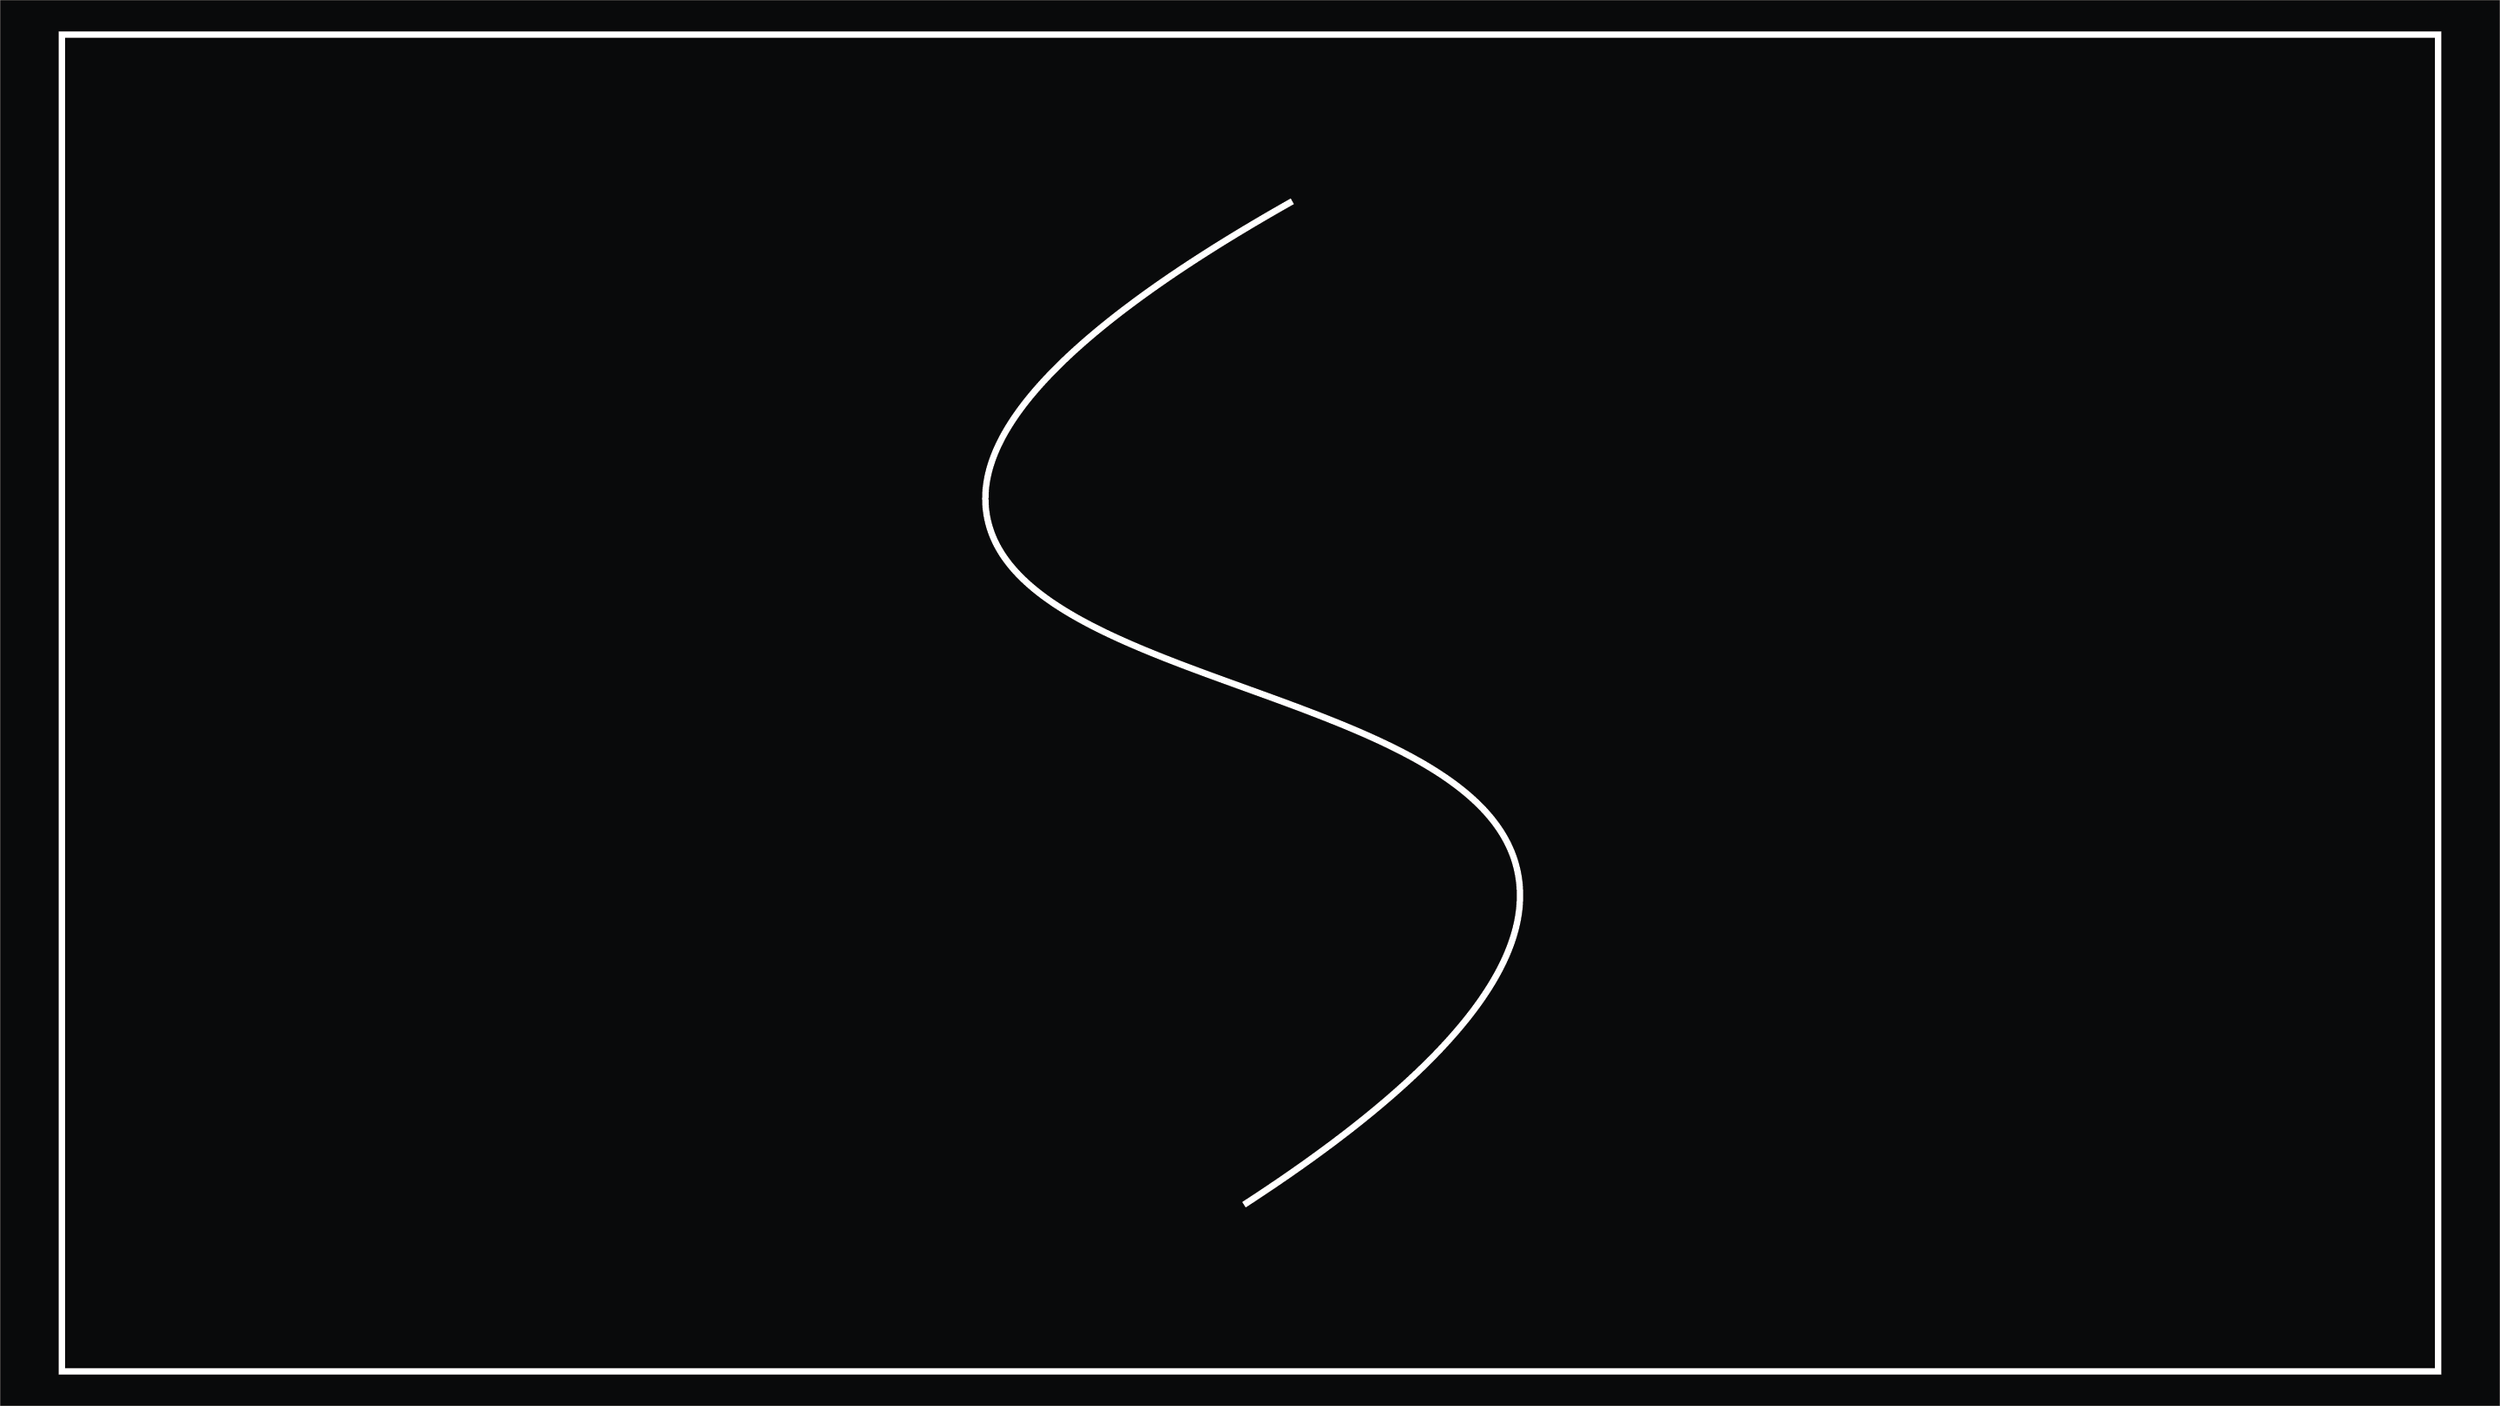
Finally we arrive at the S arrangement, which is one of my favorite proportions to find in nature. It involves finding a curvy line in your composition that resembles an S. Check out this shot I took in Tennessee:
This photo, featuring an S arrangement, was taken at Sugarloaf Mountain in Tennessee.
We have a leisurely S in the river leading up to the mountain in the corner. The s arrangement is a great way to make shots feel relaxing and laid-back. However, you can also use them to add irony to a shot. For example, in this shot, we have a standard S formation, but it was taken during an absolutely brutal hike in Colorado with 2,000 feet of elevation gain in scorching heat:

This photo, also featuring an S arrangement, was taken on Oxford/Belford Peaks in Colorado.
Contrasting the leisurely S with a strenuous hike adds a nice contrast to the shot, which makes it interesting. There are endless ways to play with S shapes.
Centering Point
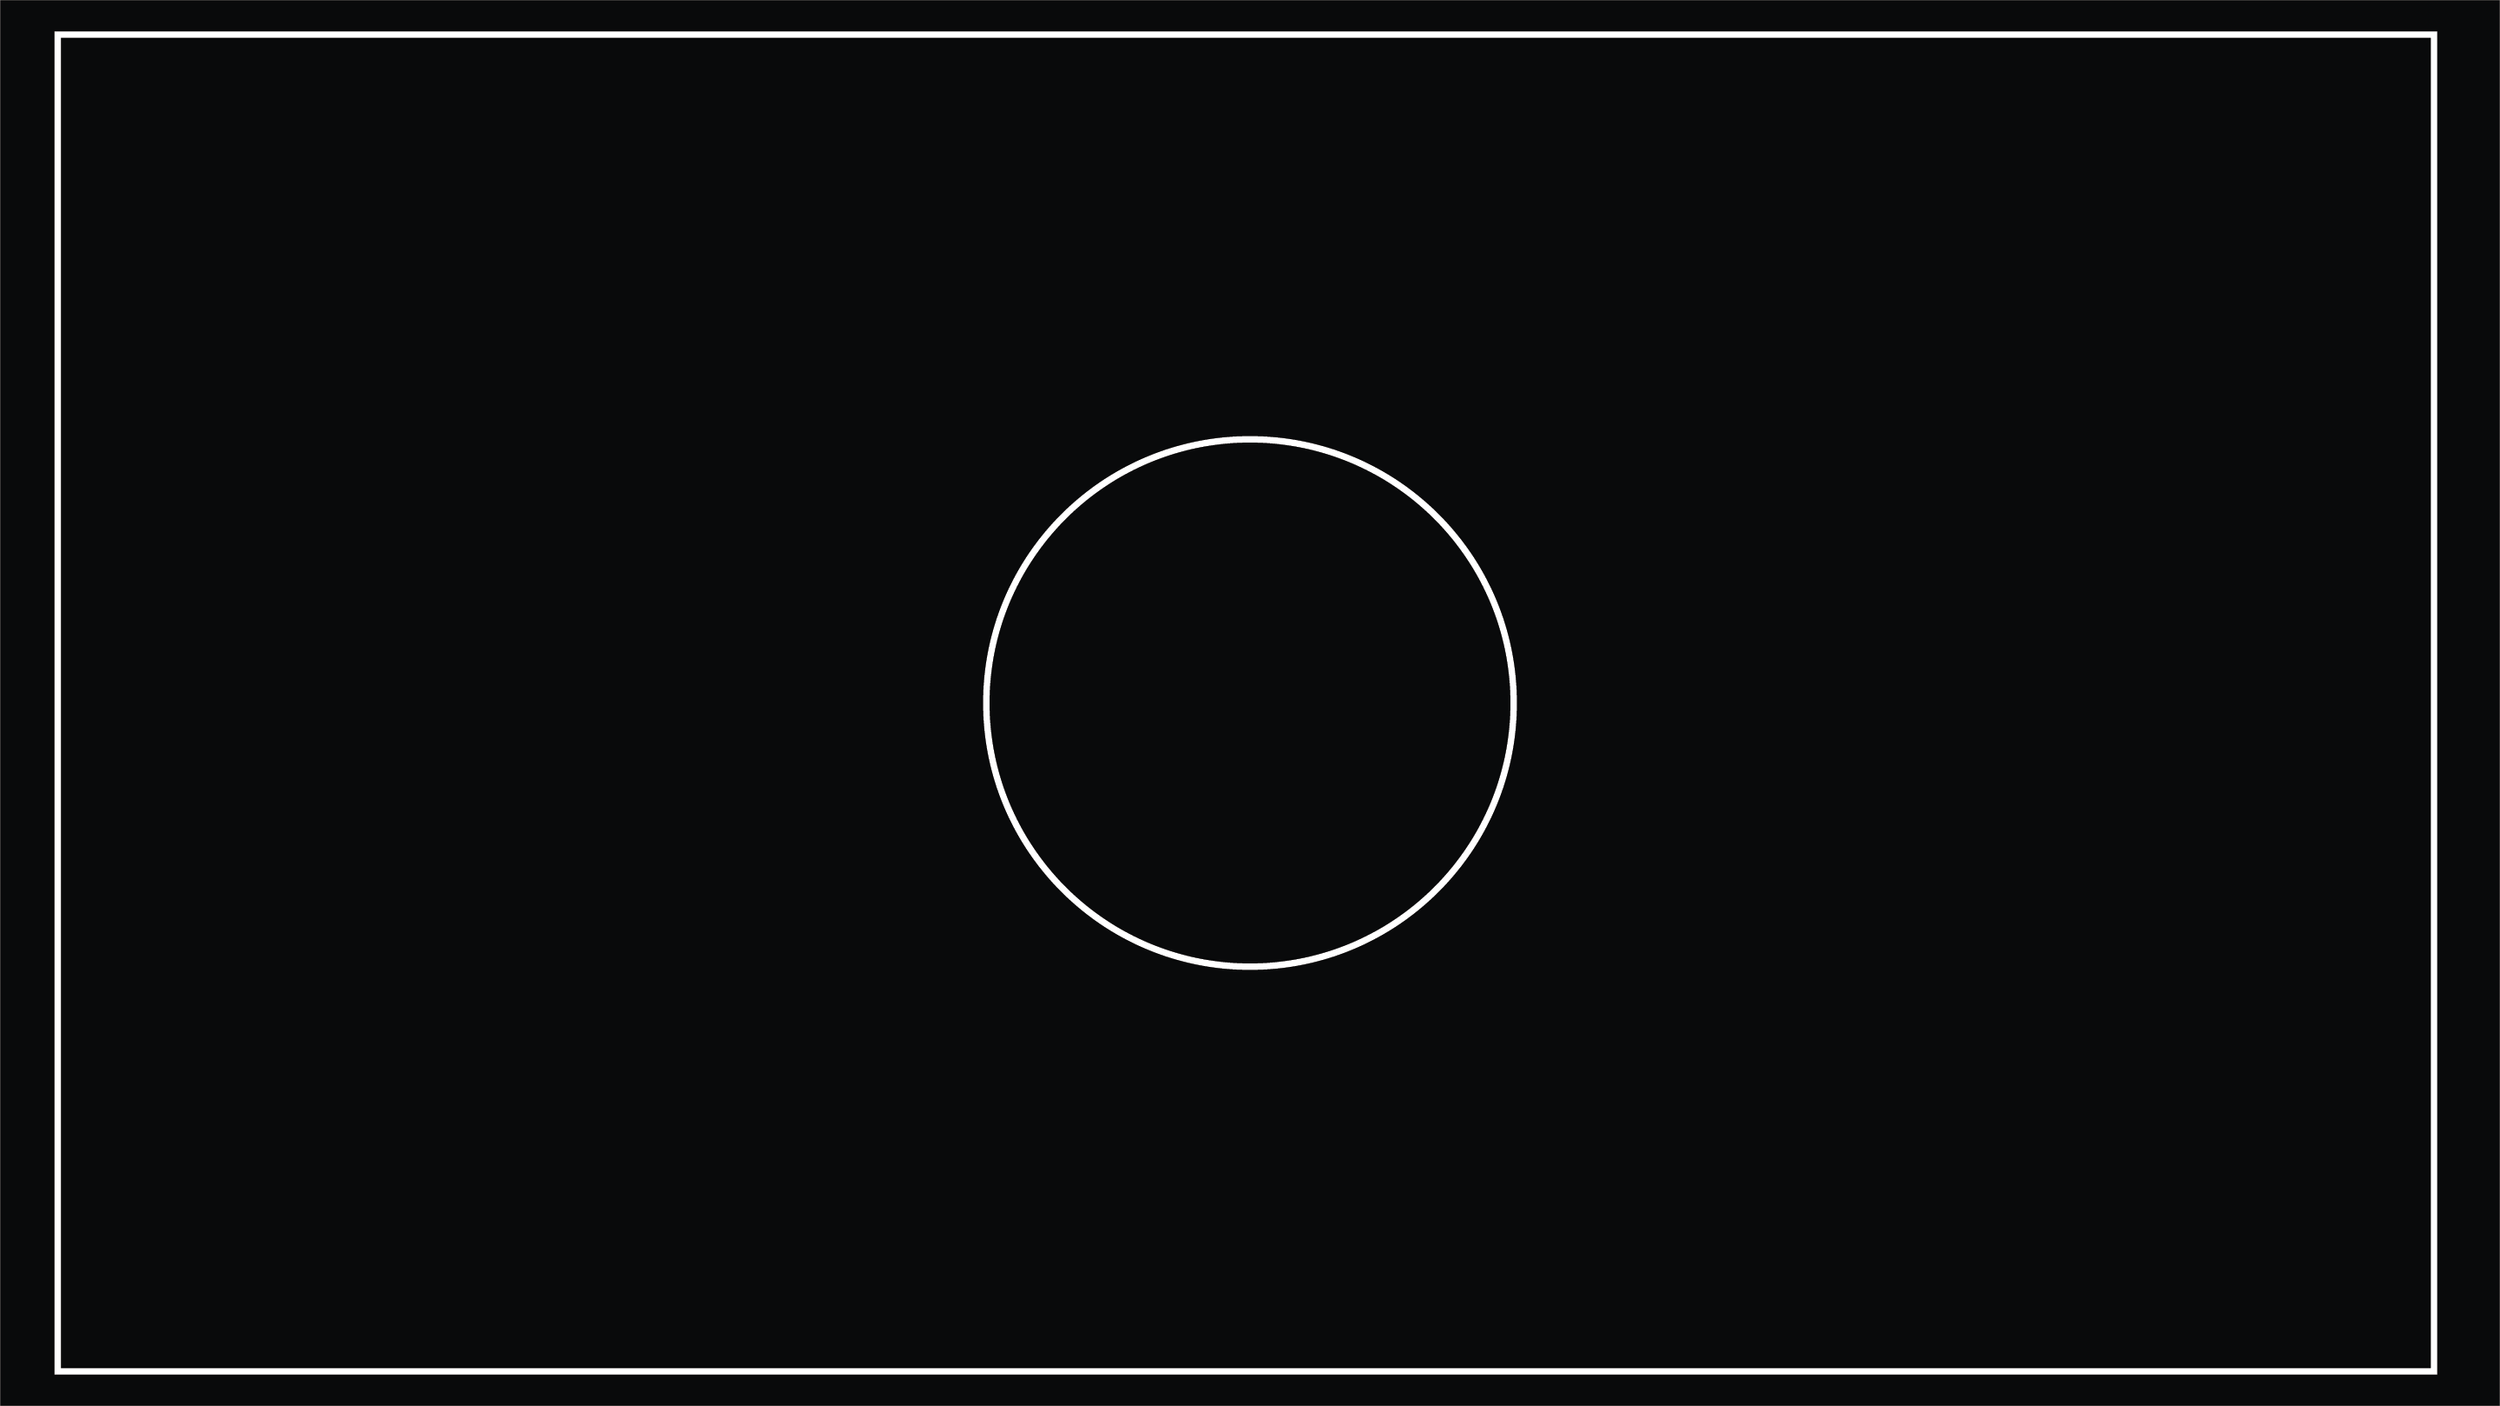
The next proportion I want to cover is called a centering point, which is exactly as it sounds: you place your subject in the very center of the image. For many beginners, this is the go-to composition because of mainstream advice to center your subject.
This is solid advice, but I urge you to use it only for very important or powerful subjects. Don't center everything in your shots, or it’ll quickly lose its power. For example, in this shot, the sun is the center point, and everything revolves around it:
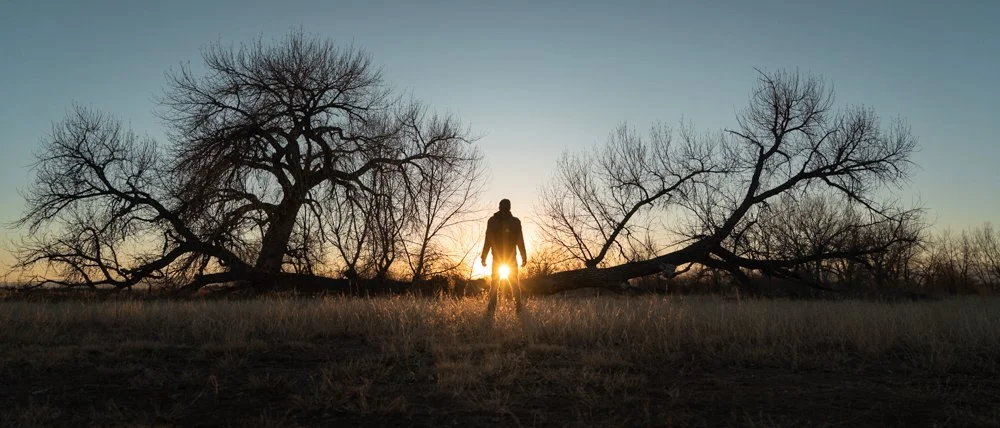
This photo utilizes an obvious center point, and it was taken at St. Vrain State Park in Colorado.
We have two trees on the sides that almost look like wings, perfectly framed, and I’m standing over the shot with my legs around the sun. Another example is this drone shot of a church from above:

This taken, with the church framed at the center, was taken at Catedral de Nuestra Señora Santa Ana in El Salvador.
The church, with its cross pointing up to the heavens, is directly framed in the center. I used a warp tool to make the road outside frame it even better, giving the image more power. One more example, just because I love this proportion:

This photo, which has a centered subject, was taken at Oak Alley Plantation in Louisiana.
It's almost like a vanishing point composition, but the trees lead to a giant house, giving it immense importance with the leading lines in the walkway guiding the eye toward it. Use this centering point wisely.
Framing Depth

Next, let’s talk about a framing depth proportion. This is where you use elements in the foreground to frame your image, guiding the eye deeper into the shot. Simply look for a circular (ish) object to put around your subject. For example, in this shot, I’m framed by a sea cave:

This photo, taken at Rialto Beach, in Washington, utilizes framing depth as a proportion technique.
Here’s another example of a shot that uses trees as the central framing point for the image:

This photo of the Golden Gate Bridge was taken in San Francisco, California at Marshall’s Beach.
Whenever I'm struggling to find a composition in nature, this proportion is one of my go-to’s.
Filling the Frame

The final proportion I want to cover is called filling the frame. It’s traditionally one of the easiest methods to use, and it typically works best with Textures and/or Patterns. It involves taking one subject and making it the entirety of the shot, providing a solid minimalism vibe. For example, check out this image of simple green plants taken at a botanical garden:

This composition, which uses the filling the frame technique, was taken at Chatfield Botanical Gardens in Colorado.
Filling the frame is a great way to warm up your photography session.
Conclusion
Alright! Those are all the proportions I wanted to cover in this course. Other proportions may exist, but I’d argue almost every other one falls into one of these ten categories.
The best way to practice these is to go out with the intention of shooting just one of these proportions. Then, once you feel like you can find it almost anywhere, move onto another. Then start incorporating more into your workflow.
Once you do this enough, you'll start seeing these compositions everywhere, even without a camera around. Let’s move onto the next tutorial, where we’re going to cover Variety and its role in the Principles of Art.