
Adding Movement to Your Photography
Learn about the 4th Principal of Art- Movement. I’ll run through seven ways to show movement of the subject, and two ways to move a viewer’s eye through a photo.
Introduction to Movement in Photography
In this tutorial, I'm going to walk you through the fourth Principle of Art, which is movement. There are two main ways to capture movement in photography: the first is through the movement of the subject, and the second is through the movement of the viewer's eye.
How do you guide a viewer's eye through a photo, and how do you capture a moving photo? I'll cover both methods shortly, but I want to preface this tutorial by saying that this type of photography isn’t something I shoot often.
As a result, most of the photos in this tutorial will be from other artists. I’ll credit their names below and break down how they achieved these shots so you can replicate them in your own photography.
With that being said, let’s get started!
Movement of the Subject
First off, I’m going to cover how to shoot a moving subject. There are seven different ways to do this, so pay attention closely.
1. Panning
Panning involves tracking a moving subject in your shot, like so:

This photo, representing a panning movement, was taken by John Bearby on Unsplash.
Notice how the motorcycle is perfectly clear in the center, while the background has a beautiful blur effect. The key is to use a slightly long exposure, somewhere between 1/30th and 1/180th of a second. This keeps the subject in focus while creating a nice background blur due to the movement of the exposure.
I’ll be honest- this is a challenging technique to master. However with enough practice and a steady hand, you can learn to get the timing right. I also recommend using burst mode on your camera to take multiple shots, increasing the odds that one will turn out well.
Panning isn’t limited to cars, motorcycles, or action sports. You can also use it for more abstract interpretations. For instance, set your camera to around 1/30th of a second, go to a place with tall trees, and slightly tilt the camera upward while the shutter is open. This creates a cool, blurry shot of the trees with an almost painterly, impressionistic look. Check out this example:
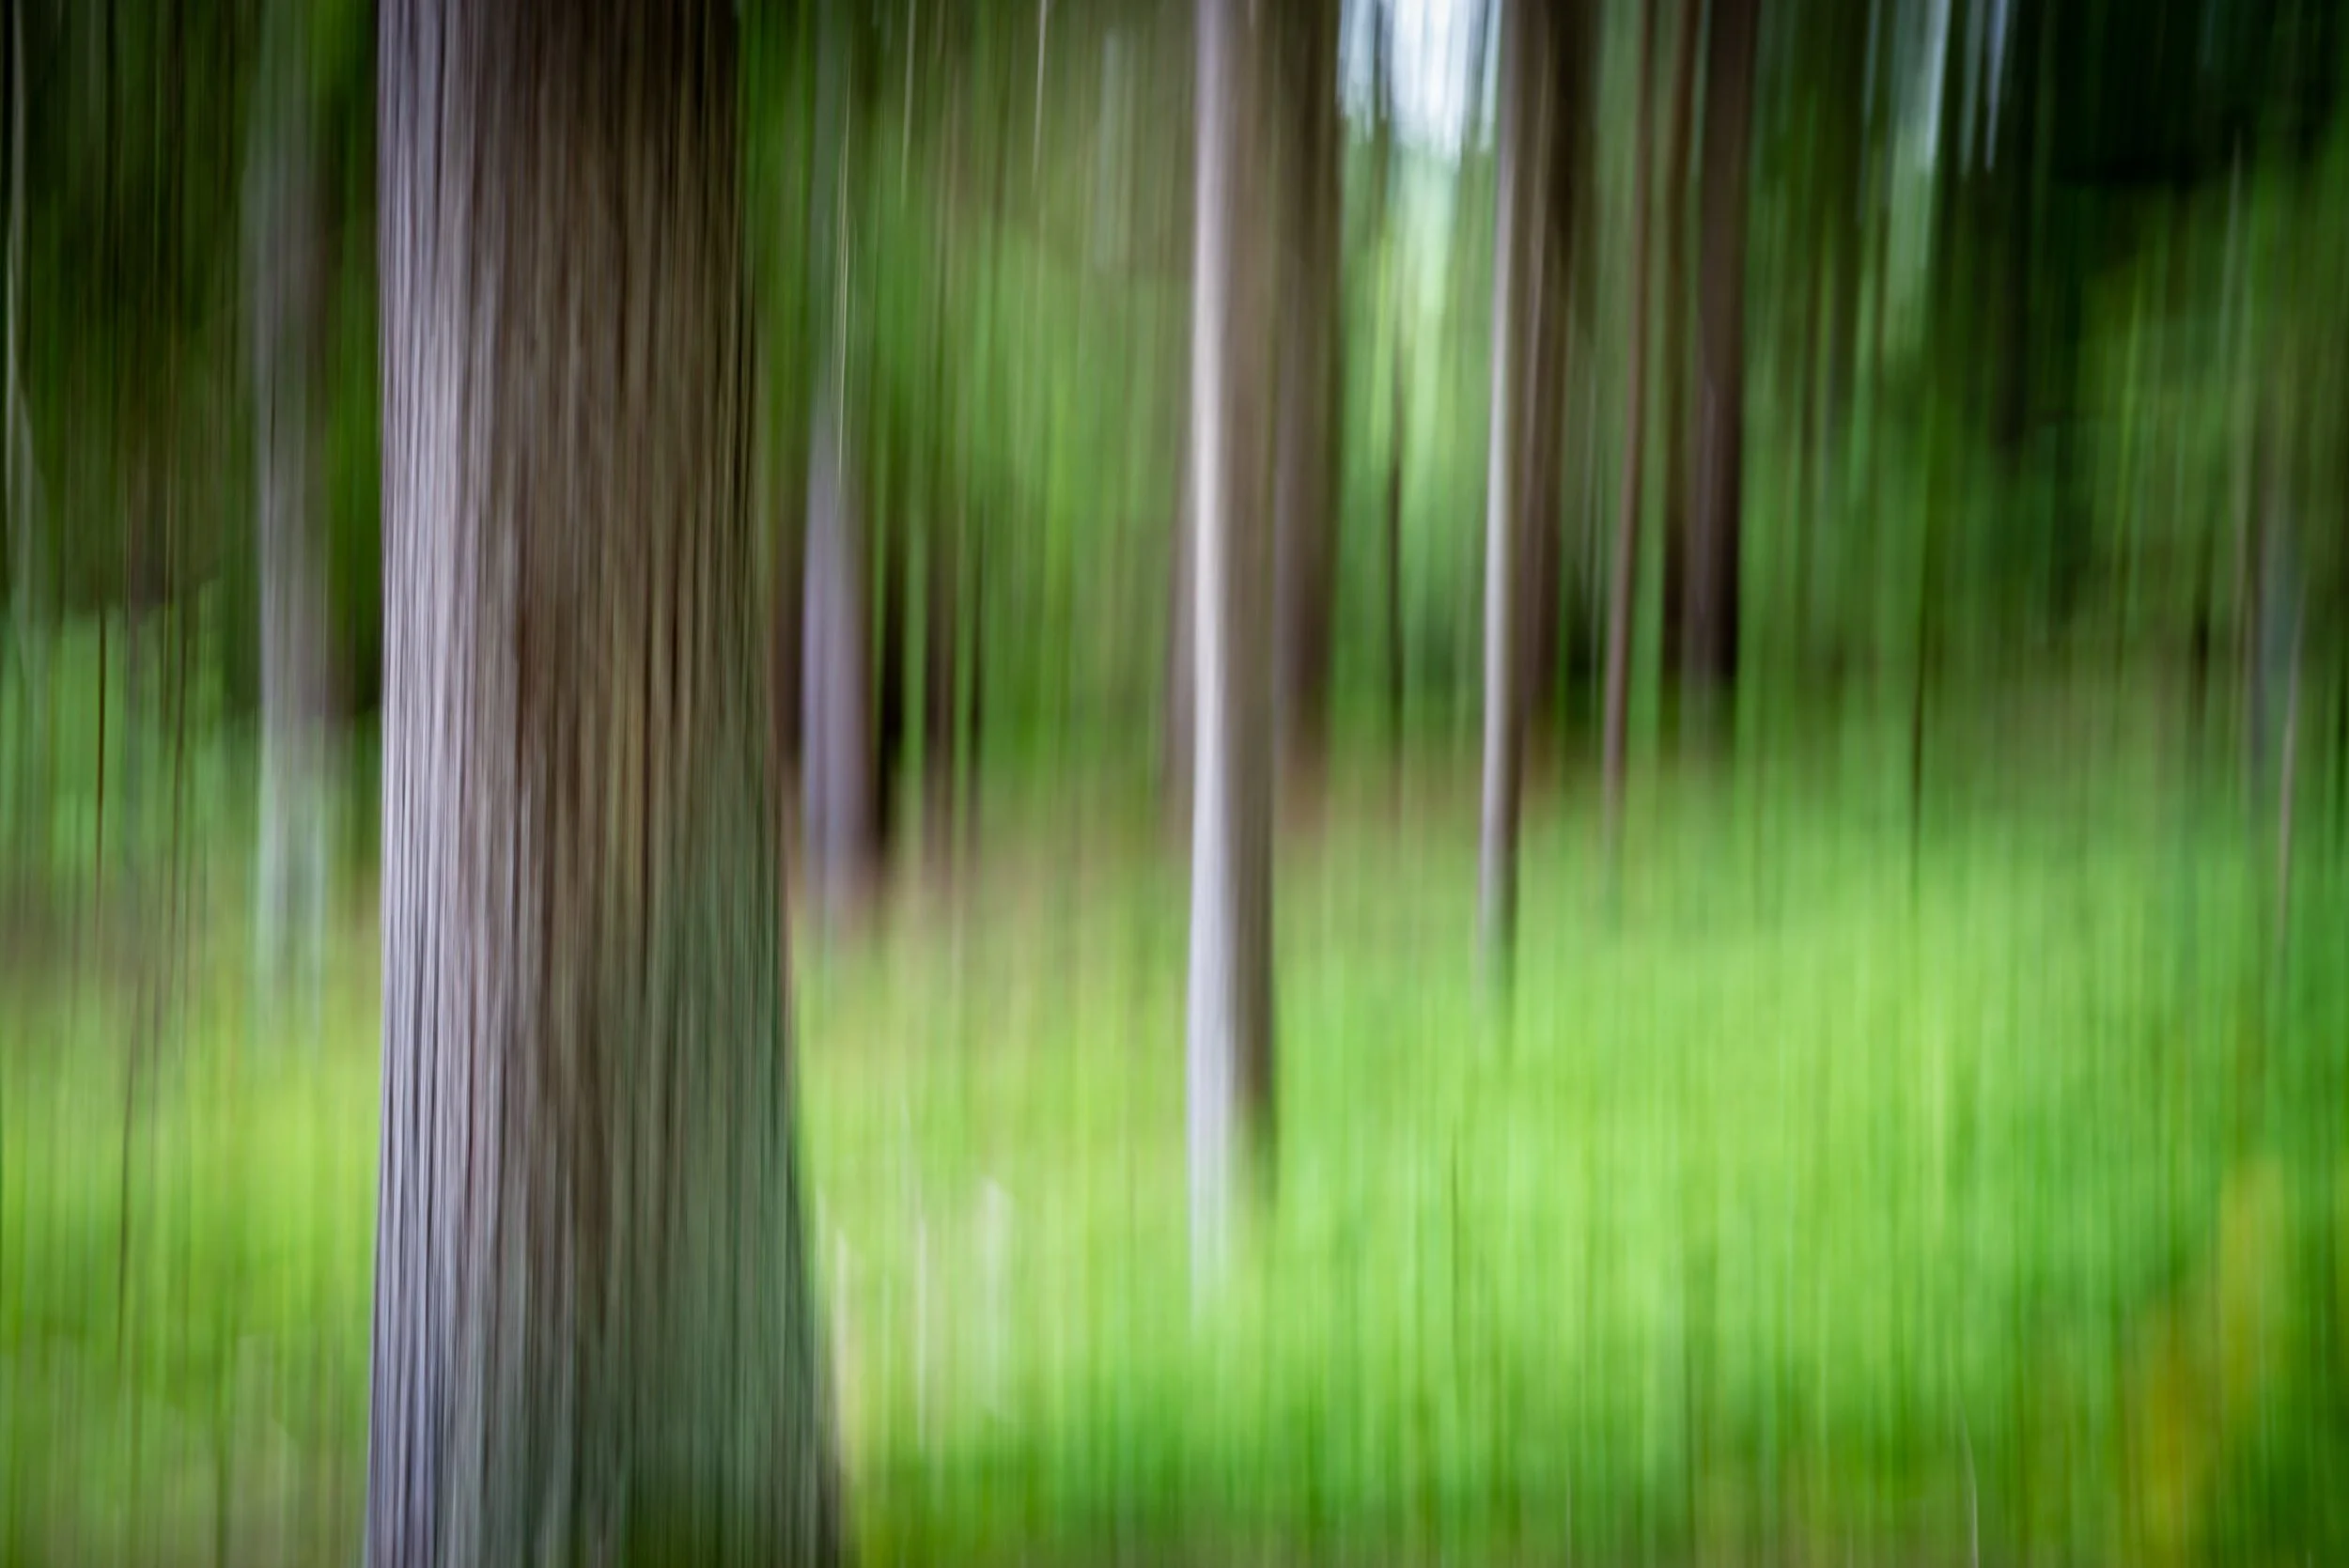
This photo, demonstrating an upwards pan, was taken by R. Merlijn on Unsplash.
This effect can be replicated in Photoshop if you know how to select subjects, mask them, and blur the background, which I cover in the editing section of this course. However, achieving this in-camera is much more impressive, so I encourage you to try it.
2. Long Exposures
We’ve covered long exposures extensively in this course, particularly with water or clouds to demonstrate movement, but I want to highlight a few more scenarios where you can use them.
The first is with people. To create a haunted or double-exposure-like effect, set your camera to a slightly long exposure, such as 1/10th to 1/30th of a second, and have the person move their head or part of their body. For example, look at this shot:

This photo, representing how hair can be used for a long exposure shot, was taken by Aedrian on Unsplash.
The head has a nice blur with the hair, while the body remains perfectly sharp, creating a haunting, striking image.
Another way to use long exposures is with crowds. If you have a large group of people moving, you can make them look like ghosts. Check out this shot:

This photo, also a long exposure shot of people, was taken by Jaanus Jagomagi on Unsplash.
Notice how the crowd is moving through a station, while the security guards remain perfectly still, providing a strong contrast in the busy scene.
You can also use long exposures with trains or light rails. The technique involves setting up your tripod at the front or back of the train, ideally through an open, straightforward window. Now take a long exposure as the train moves forward or backward. The result is a warp-tunnel, abstract effect, like this example:
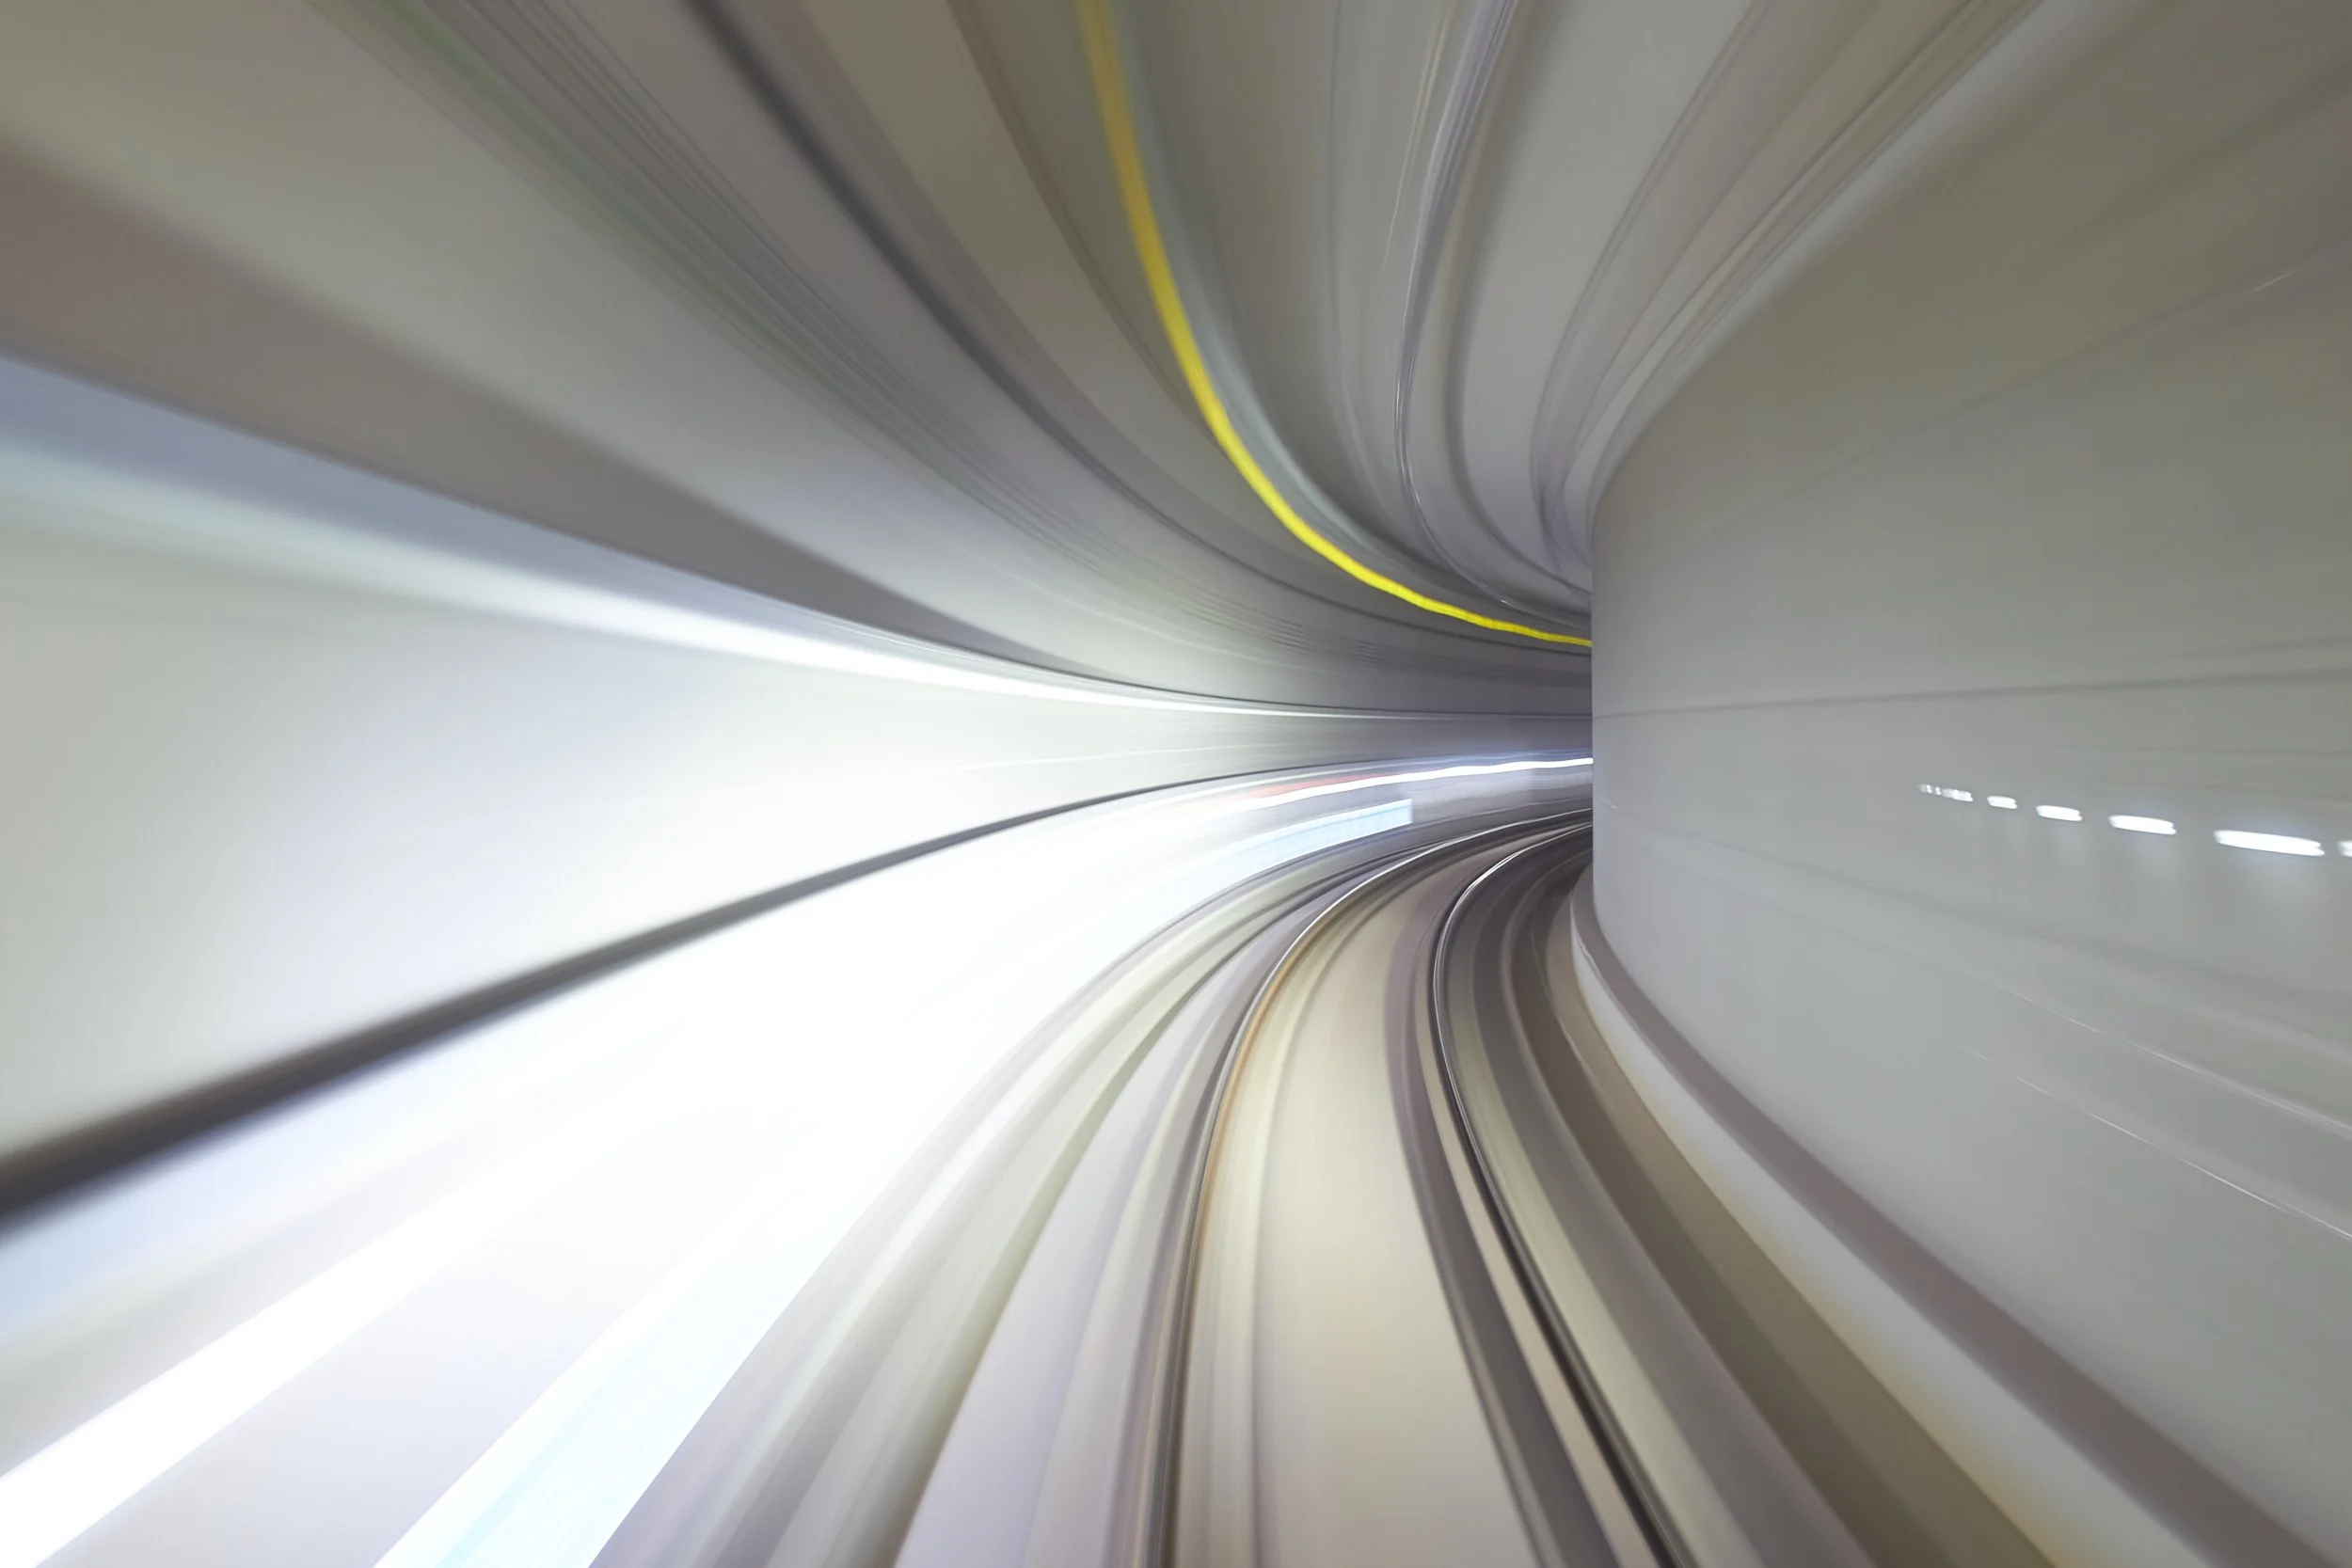
This photo of a long exposure moving forward/backward, was taken by Mathew Shwartz on Unsplash.
Another fun application for long exposures is at amusement parks. Ferris wheels, spinning roller coasters, or any ride with a lot of movement can create cool long-exposure effects, especially at night when the lights are on:

This photo of a carnival ride long exposure was taken by Max McKinnon on Unsplash.
3. Suspended Movement
Suspended movement involves capturing a subject in midair, implying motion within a single frame. It’s essentially the opposite of a long exposure shot, as it requires a quick shutter speed. For example, check out this shot I took of myself in Death Valley:
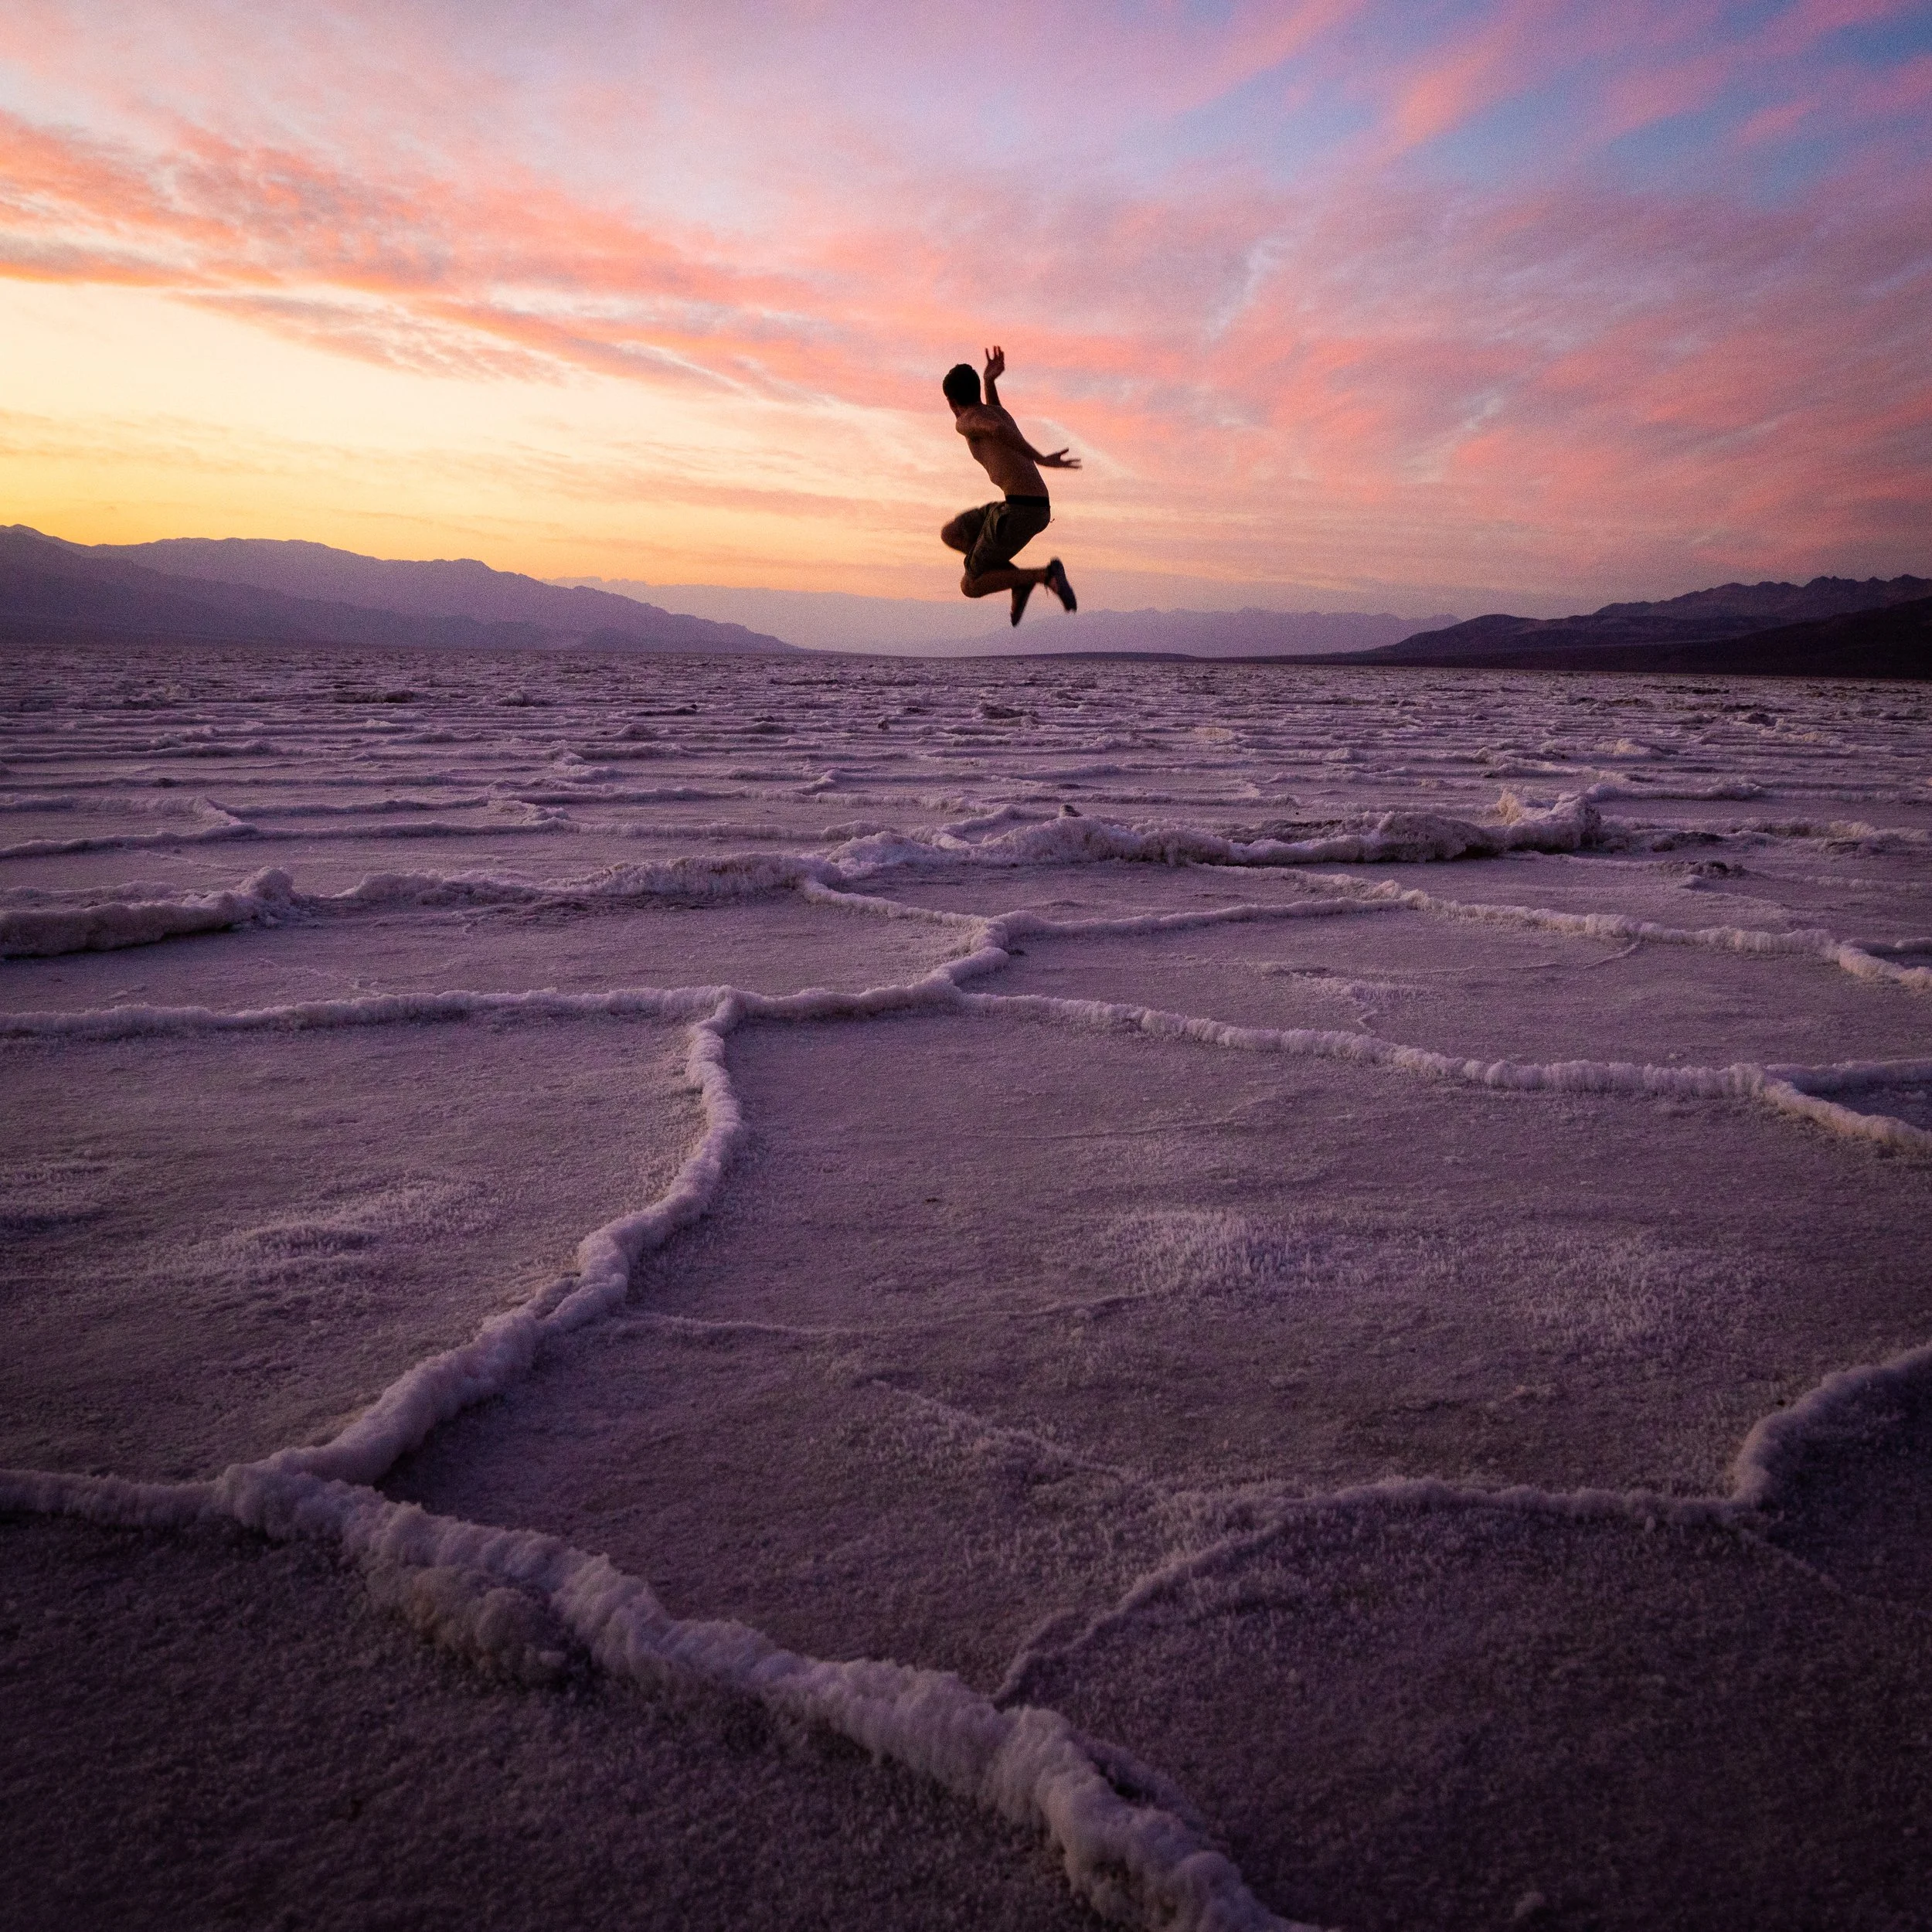
This photo of suspended movement was taken in Death Valley National Park at Badwater Basin.
I jumped in the air, and the movement is implied by gravity. This technique works well for subjects like trucks jumping off ramps, bikes, or skateboarding, but the subject must be in midair for maximum effect. If you use a fast shutter speed, like 1/2000th of a second, on a car driving normally, it will just look parked, lacking the sense of movement.
4. Light Painting
Light painting on its own is an entire sub-genre of photography. To do it, you simply set your camera on a tripod with a long exposure and move various lights (like LED sticks, for example) in the frame to "paint" the air. The long exposure captures trails of light wherever you move.
A popular variation is to have a subject, like a person, stand in the shot, and paint the LED light behind them:

This photo, representing light painting, was taken by Andrea Riezzo on Unsplash.
As you can see, this artist “painted” a circular shape behind the subject’s head to create a striking silhouette. If you search for “light painting portraits” online, you’ll find a ton of mind-blowing examples, many of which look like they were done in Photoshop, but were actually created in-camera.
Another popular light painting trick is to use steel wool. You simply light the steel wool to create sparks, then spin it while your camera is running a long exposure. The sparks fly, and the camera captures their light trails. Check out this shot where the artist stood on top of a car and spun the wool, creating a stunning effect in the dark:
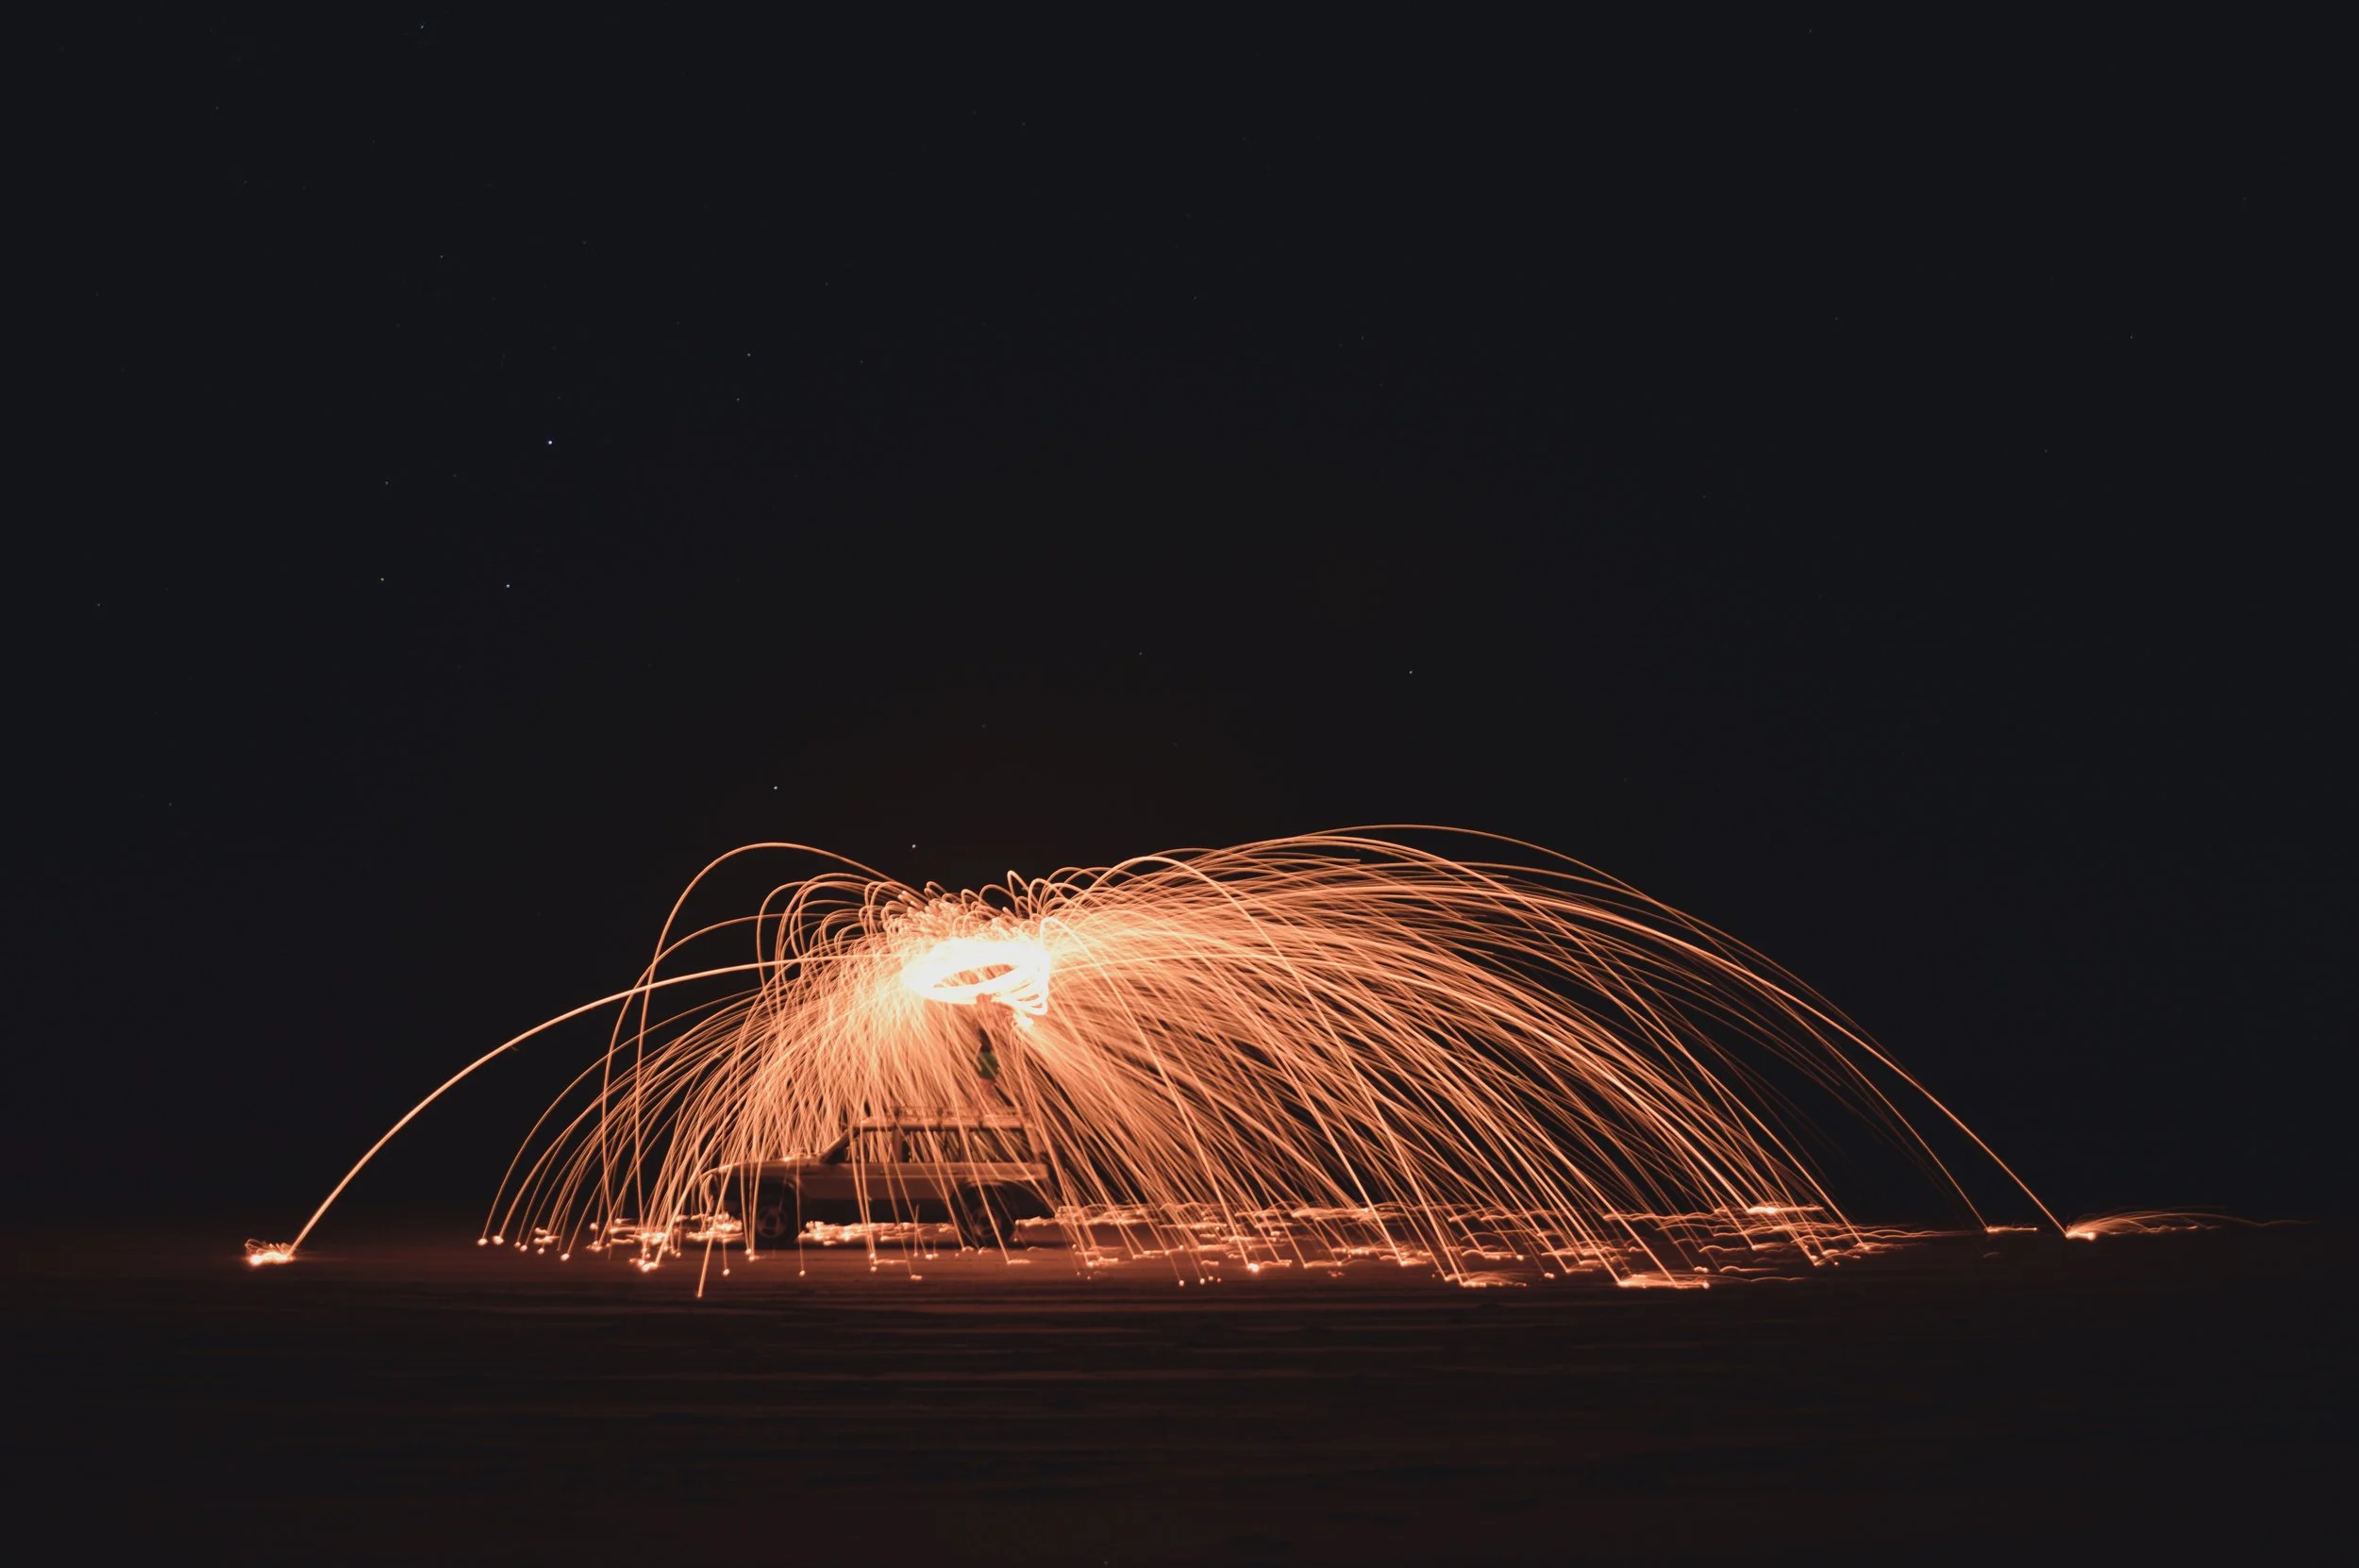
This photo of steel wool light painting was taken by Max McKinnon on Unsplash.
You can also use drones for light painting. Attach an LED to a drone and fly it around a central subject. For example, this shot of a building was lit up by a drone, with additional light painting to enhance the effect:

This photo of light painting with a drone was taken by Rob Bates on Unsplash.
One last creative way to light paint is with fireworks, such as sparklers. With a good depth of field, you can capture bokeh from the sparkles at different depths:
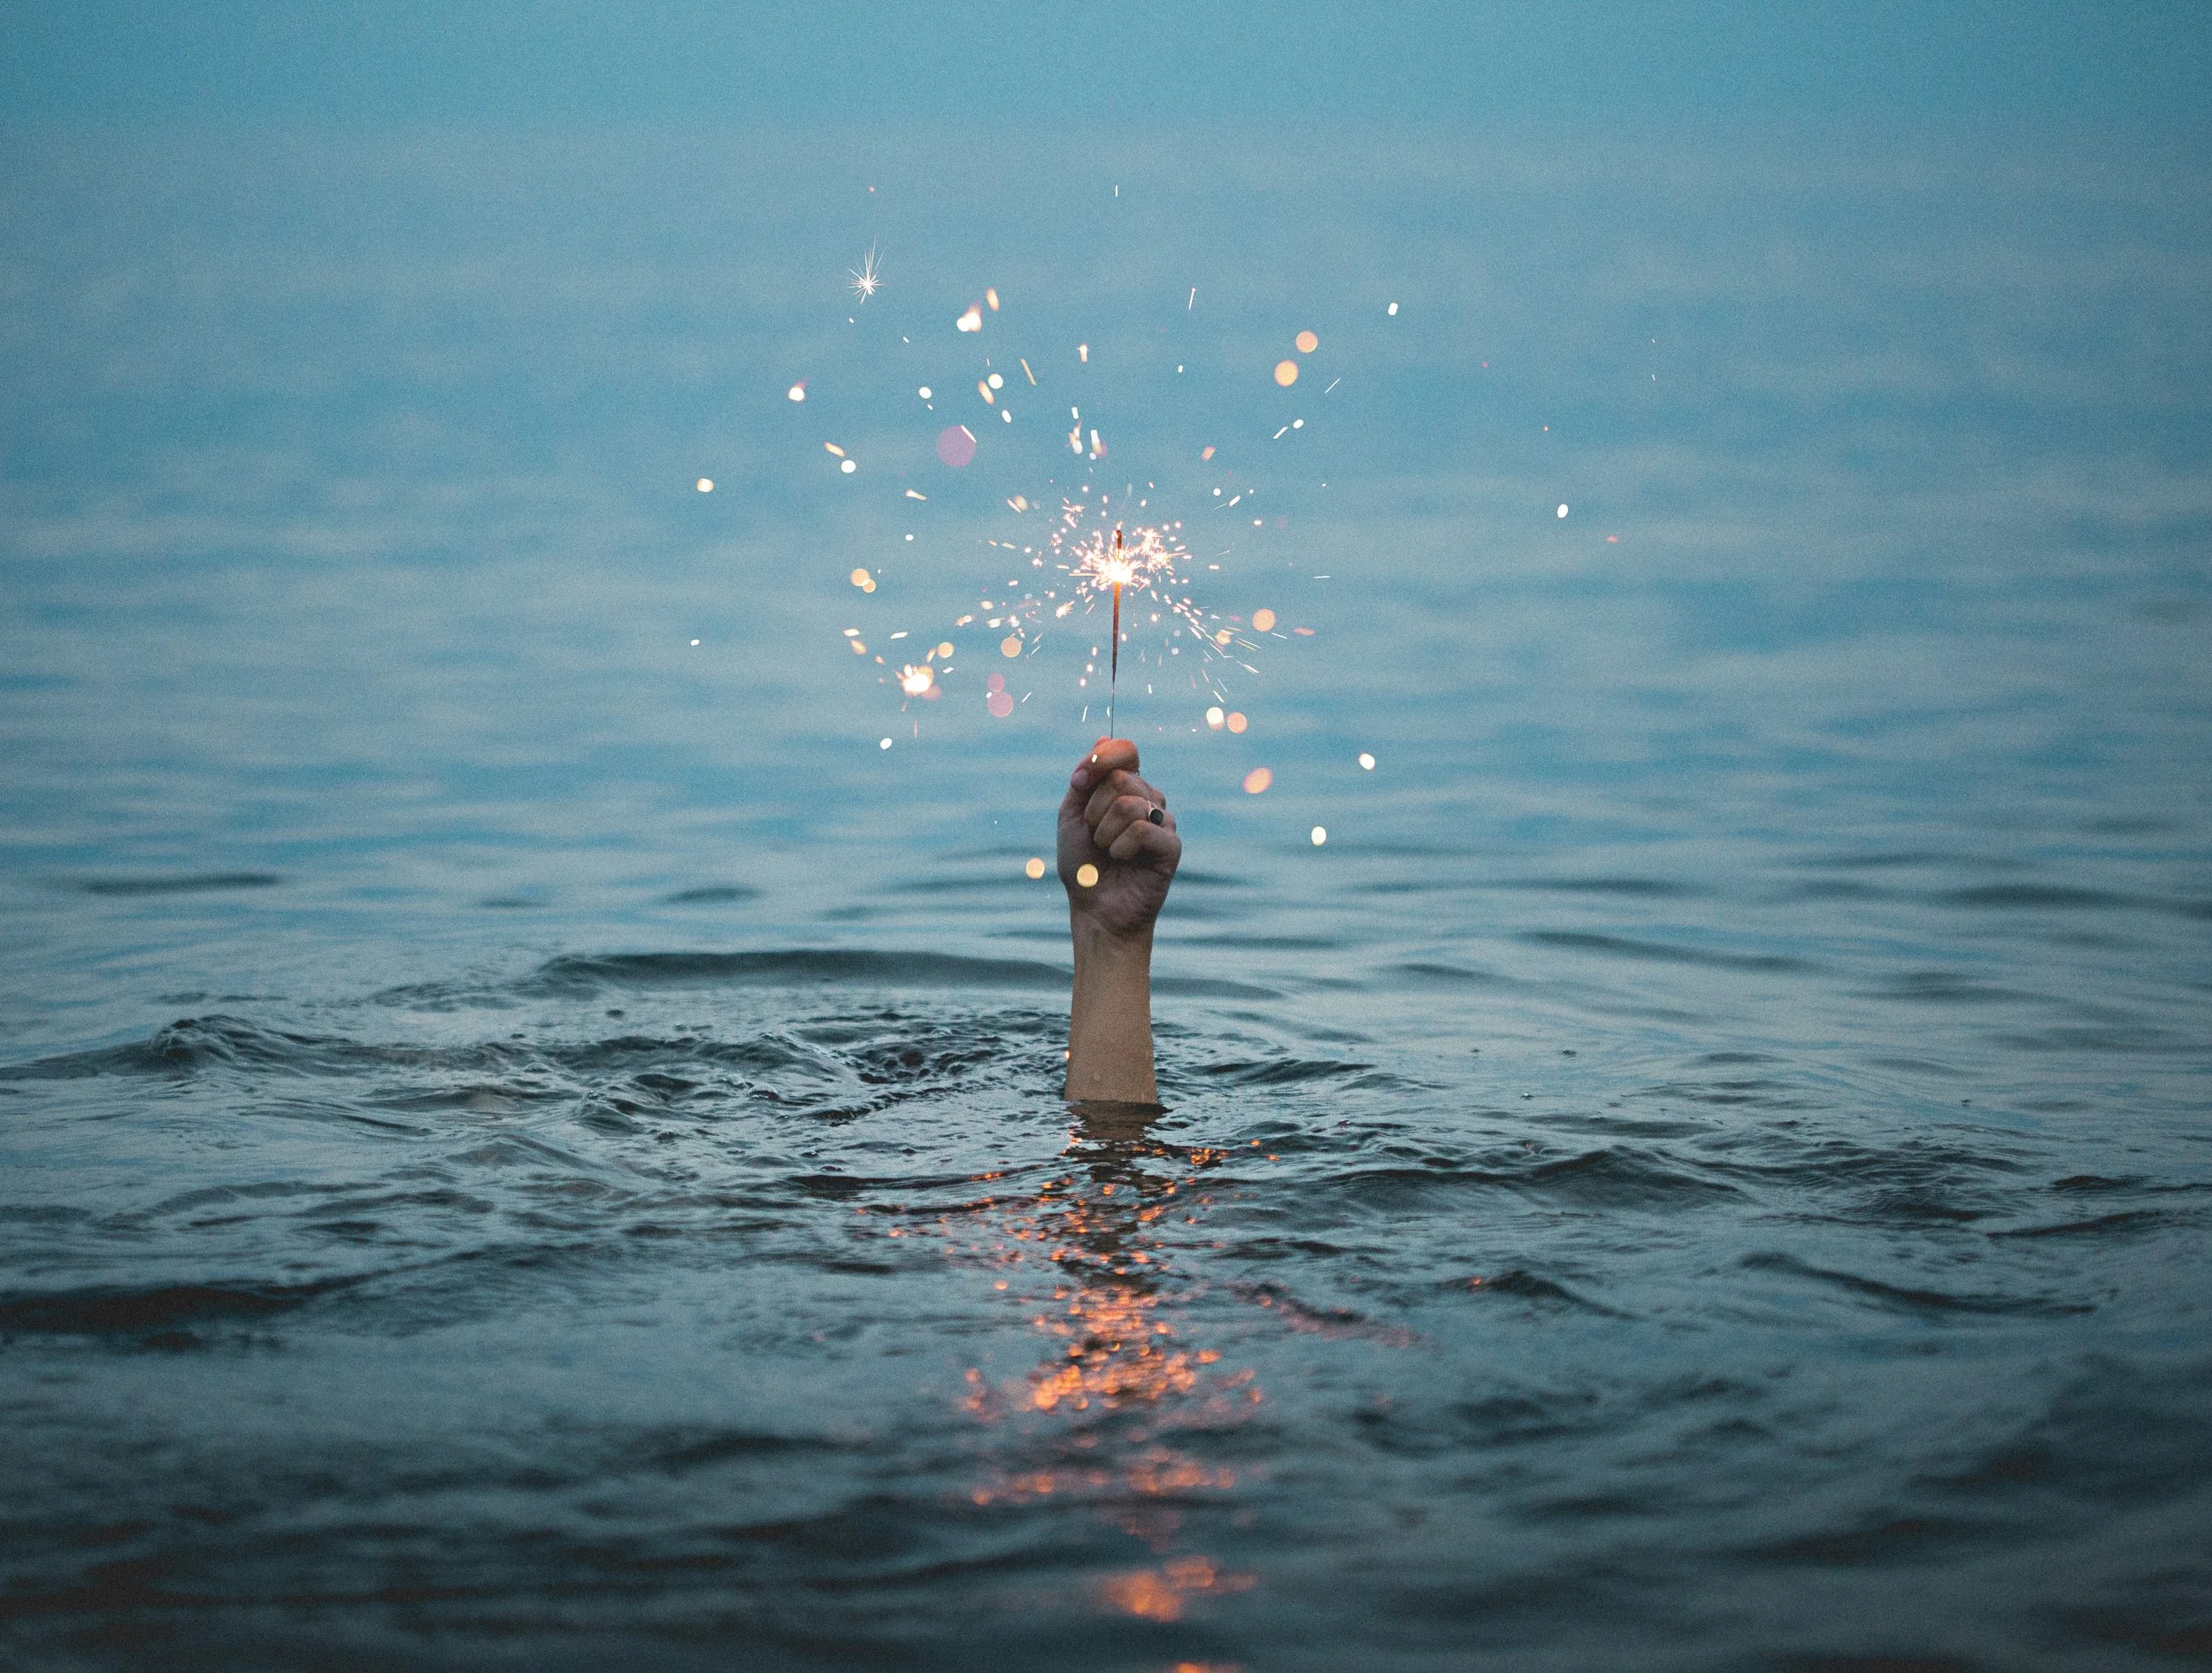
This photo of sparklers infused with bokeh was taken by Kristopher Roller on Unsplash.
This also works well with standard fireworks, like those on the Fourth of July. Light painting offers endless fun and experimentation.
5. Multiple Exposures
Multiple exposures involve setting your camera on a tripod and capturing a subject performing multiple actions with burst mode on. Then you simply stitch all of the photos together in Photoshop to create a single image sequence. For example, check out this photo of a skateboarder flying off a ramp:
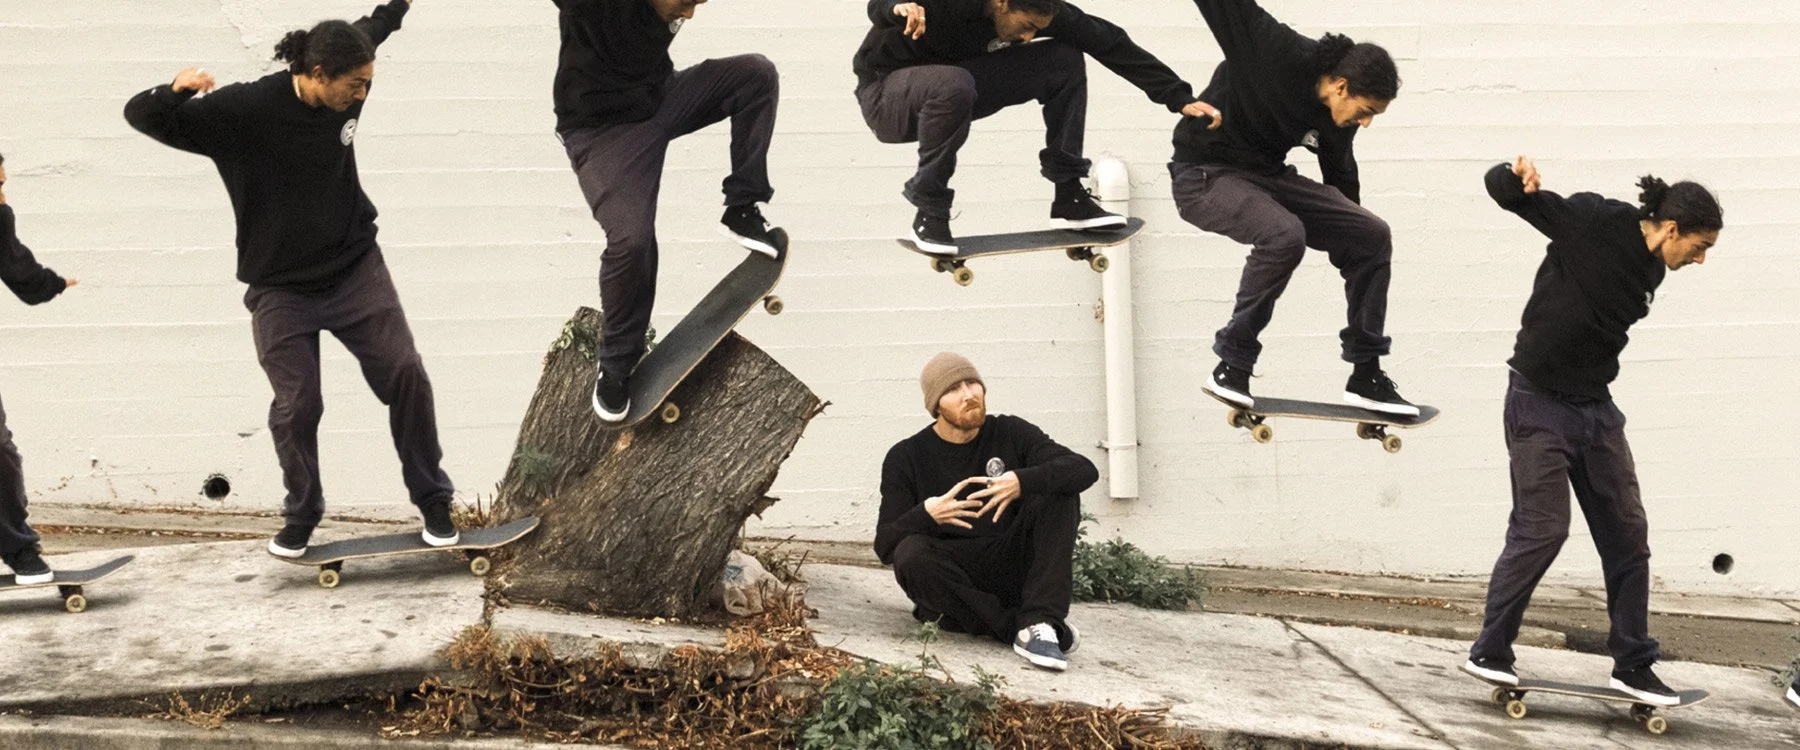
This photo of a skateboarder stitched together in multiple exposures was sourced from Unsplash.
The Photoshop skills required to do this are quite easy- it’s just basic Masking. The key is to make sure you maintain focus of the subject throughout the entire movement. Using Continuous Focus paired with Focus Tracking will make this significantly easier. This method is a great way to capture action sports without having to create an entire album.
6. Zoom Bursts
Zoom bursts are when you place your camera on a tripod, hold the shutter button, and zoom in or out while the shutter is open. This creates a long exposure effect where lines blur forward, resembling hyperspace or giving a 3D appearance. Check out this shot of a Netflix logo on a computer screen- it looks like it’s floating in a ghostly motion:

This photo of a zoom burst was taken by Oscar Vargas on Unsplash.
The trick is to use a slightly long exposure (like 0 - 1.5 seconds) and experiment with different zoom in/out times. I’d recommend going faster rather than slower, as it can be difficult to minimize camera shakes when going slower, unless you have a remote zoom setup.
7. Stereoscopic Photography
The last example I want to cover is stereoscopic photography, which is almost in the video world, but not quite. It basically involves taking two to three photos of a subject from slightly different perspectives and blending them into a GIF. This creates a 3D-like effect, as seen in this example:
This GIF, representing stereoscopic photography, was sourced via Unsplash.
To achieve this, place your camera on a tripod, take a centered shot, then move the tripod 2 centimeters to the left or right and repeat. Combine the images into a GIF for a fun, bouncing effect. Fun fact: stereoscopic cameras with mirrors that capture slightly different perspectives exist, but they’re rare, older, and expensive. If you find one, they’re a blast to use.
Moving the Viewer’s Eye
Now that we’ve covered moving subjects, let’s talk about how to guide a viewer’s eye through a photo. There’s two primary techniques to do this:
1. Leading Lines
Leading lines is perhaps one of the most well known composition techniques in all of photography. It essentially involves using diagonals or other lines to guide the viewer’s eye from one point to another, ideally toward your subject.
For example, check out this shot:
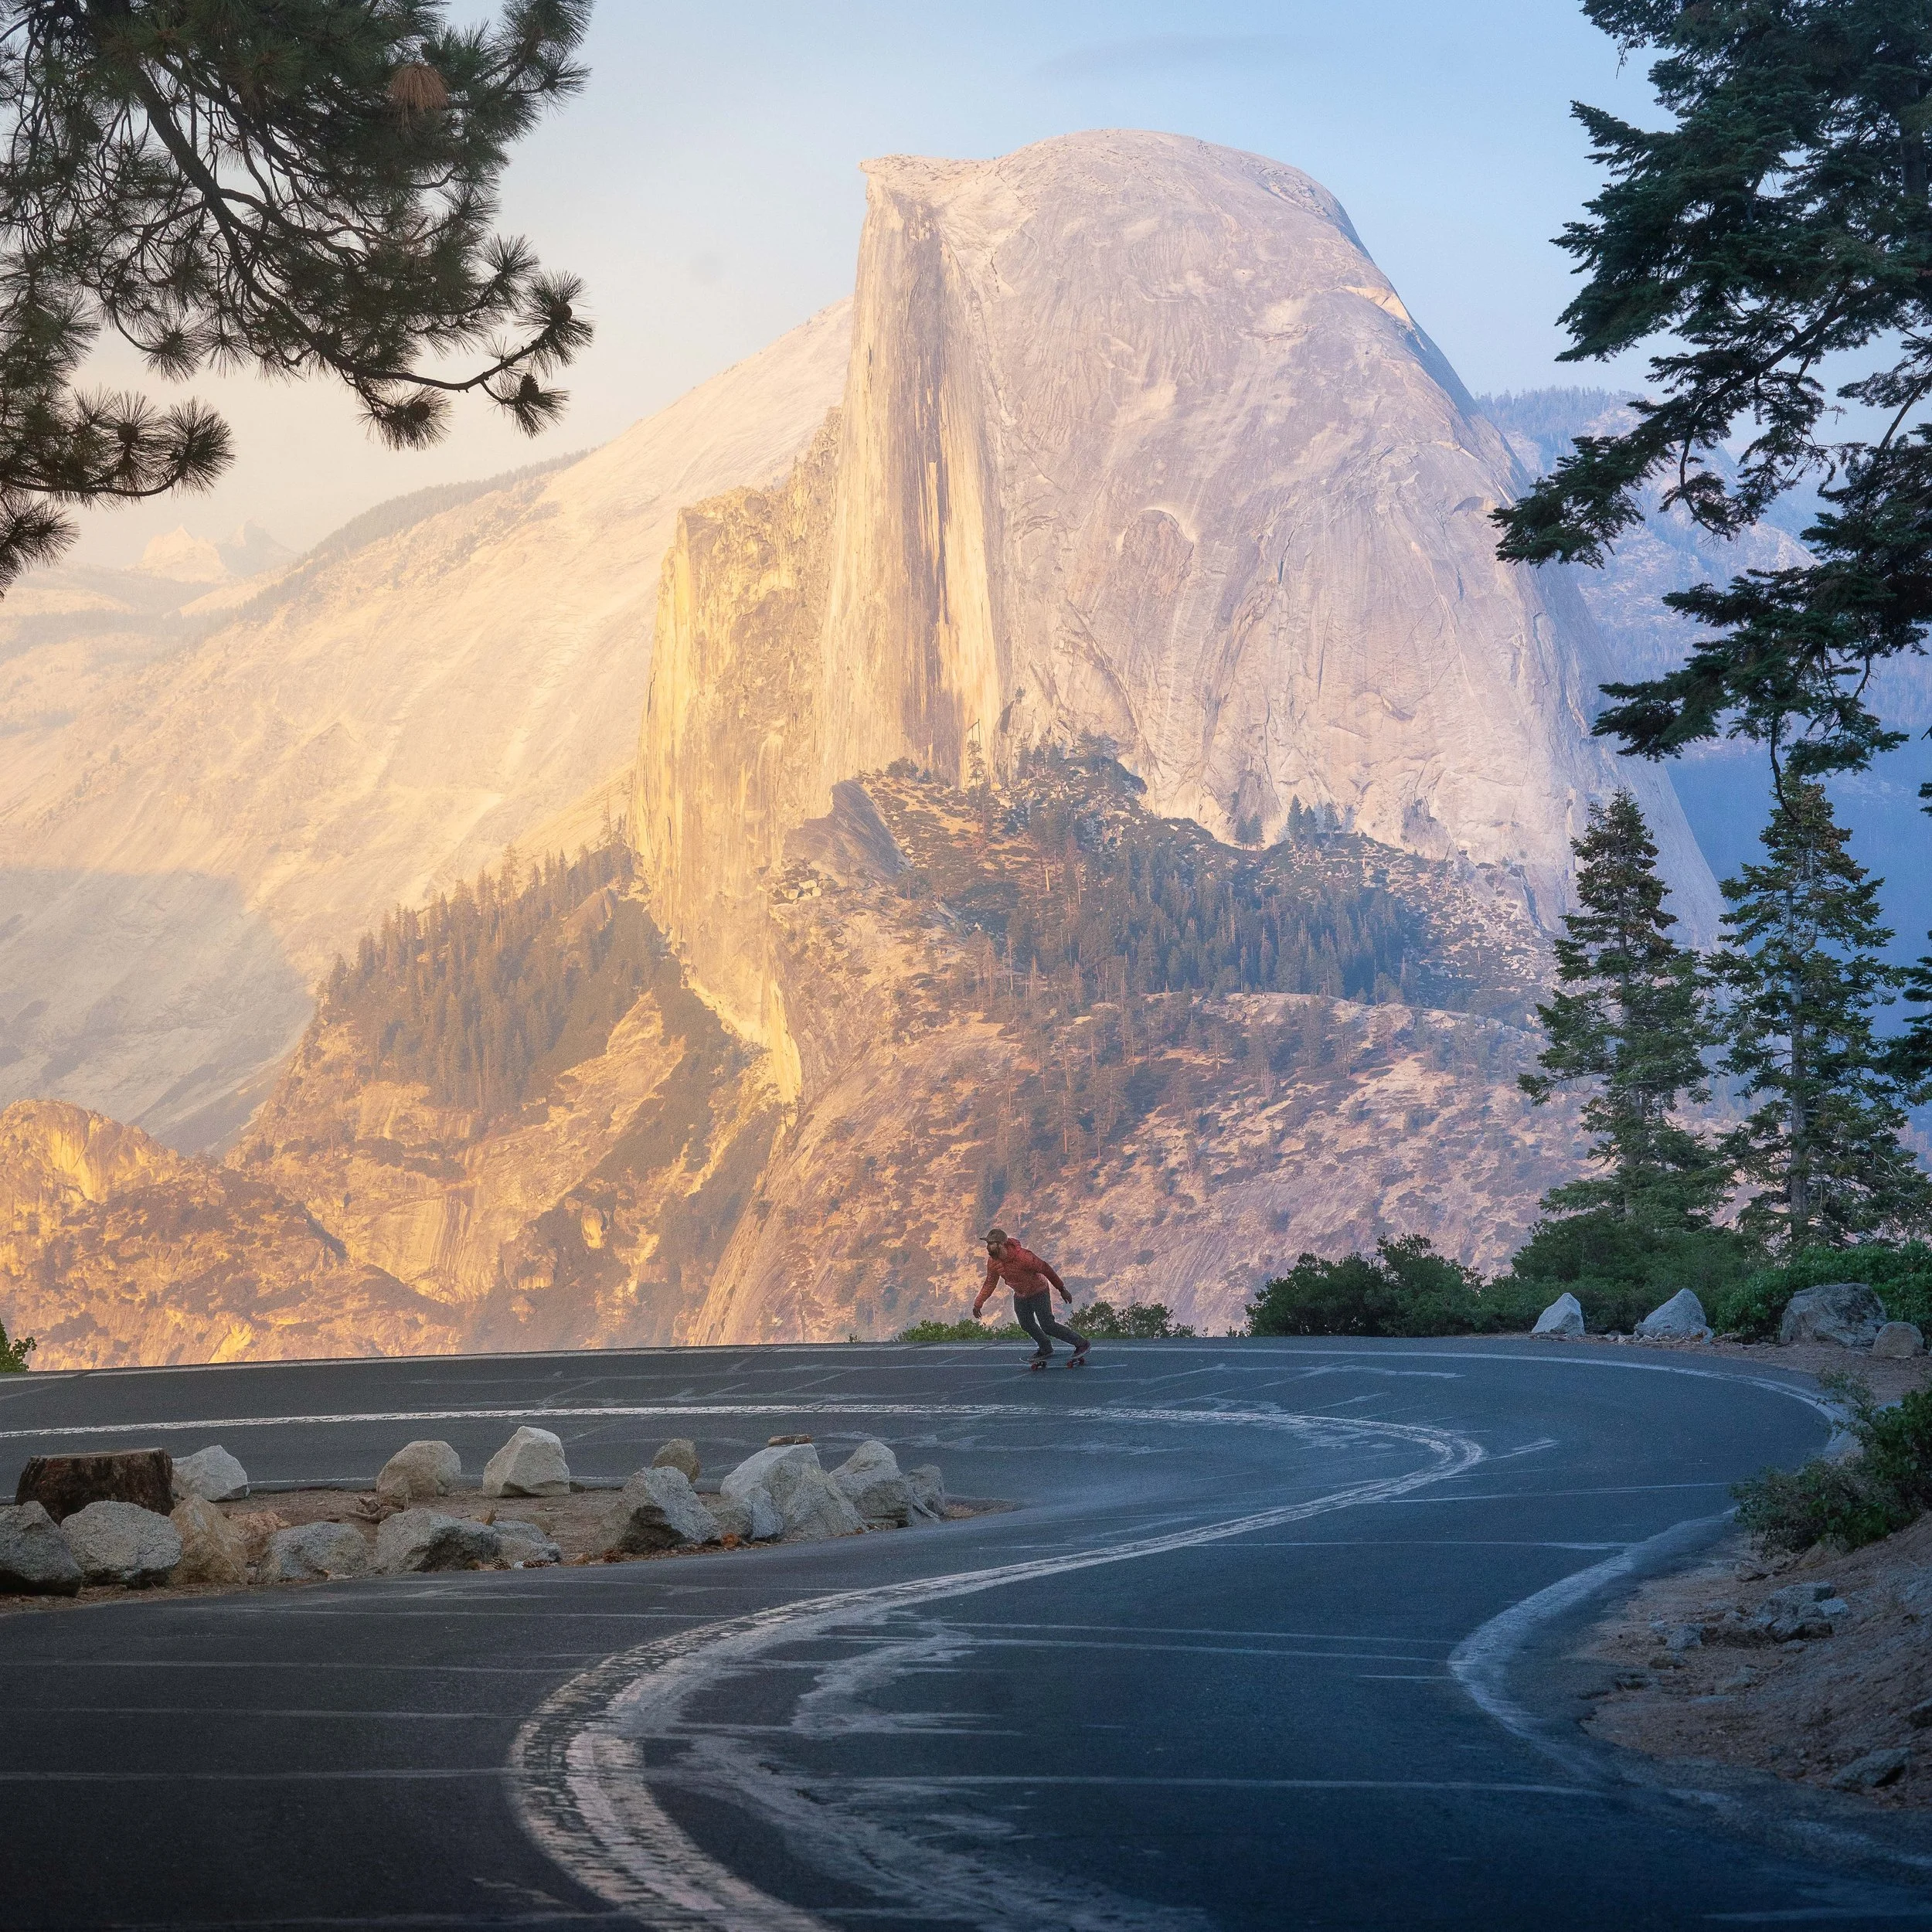
This image, representing how leading lines work, was taken at Glacier Point in Yosemite National Park.
The yellow line on the road leads to my buddy skateboarding, with Half Dome in the background. Another example of leading lines is in this shot of an old car, where I positioned a hose to guide the eye toward the subject:

This photo, featuring a hose leading line, was taken at Edmiston Ranch in Texas.
Don’t be afraid to move objects like sticks, logs, or hoses to create leading lines.
2. Vignettes
Vignettes are an easy way for beginner photographers to make your shots stand out. Darken the edges of the image in camera or with post-production to draw the eye toward the center of the frame:

This photo, featuring a fairly heavy vignette, was taken at Fern Canyon in California.
Notice how most of the edges are darkened to draw the eye towards the center of the frame. This is a pretty intense example- most of the time you’re much more subtle with your vignettes.
As you advance in your editing practice, you can use spotlights, the opposite of vignettes, to brighten specific areas of your photo to guide the eye to places. This incorporates value into movement.
Conclusion to Movement
The great thing about the element of Movement is that it allows you to breathe so much creativity into your photography technique. There’s countless types of moving objects in the world, and each requires their own specialized methods of capture.
Movement is also an exciting element because it’s difficult. Almost all of these shots require a degree of reactivity to them, making them more coveted than your average landscape photo.
There’s a lot of fun stuff to experiment with in this tutorial. Let’s jump into the next tutorial, where I’m going to cover Proportion!