
How to Find Crazy Textures in Nature to Photograph
Learn about the fifth Element of Design- Texture. I’ll cover what texture is, ways to shoot it, some popular types of textures to look out for, and a few ways to alter it in camera.
Prefer to watch this tutorial in video format? 😏
In this tutorial, I'm going to walk you through the fifth Element of Design, which is texture.
I'm going to start by explaining what texture is and a few different ways to shoot it. After that, I’ll run you through some texture examples, and finally I’ll show you how to alter texture using your camera.
Let’s dive in.
What is Texture?
First off, what is texture? Texture is essentially a way of capturing our sense of touch, visually. One of the most powerful ways to move people emotionally is through our five senses, and touch is perhaps one of the most powerful senses.
By incorporating texture into our photos, we're giving the viewer something I like to call implied touch. Even though they can't physically reach in and feel it, if we make it look real enough, we can give them that feeling anyway.

This photo of pebbly rocks was taken at Bean Hallow beach in California.
Different Ways to Shoot Texture
There are two main ways to shoot texture. You can either use texture as the main subject of the photo, or it can be a supporting subject. Let’s break down these two differences:
1. Texture as the Main Subject
Using texture as the main subject in a photo is one way to shoot it. Generally this is common in macro or abstract photography genres. It involves walking up to something like tree bark for example, and making that the entire photo.
However, this can be harder than it seems. Although it feels simple to photograph something like bark, pulling it off effectively usually requires a deeper understanding of complex art elements like balance, contrast, lines, and shapes- elements that aren't always immediately recognizable.
It’s also important to realize that most mainstream audiences don’t “get” this kind of photography. This genre is equivalent to looking at a blob of paint and calling it fine art. Most people will say, “That’s not art, an elementary student could do that.”
But if you’ve studied any of the famous abstract painters, like Jackson Pollock, for example, you'd know that they actually know to paint incredibly well, and they have intentionally devolved their style into the abstract.
With that being said, we’re not here to impress anyone. We’re here to make beautiful art. So here’s my primary strategy for taking this kind of photo:
Start by finding a texture you enjoy. Let’s say you're walking along the seashore and you see some interesting rocks. Now look for something within that texture that stands out. Something that provides an element of contrast, or almost looks out of place.
For example, here’s a shot I took at a seashore:

This photo of mineral deposits was taken on Glass Beach in California.
Most of the rocks were orange, but one section had these blue mineral deposits. I’m not even sure what they are, but they caught my eye immediately. And the way I took the photo, it almost looks like a smiling face: there’s an eye, and a crooked smile with teeth. That little “face” within the texture helped elevate it from a basic rock shot to something memorable.
Now let’s check out another example. This is a simple photo I took of a concrete wall:
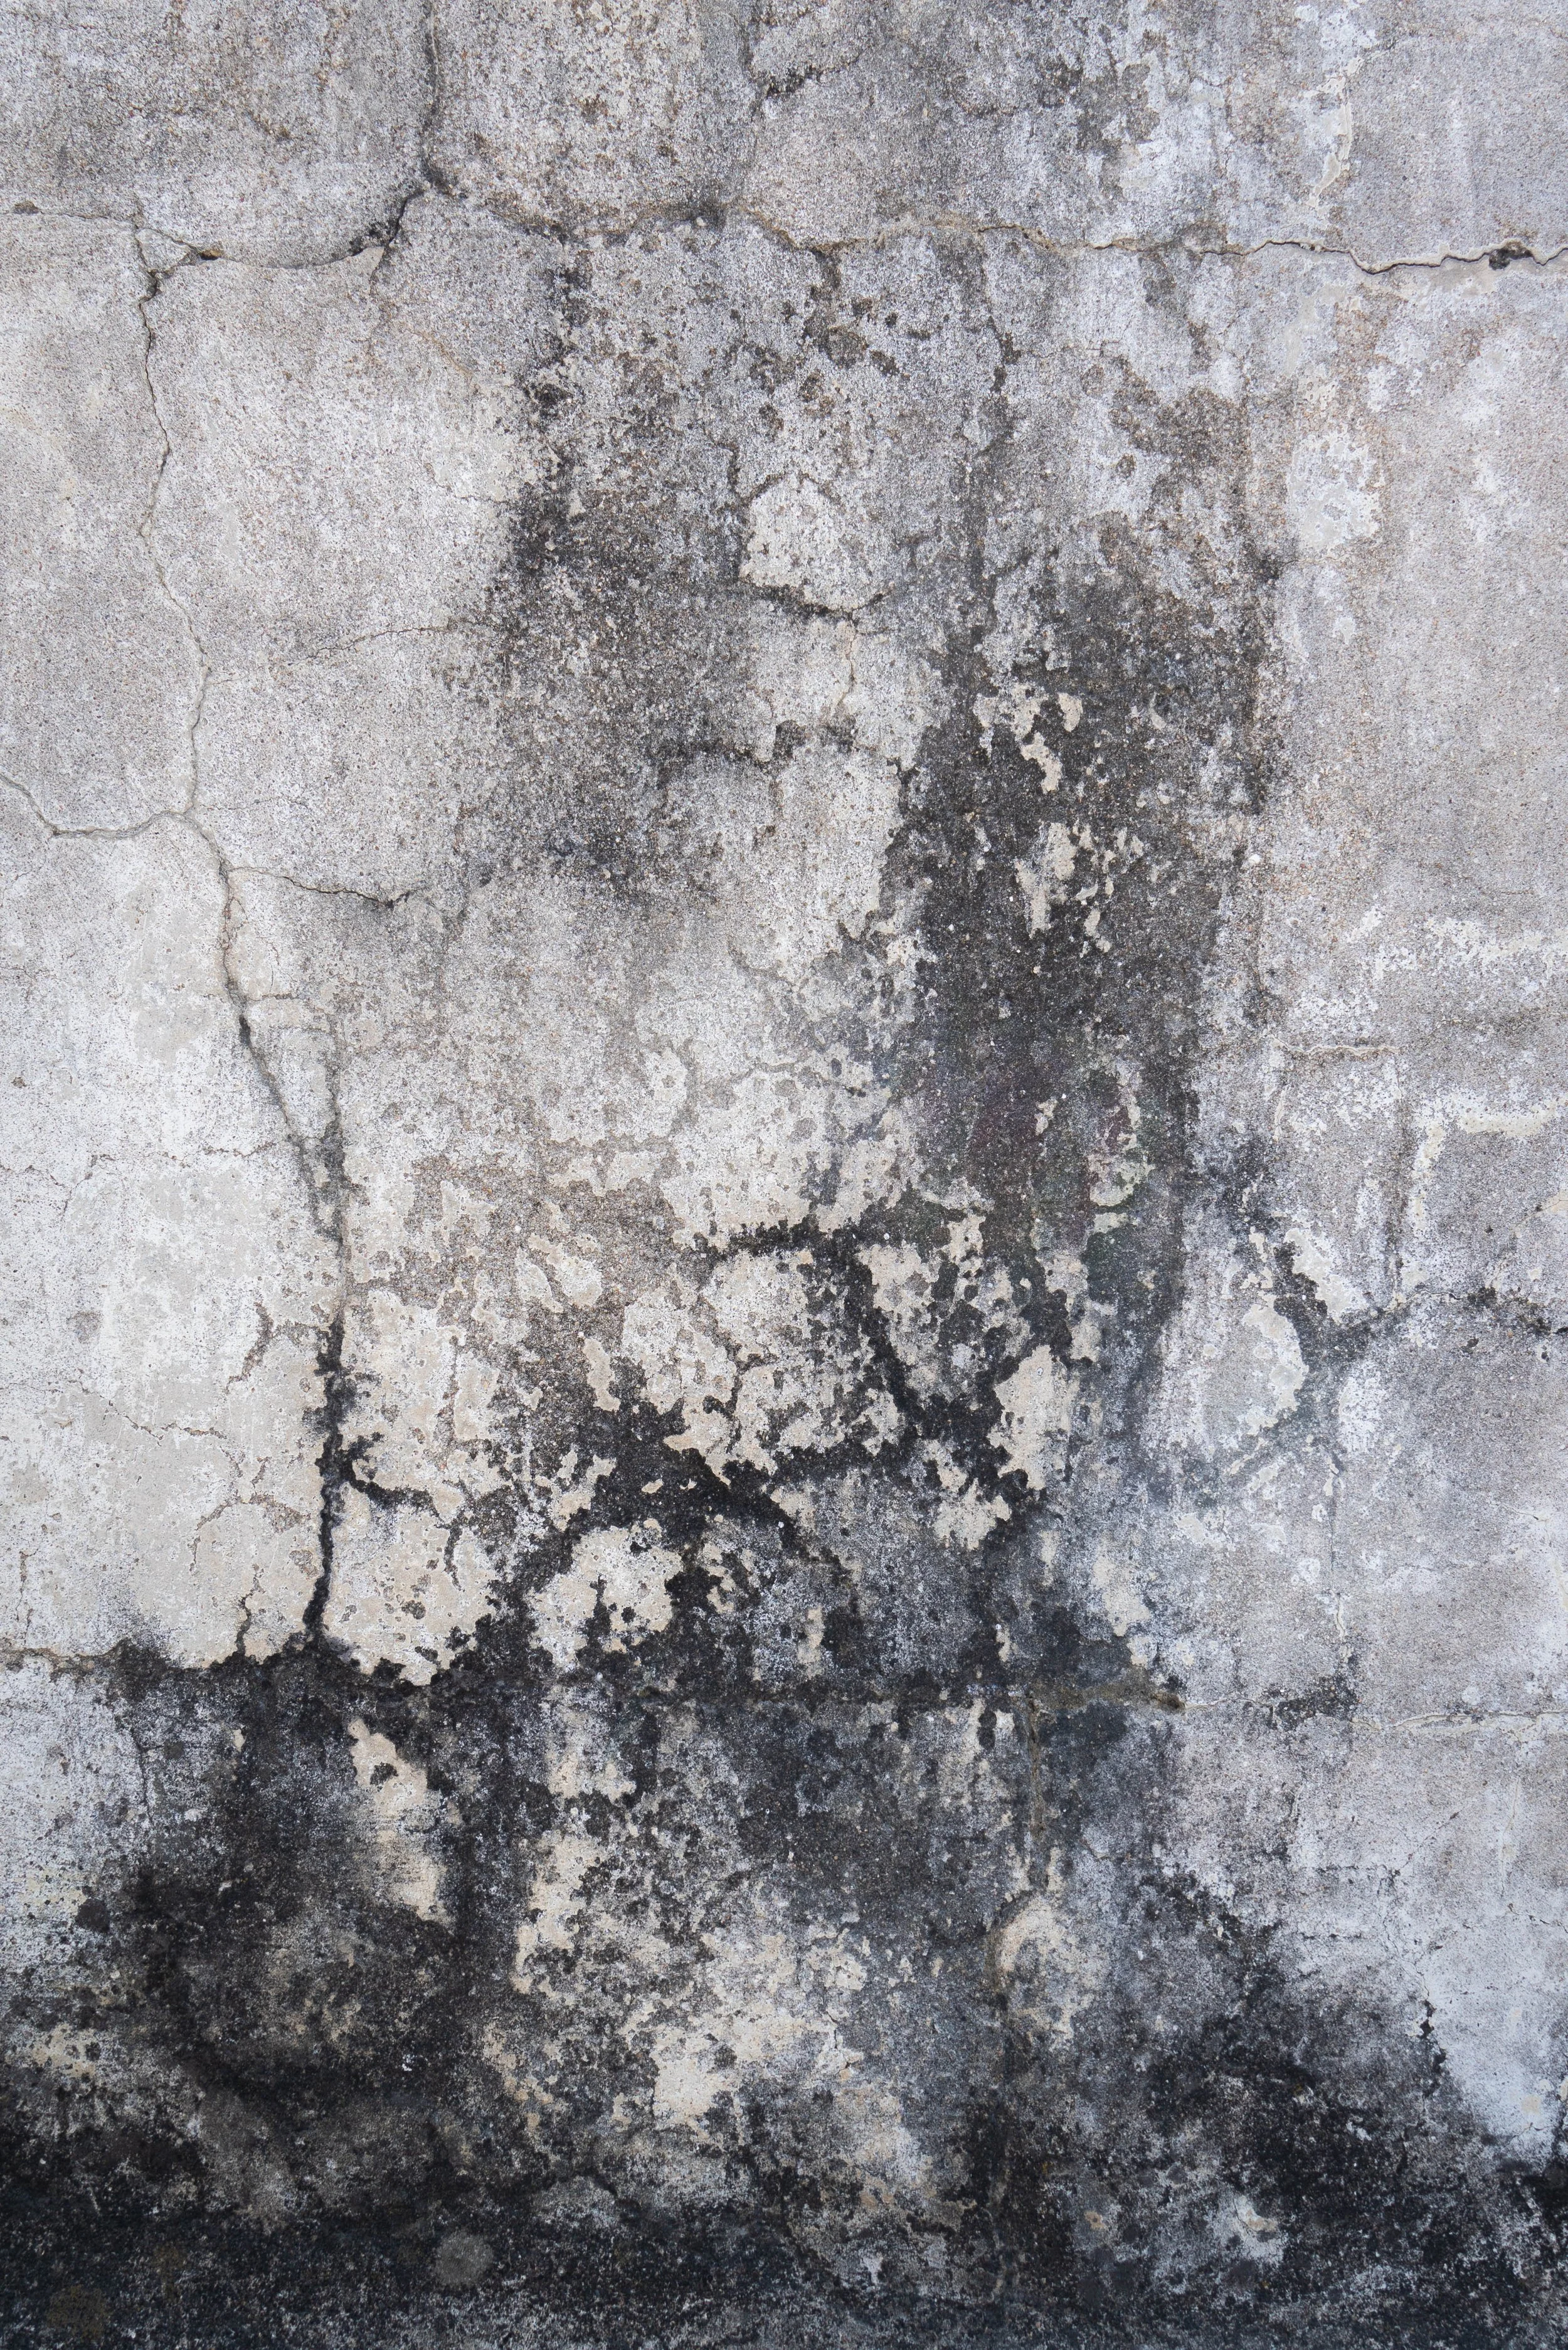
This photo of a concrete wall was taken at Archeological Park Zaculeu in Guatemala.
It’s nothing crazy, but I enjoyed how the black texture eroded into the white. You could even interpret it metaphorically- perhaps the black represents evil intruding into a space of good will (white.)
But at the end of the day, it’s just concrete. Most people probably won’t get the deeper interpretation I was implicating. But it personally caught my eye, it was a great warm up shot, and I had fun shooting it. So who cares?
2. Texture as a Supporting Subject
The second way to take photos of texture is to use it as a supporting element or smaller part of a scene.
Check out this example of a shot I took in the agave fields in Mexico:

This photo of an agave field was taken at Fábrica La Rojeña near Tequila, Mexico.
The foreground is filled with sharp pointy agave plants, making them the supporting texture for the main subject, which is the power line in the background. In the same way that electricity “crackles” or feels sharp, the pointy agave points symbolize that.
In another example, here’s a wheat field with a church in it:

This photo of a wheat field was taken at Abbott Church in eastern Colorado.
The soft, fluffy wheat texture contrasts nicely with the hard, rectangular shape of the church in the background.
Exploring Texture Through Adjectives
Textures can be described with literally millions of adjectives. One of my favorite ways to practice shooting textures is to pick an adjective out of the dictionary and try to find it in the wild.
Let’s speed run a bunch of photos so you can see what I’m talking about:
Smooth - This shot of the Gateway Arch in St. Louis has a slick, smooth texture. It almost looks like a slide or a track you would find in Mario Kart:

This photo of a slick panel was taken at the Gateway Arch in Missouri.
Rough - This shot on a temple in Mexico features a scaly lizard and a rough, stone wall. They compliment each other nicely, and you can imagine how it would feel to touch them:
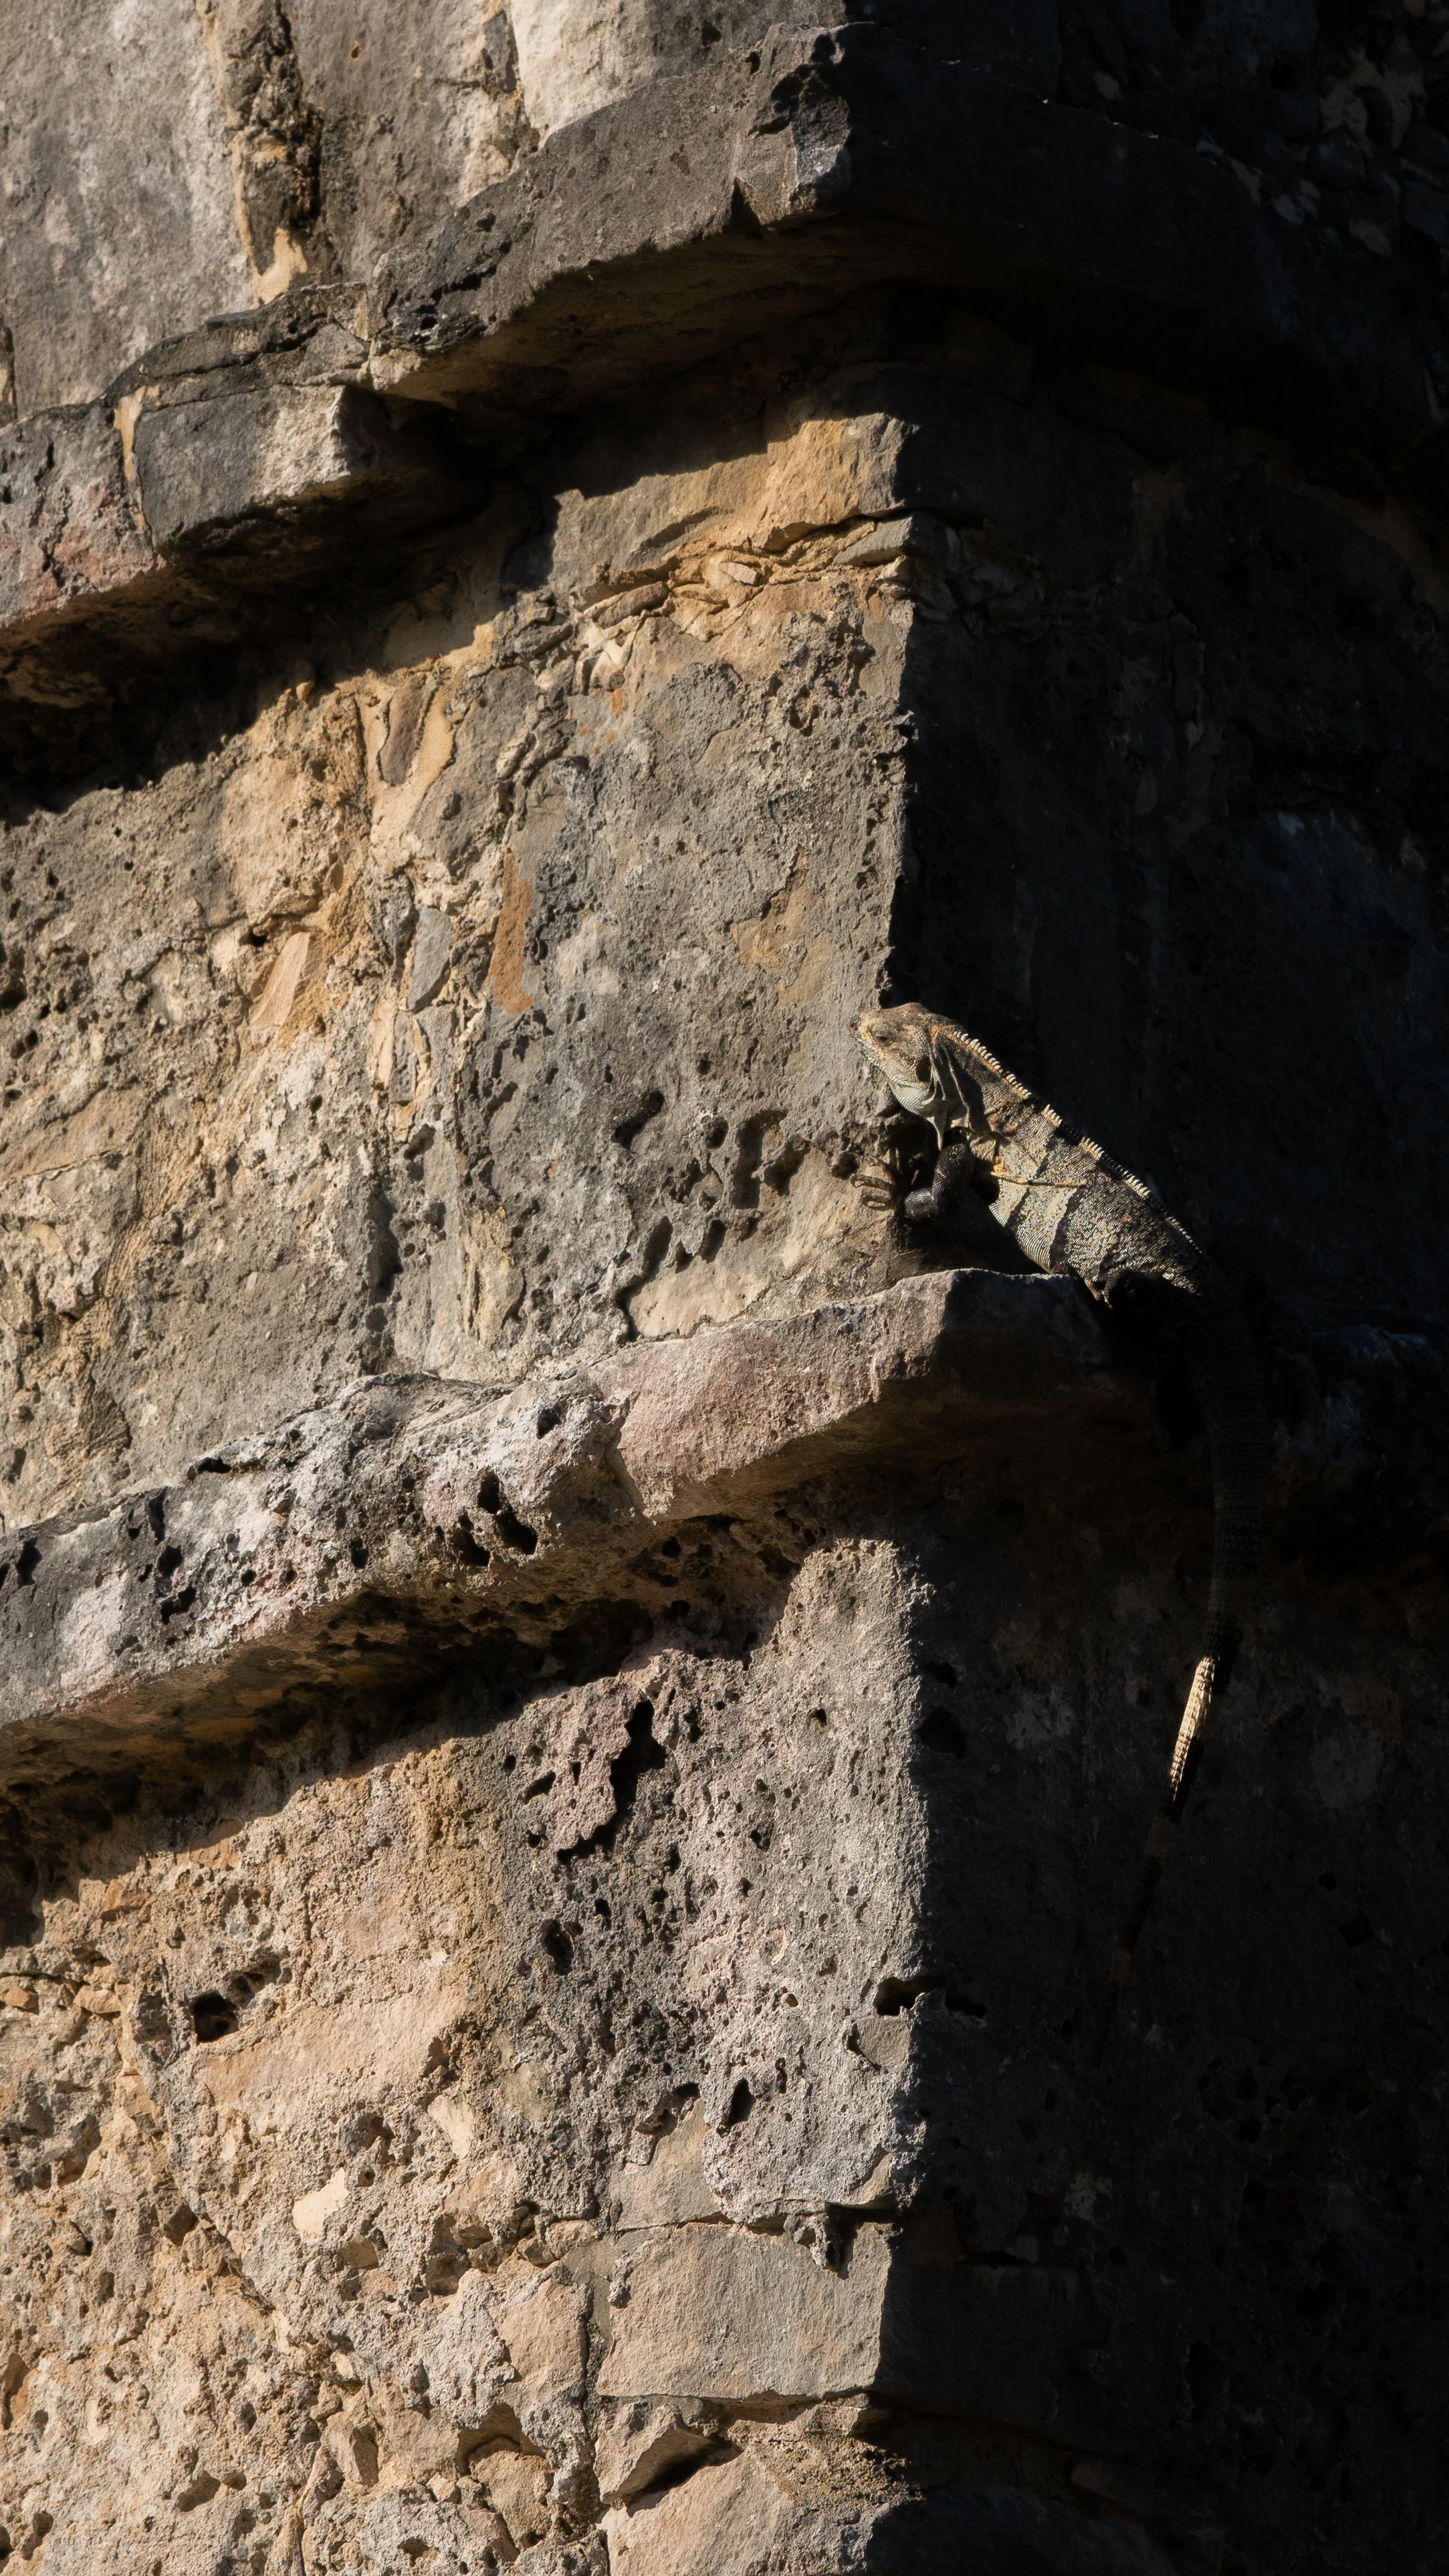
This photo of a lizard on a stoney wall was taken at the Temple of the Frescoes in Mexico.
Coarse - Here’s a photo of some fine wavy sand, taken at White Sand National Park. You almost want to run your hand through it and feel the sand through your fingers:
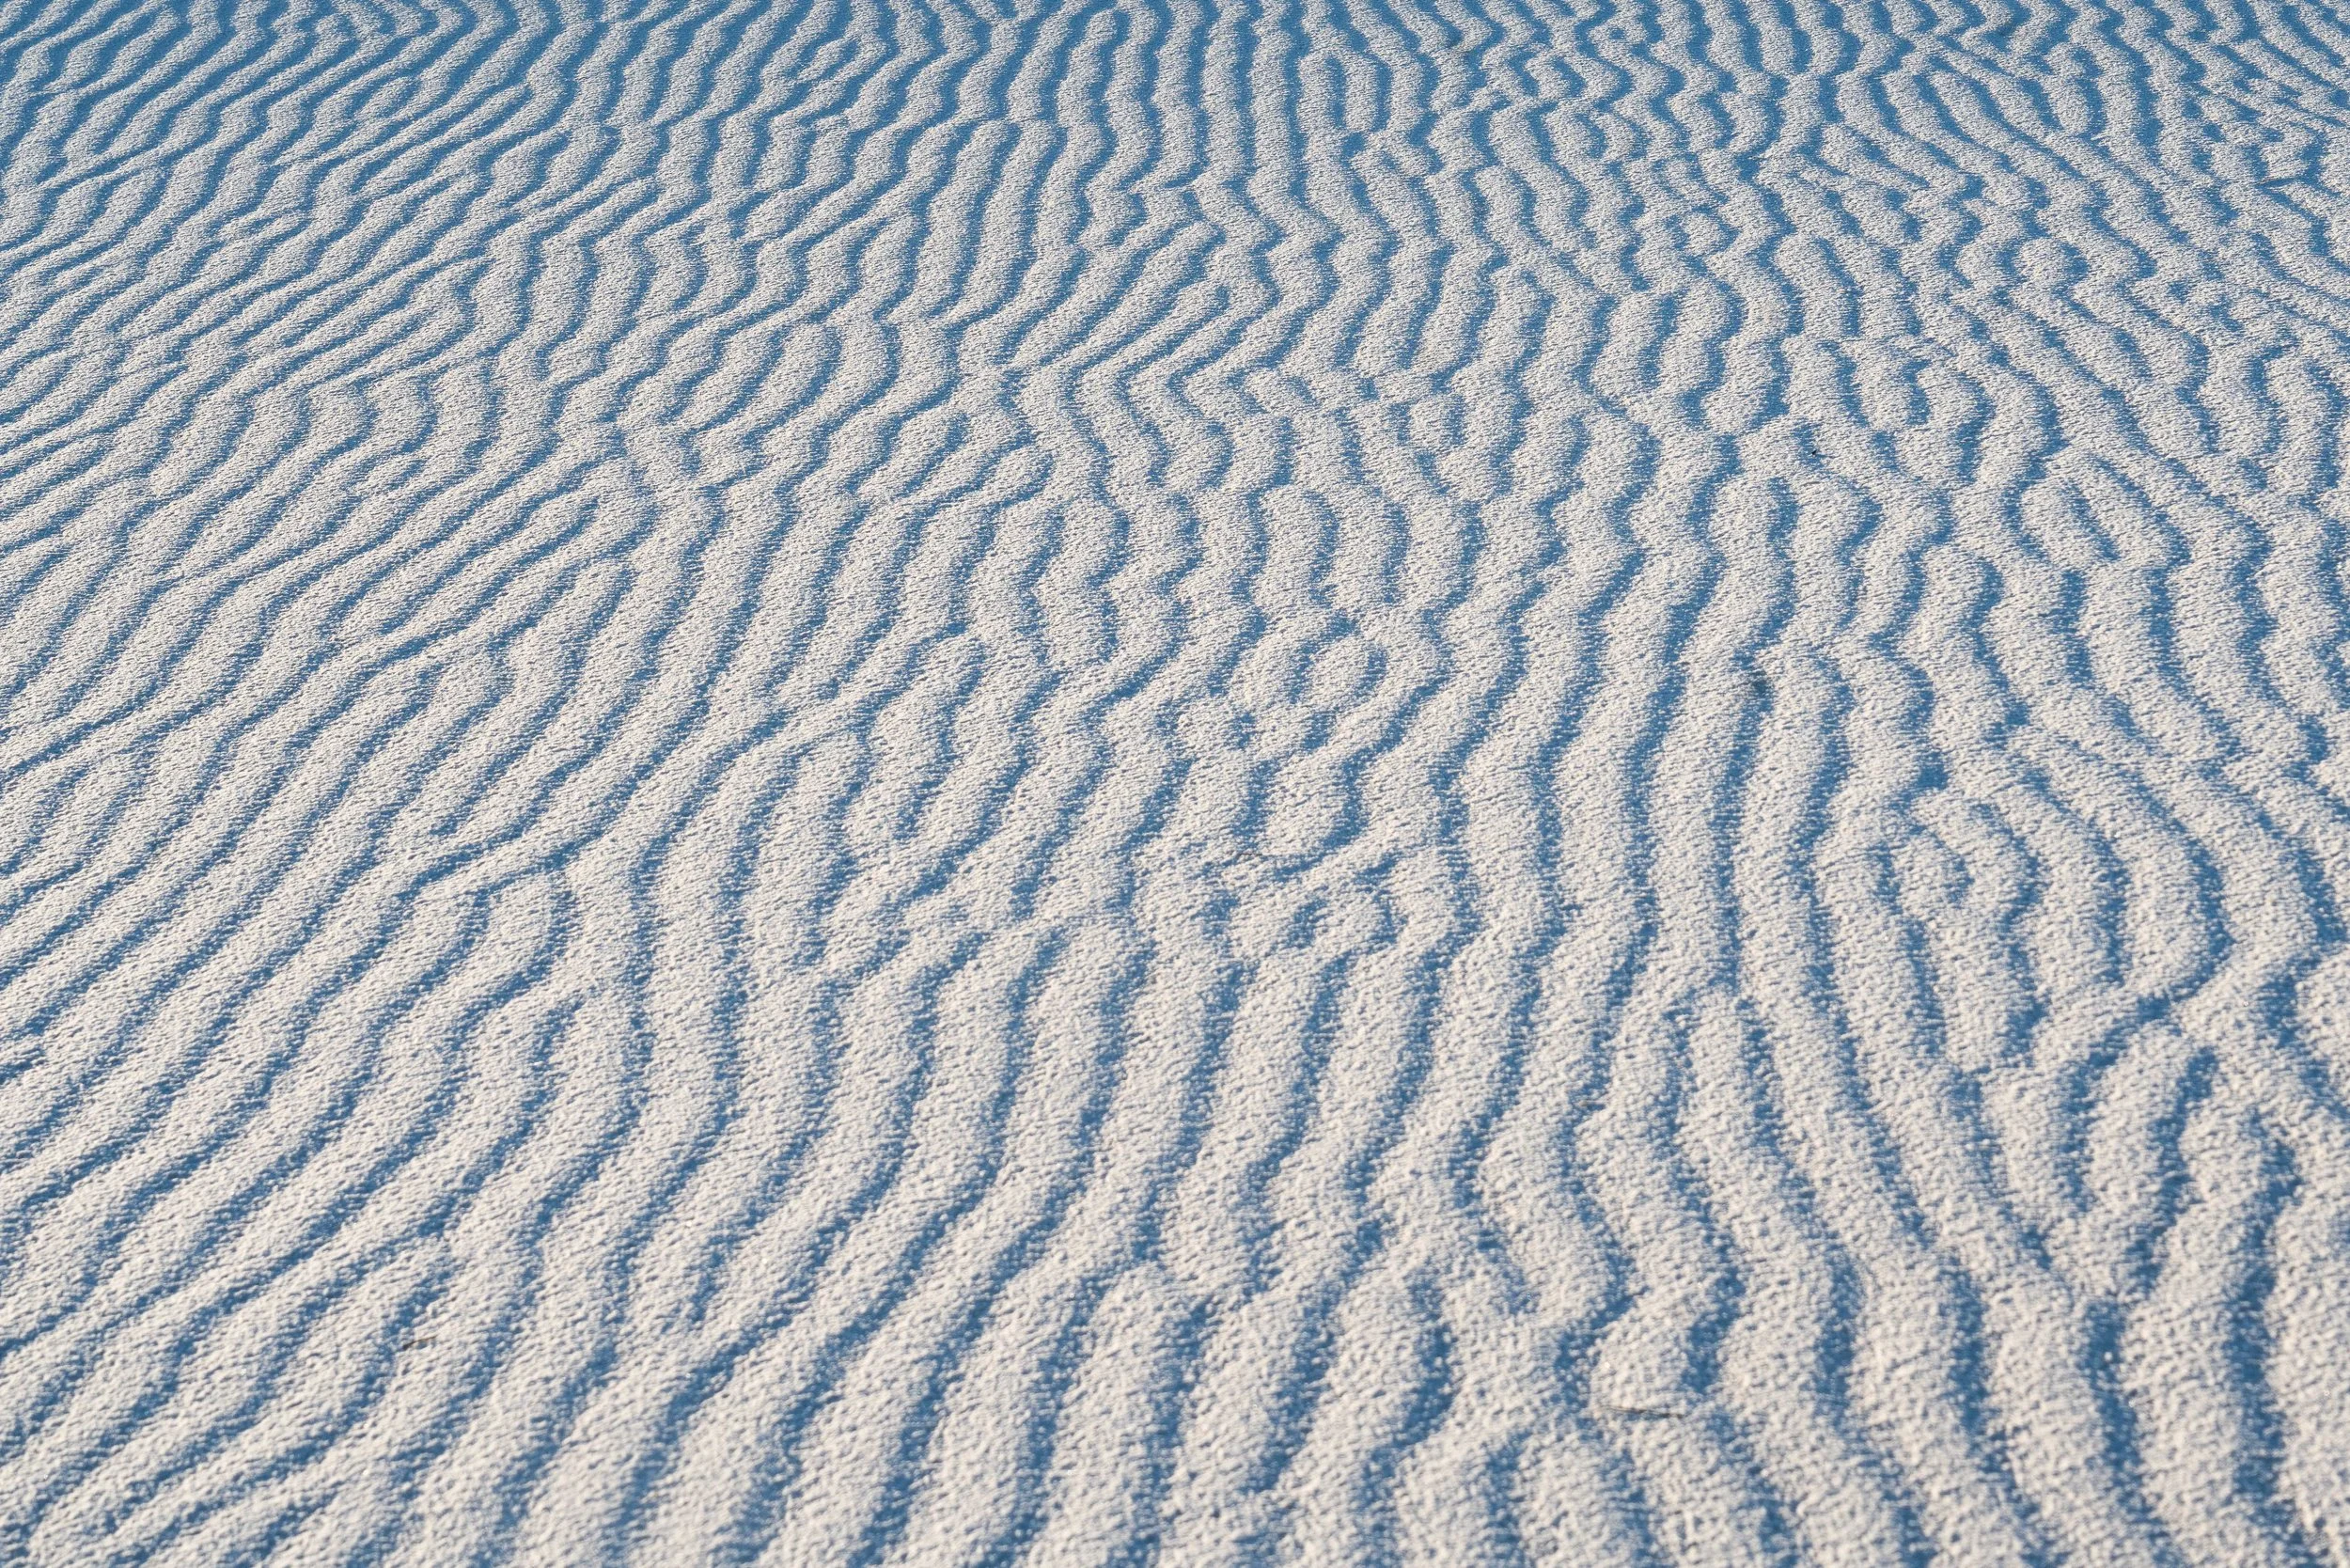
This photo of course sand was taken at White Sands National Park in New Mexico.
Soft – These plants, taken in a botanical garden look like they’d feel super soft if you laid them down in them:

These leaves, taken at Chatfield Farms in Colorado, represent how an image can feel soft.
Dry – These mud cracks are from a dried water bed. The mud crisped up to almost form a heart shape:

This image of cracked mud was taken at the Bisti Badlands in New Mexico.
Sharp – These silver minerals, taken at the Denver Mineral Convention, are jagged and prickly, like a cactus. Their shiny appearance adds to the needle-like sharpness:

This photo of sharp minerals was taken at the Denver Gem & Mineral Festival in Colorado.
Muddy – This photo was taken in Yellowstone, where white mud was bubbling up from intense underground pressure. It almost looks like a CGI render- sticky, syrupy, and gooey:
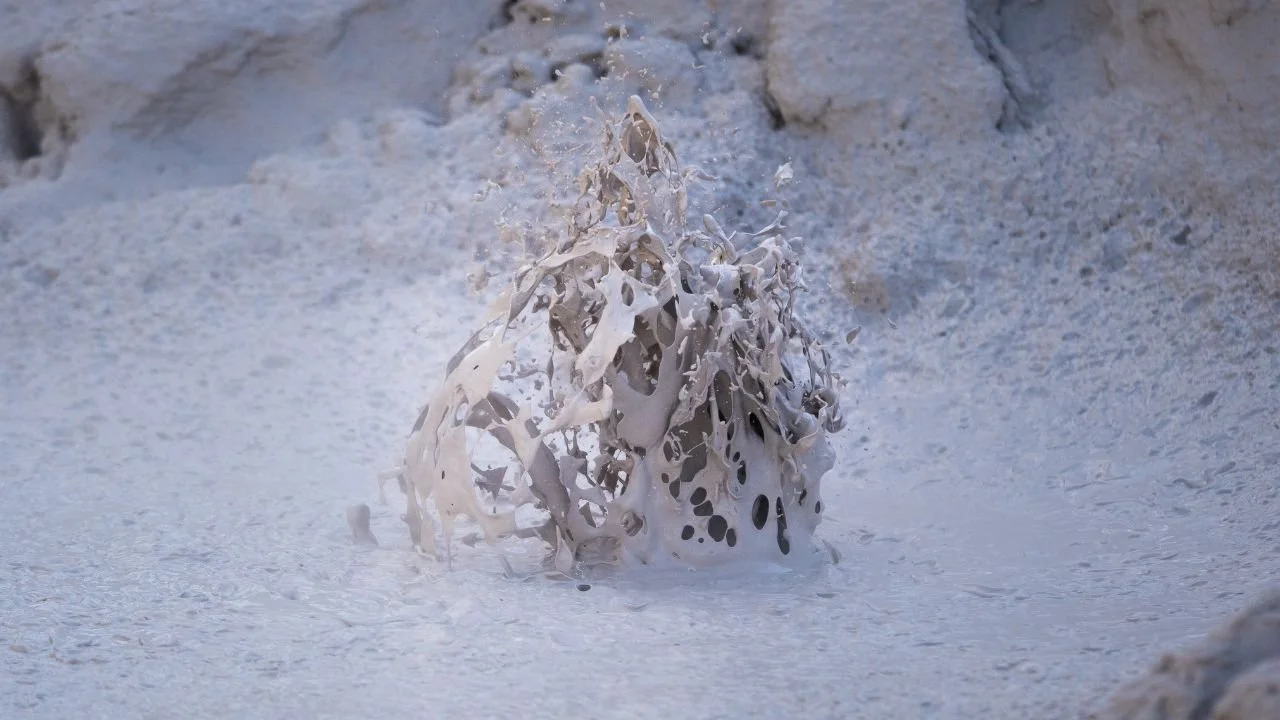
This photo, taken in Yellowstone, represents a gooey, muddy texture.
Misty – This shot was taken at a blowhole in Mexico. Water shot up and created a mist that looked like some kind of ghost or spirit rising. It had a dreamy, ghostly quality:

This photo of mist from a blowhole was taken at La Bufadora in Mexico.
Furry – This rock, covered in sea moss, gives the appearance of hair, while the rock shape almost resembles a bird.

This photo of a hairy tidal pool was taken at Bean Hallow beach in Califonia.
Fluffy – Let’s end this last photo on a good note. This is a shot of sea foam with a baby turtle experiencing the ocean for the first time. You can almost feel that foamy fluff brushing over you.
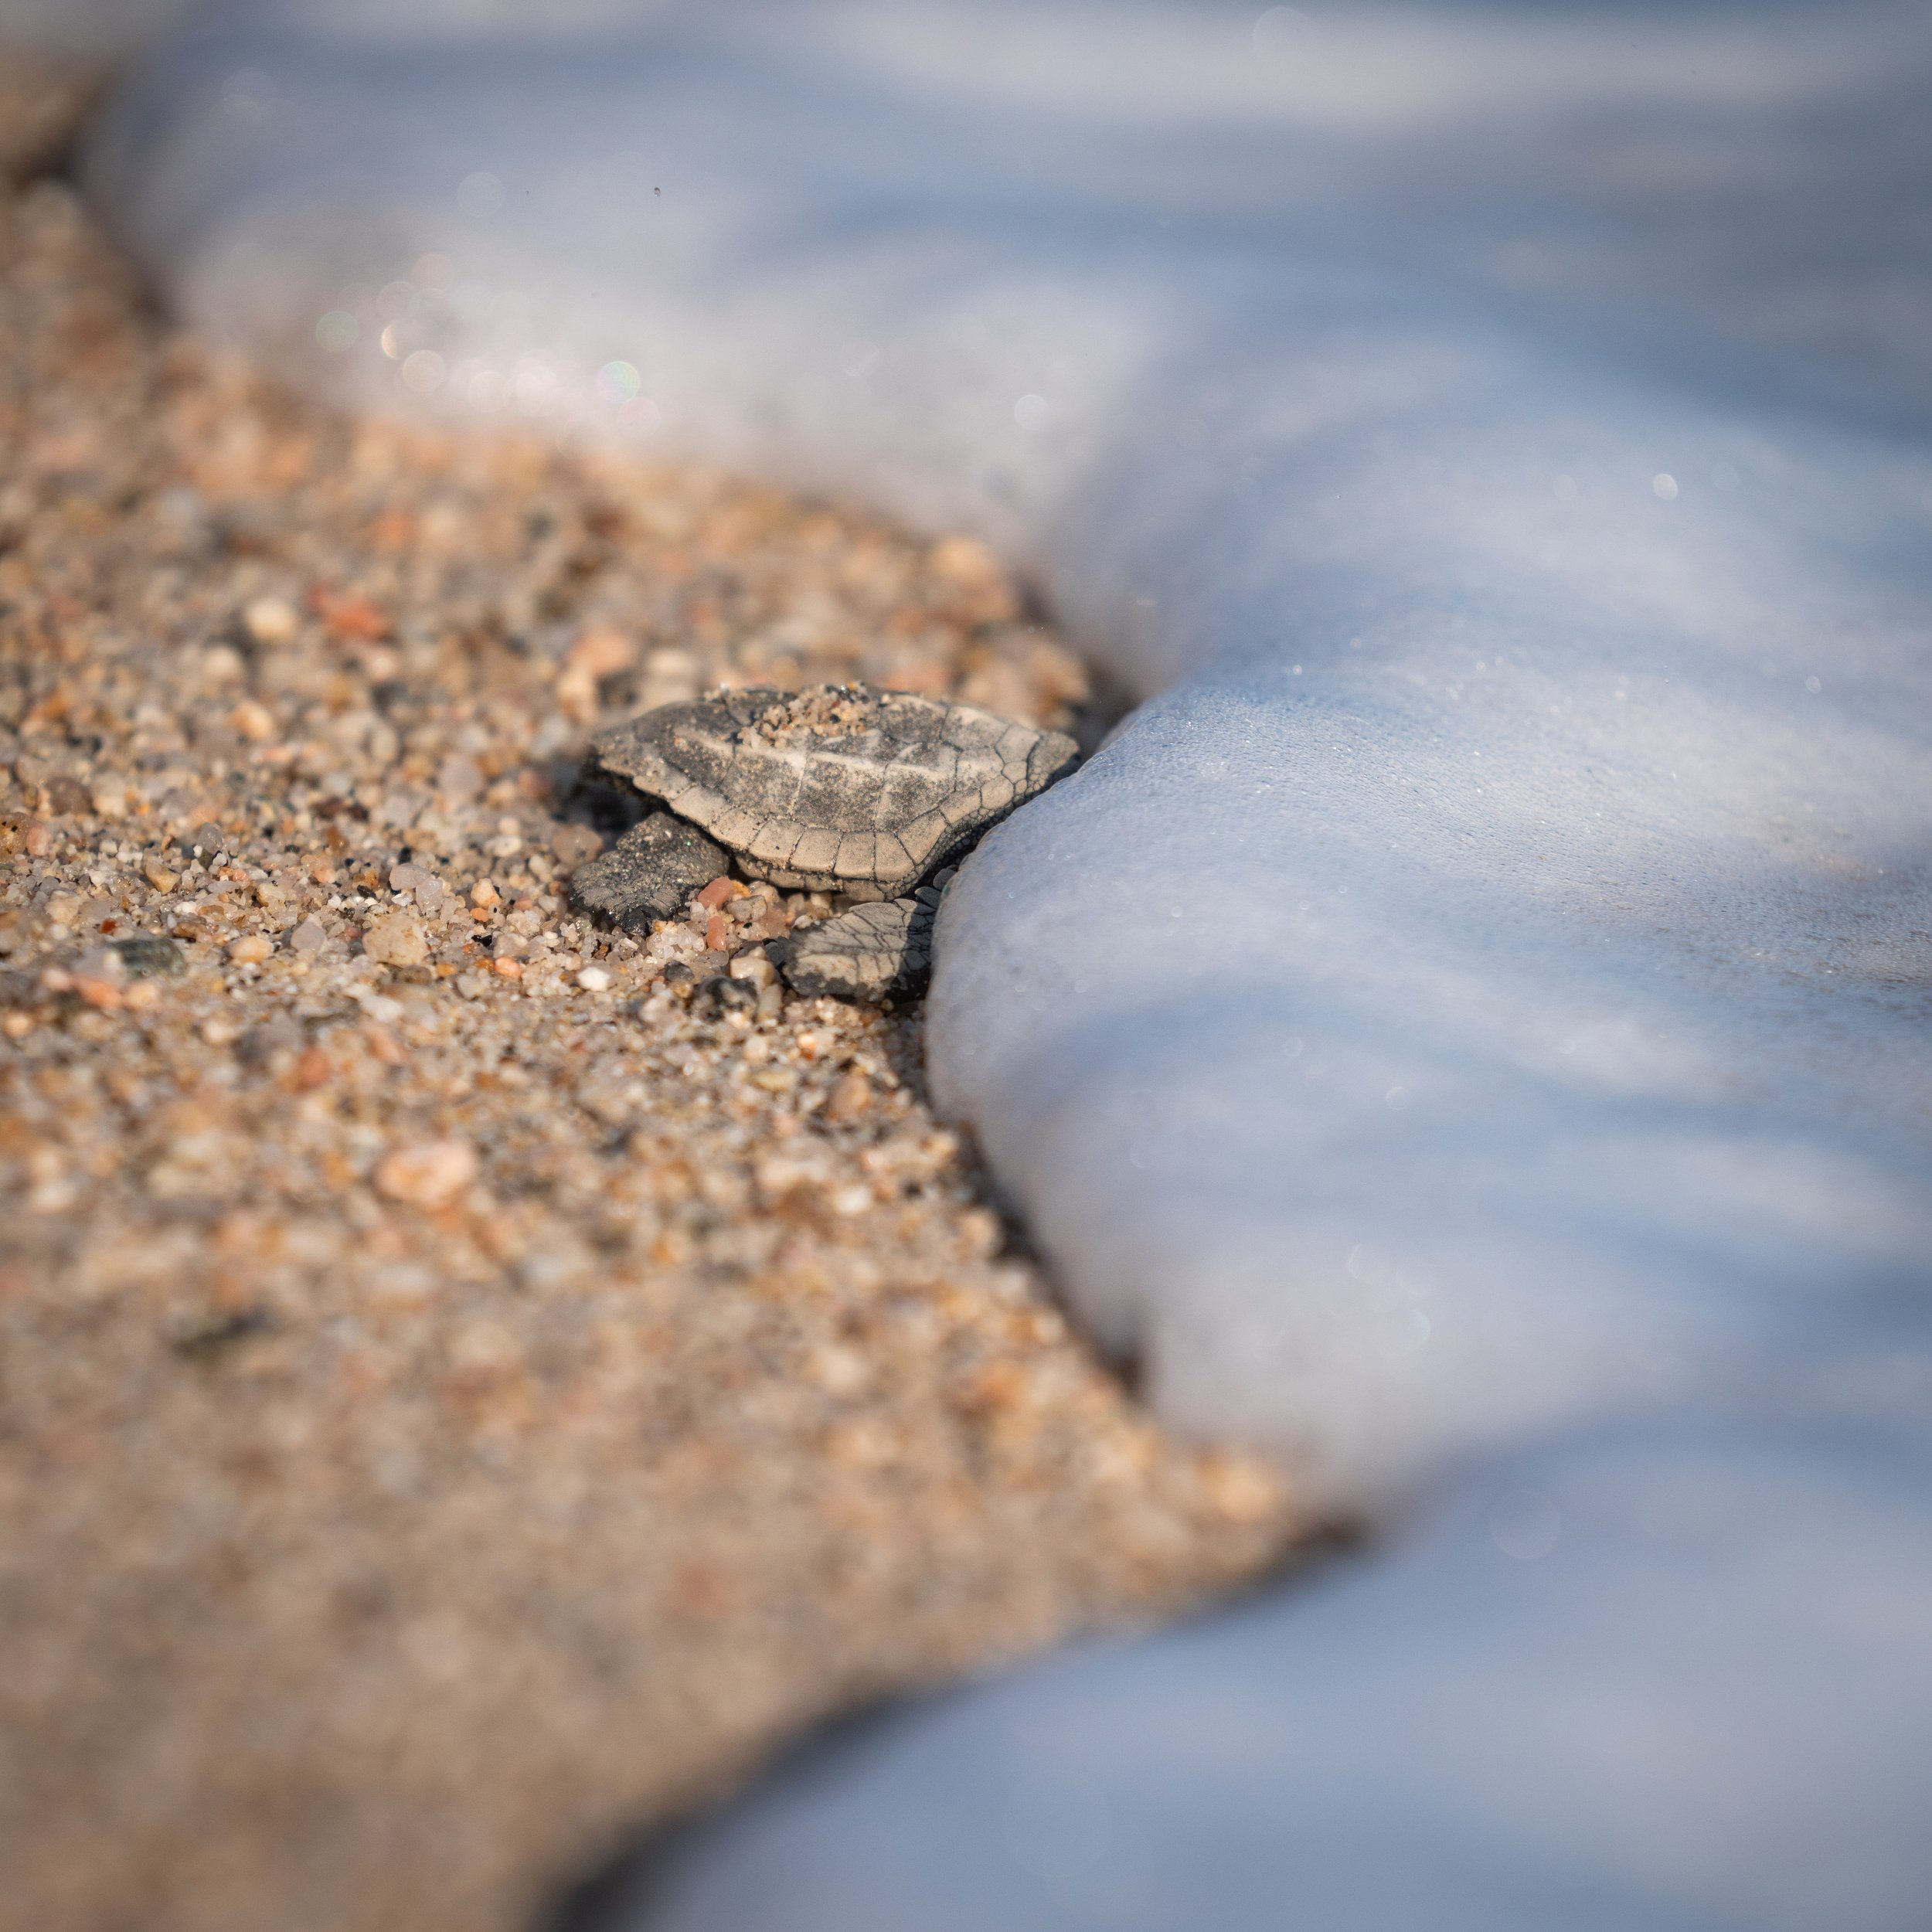
This photo of a baby sea turtle in sea foam was taken in Buenos Aires, Mexico.
As you can see, textures are everywhere. You just got to start looking.
Altering Texture
The interesting thing about textures is that you can personally manipulate them with your camera or editing tool. A simple shot of a leaf, for example, can look completely different depending on what camera settings or Photoshop tools you use on it.
Using Your Camera
The most obvious common method to change the texture of an object is to change your camera’s shutter speed. Water is perhaps the most common example. Take this shot of a tranquil beach:

This photo of a buttery horizon was taken near the Tree of Life in Washington.
The long exposure makes the water look silky smooth. Now compare that with this shot of a fast exposure taken on a windy, choppy day:

This photo of choppy water was taken at Punta Brava in Mexico.
The water looks rigid and crackly. Did you notice the pelican in the center?
The same idea can apply to virtually any object, so long as it’s moving. Personally, I like to use long exposures on clouds. A long shutter speed can help melt them down across the sky. It’s a great way to soften the clouds if they look choppy and you want your scene to feel more serene.
Another uncommon but beautiful object to shoot long exposures on is leaves. Say you’re out shooting and the wind is going absolutely crazy. Try slapping an ND filter on your lens and taking a one second exposure of a solid-trunked tree. You’ll get a non-moving trunk and fluffy, Monet-like leaves.
You can also use long exposures on moving lights- like cars, trains, or airplanes. Here’s an example of a shot I took on Lombard Street in San Francisco.
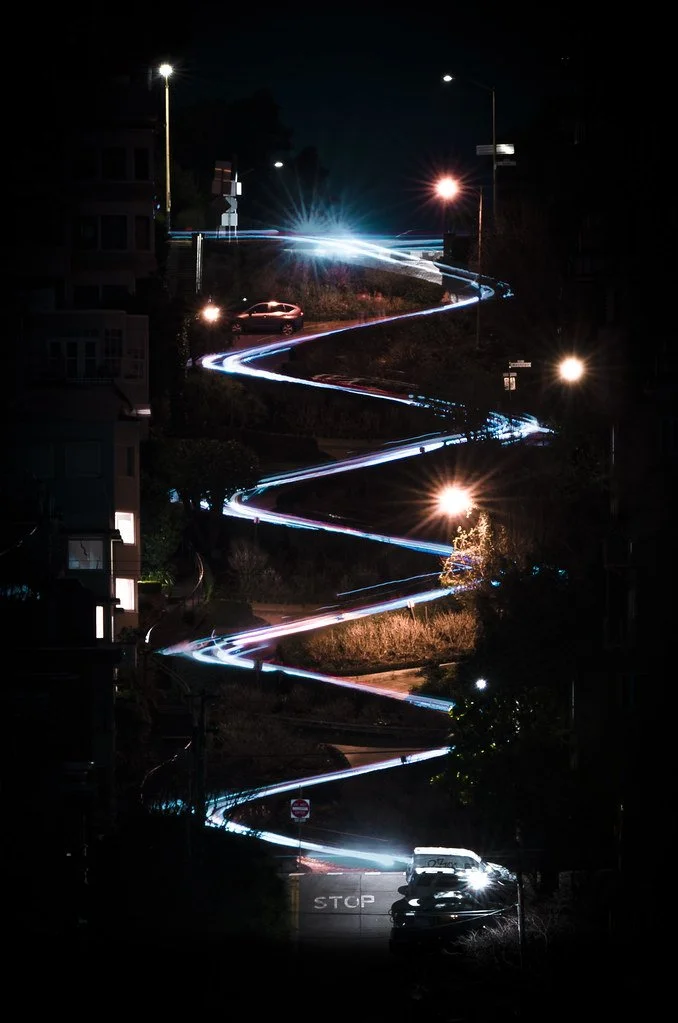
This photo of a long exposure was taken on Lombard Street in San Francisco, California.
Since the road is famously windy and downhill, I figured it’d create a unique effect. The result was these cool, wavy light trails, almost like a pinball machine.
Using Editing Tools
When it comes to editing tools, the world is your oyster. Nowadays, there’s a million and one tools you can use to alter the textures in your photos. However, some of the most common tools you’ll find in Lightroom/Photoshop are the clarity, texture, filter, and sharpening tools.
We’ll cover all of these tools in significant detail over in the editing portion of this course. For now, just know that tools do exist that can help smooth rough looking rocks, fluff out clouds, remove coarse skin in portraits, and even give static water motion blur.
In Conclusion
That’s the element of texture for you. It can be used as a main subject if you're into more abstract work, or as a supporting subject to help enhance your compositions. Either way, texture is one of the most powerful tools you can use to evoke emotion in your photography.
Let’s hop into the next tutorial, where I’m going to go over one of the least talked about compositional elements- Value.