
10 Tips for Killer Urban Photography
Learn 10 tips to improve your urban photography.
Prefer to watch this tutorial in video format? 😏
In this tutorial, I'm going to walk you through ten tips to improve your urban photography. By urban photography, I mean street, architectural, and everything in between.
As you can probably guess, this genre of photography isn't my most popular, nor is it my best, but I do have solid tips for these environments. Let’s jump in.
Tip #1: Focus On One Component
The first tip I have for architecture photography is to focus on one part of the building. Instead of trying to get an entire building in a single shot, which can be a messy process if there’s a lot going on, pick a singular subject.
For example, find a window you like, a doorway, or a specific architectural detail that stands out to you. When in doubt, keep it simple.

This minimalist photo of support beams was taken at the Kauffman Center in Kansas City.
Tip #2: Be Respectful
The second tip I have is to be respectful inside buildings. This is particularly important in religious places, where there may be unspoken rules to follow. In Christian churches for example, you're expected to take off your hat and bless yourself when you walk in. In Muslim mosques, you’re expected to take off your shoes, wear long pants, and wear a hijab if you’re female.
It can be helpful to do a quick Google search about the culture of the building you’re entering. In general, I try to avoid selfies, talking, and using a tripod in religious places. You may want to time your visit when there are not many people around- usually midday on weekdays.

This photo was taken at the Santuario de Nuestra Señora de Guadalupe in Mexico.
This concept also applies to corporate buildings, museums, hotels and other similar environments. Many hotels and corporate offices with neat architectural lobbies have security guards, and if you're wandering around with a big tripod and making a scene, you may be asked to leave.
Tip #3: Look for Events
The third tip I have is to look for events to get great street photography. If you're in a bland town and you're not sure what to shoot, check out what’s happening this weekend. Parades, local gatherings, concerts, speeches, and even rallies are great opportunities to get interesting shots.
I also recommend airing on the assertive side when it comes to street photography. If you’re confident enough, you can take shots of anyone, pretend to be the press, and fake your way behind the scenes. Having a long camera lens helps.
Tip #4: Wait for the Action to Come to You
The fourth tip is to wait for the action to come to you, especially in the world of street photography. When starting out, it’s easy to just keep walking and hope an interesting scene appears, but I’ve found it’s easier to pick a busy spot, line up a composition, and wait for something to happen.
A good timeframe is about fifteen to twenty minutes. See who walks by, what reflections appear, how cars move through the area, and really observe the location. This takes the stress off constantly wandering around and building out new compositions in your head.
After about fifteen minutes, move to a new spot, and rinse and repeat. You can do this for several hours without burning out, and leave with a variety of great shots.

This shot was taken the The Vessel in New York City. I posted up at the top of the exhibit and waited for the security guard to walk in the entrance at the perfect time.
Tip #5: Avoid the Homeless and/or Children
The fifth tip is to avoid shooting homeless people or children without permission. Photographing the homeless is generally frowned upon because they are in a vulnerable situation, and using them to create artwork that you might sell or post online usually doesn't sit well with audiences.
If you do want to photograph them, talk to them first, offer a bit of money, and ask if you can take a portrait and hear their story. That is the best approach.
When it comes to children, I would always ask the parents and make your intentions very clear before doing anything.
Tip #6: Get Off the Beaten Path
The sixth tip is to get off the beaten path. You don’t always need to go where the crowds are. Explore parking garages, back alleyways, highway underpasses, and less-popular districts.
This is where you’ll find the grimy, underbelly of a city that’s got the real character.
There have been times when I have literally pulled over on the side of the freeway because a particular scene was so amazing. However, if you do end up in these more vulnerable photography spots, you generally need to move quickly. People will call the cops, especially if you have a tripod.

Although this photo was taken very early in my photography career (hence the cringy stance,) it remains a favorite of mine because it was taken from the bridge of a busy highway overpass in Colorado.
Tip #7: Leave Yourself Several Options
The seventh tip is to have backup plans when shooting in a city. Nothing is ever on time, and unexpected events can happen at any moment. The number of times I have shown up to a particular building only to discover it is under construction, closed, or hosting some kind of private event is very high.
Whenever I go to a city, I pick two or three locations in the same general area that I’d also like to shoot. That way, if one location doesn't work out, I have backups. This will save you the stress of having to improvise on the spot, which is especially if the light is rapidly running out.

This photo was taken at The Beekman hotel in New York City. Moments after this shot was taken, I was asked to leave by the concierge because photography wasn’t allowed. Luckily, I’d already been there for a half hour and had gotten all the shot I wanted.
Tip #8: Don’t Be Afraid to Rotate
The eighth tip pertains to architectural abstracts. If you're shooting close-up details of a building, do not be afraid to rotate your camera or image. This can completely change up the composition, and if the shot is abstract enough, viewers won’t know the difference between up and down.
Think about how window panes, for example, might look upside down, sideways, or reflected. This trick alone can unlock countless new compositions.

This photo was taken in a shopping mall near the Mechanic’s Institute in San Francisco.
Tip #9: Bring Water for Reflections
The ninth tip is to bring a water bottle to create your own reflections. If you see a neat building at night, pour some water on the ground and get low. Now you have a puddle and a clean reflection on demand.
With that being said, shooting street and architectural photography in the rain is basically as good as it gets, so keep an eye on the forecast. The shiny, reflective nature of water makes everything look just a little bit better.
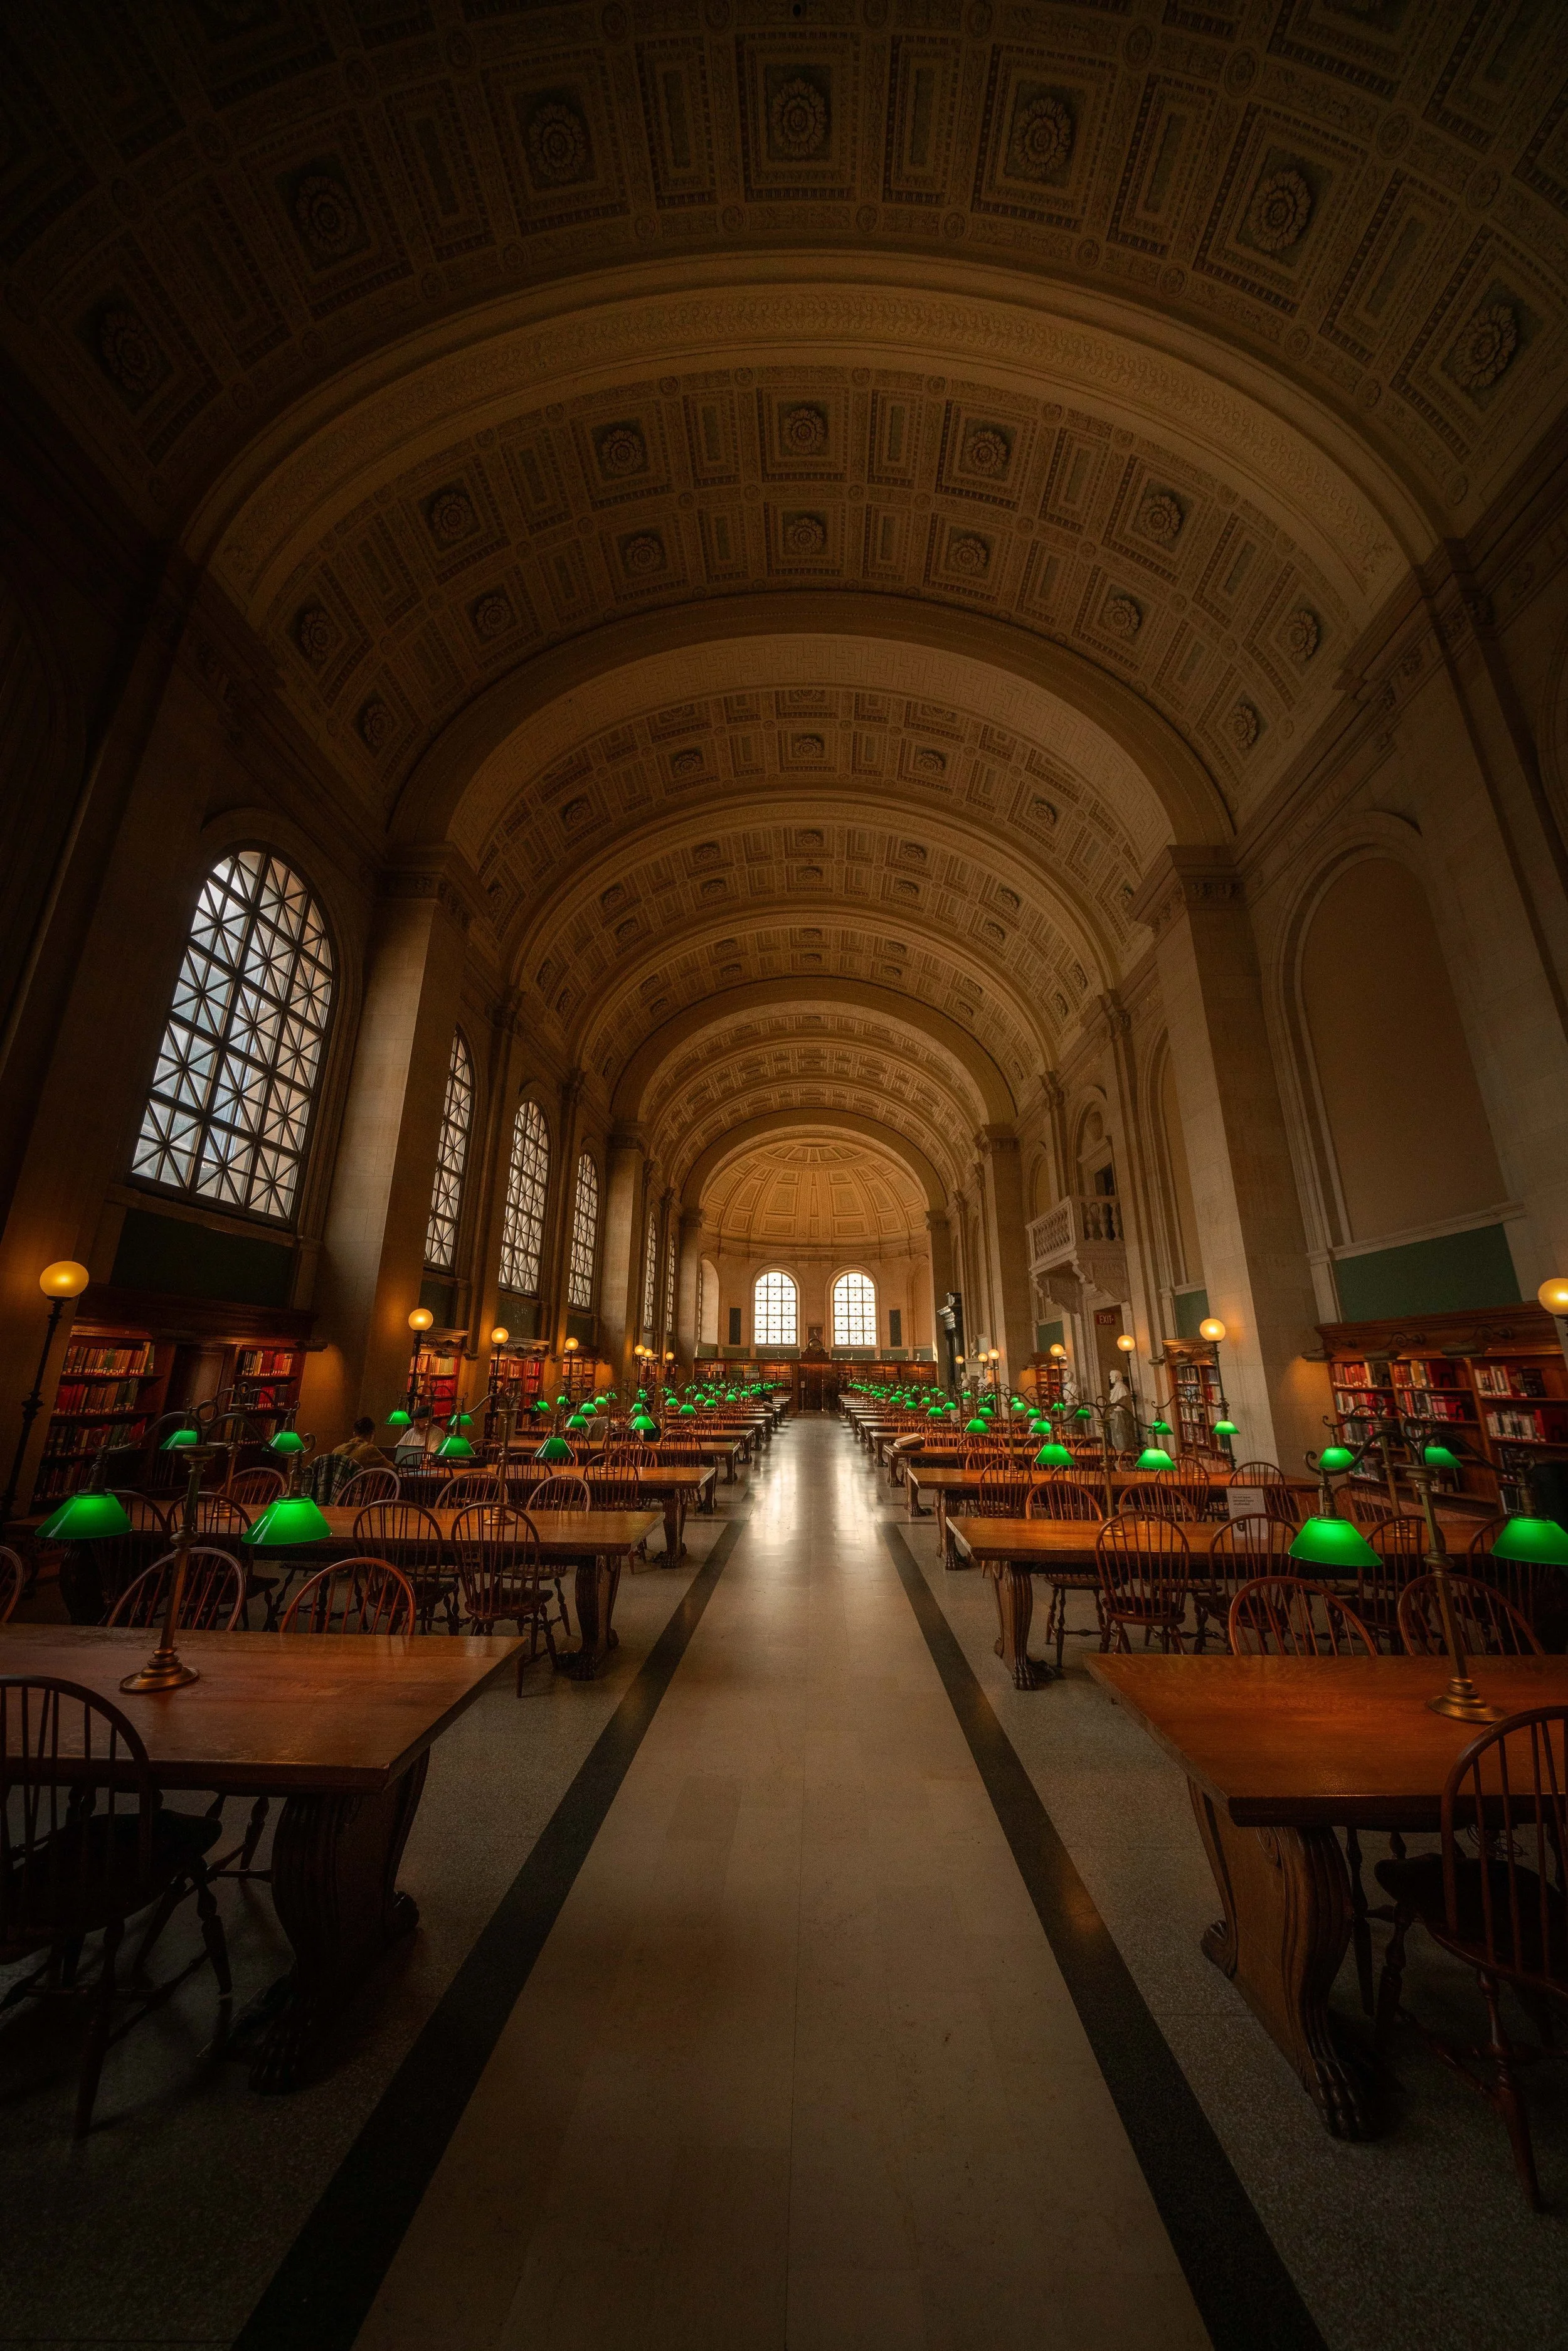
This photo was taken at the Boston Public Library moments after opening, before the crowd could arrive to this popular hall.
Tip #10: Use a Tilt-Shift Lens
The tenth tip is to use a tilt-shift lens for architecture photography. Tilt-shift lenses alter the perspective of the camera, allowing you to remove distortion before you even take the shot.
By this I mean they can help keep lines straight to maintain a consistent perspective. However, they can be expensive and have a learning curve, so make sure you’re committed to architecture before buying one.
Another neat trick of tilt-shift lenses is that they can create a “miniature look”. If you shoot a city from above for example, you can make an entire city look like a tiny model. It’s hard to describe in words, but if you search for tilt-shift cityscape photos, you’ll see what I mean. It is a fascinating niche genre with a surprisingly large market.
Anyway! Those are my ten tips for urban photography. Let's go ahead and jump into the next tutorial, where I’m going to cover the ins and outs of Wildlife photography!