
How to Bring Your Seascape Photography To Life
Learn 10 tips to improve your seascape photography.
In this tutorial, I’m going to walk you through 10 tips to improve your seascape photography. By this, I mean oceans, beaches, sea stacks, and everything in between.
Let’s jump right in.
Tip #1: Use Timelapse Mode
My first tip is to use time-lapse mode for capturing waves. This prevents you from having to “time” the waves to get a shot. Say you see a big wave coming in, you try to click it real fast, but miss. Then another wave comes in, and you try to click it again. Another miss. Instead, just put your camera on time-lapse mode and sit back and relax.
What I like to do is find a composition, get my focus, and then set it to take one photo every second for about 60 seconds. As those waves come in and out, your camera is automatically taking photos throughout that entire 60-second session. After that, you can sit back and see which ones you actually like.
If you don’t like any of them, simply rinse and repeat. And if you find certain parts of different photos appealing, you can combine them in Photoshop. Maybe you like the front half of one image where the water is swirling, and the back half of another image where a wave is crashing over a rock. You can bring both into Photoshop and combine em’. That way, you get the best of both worlds.
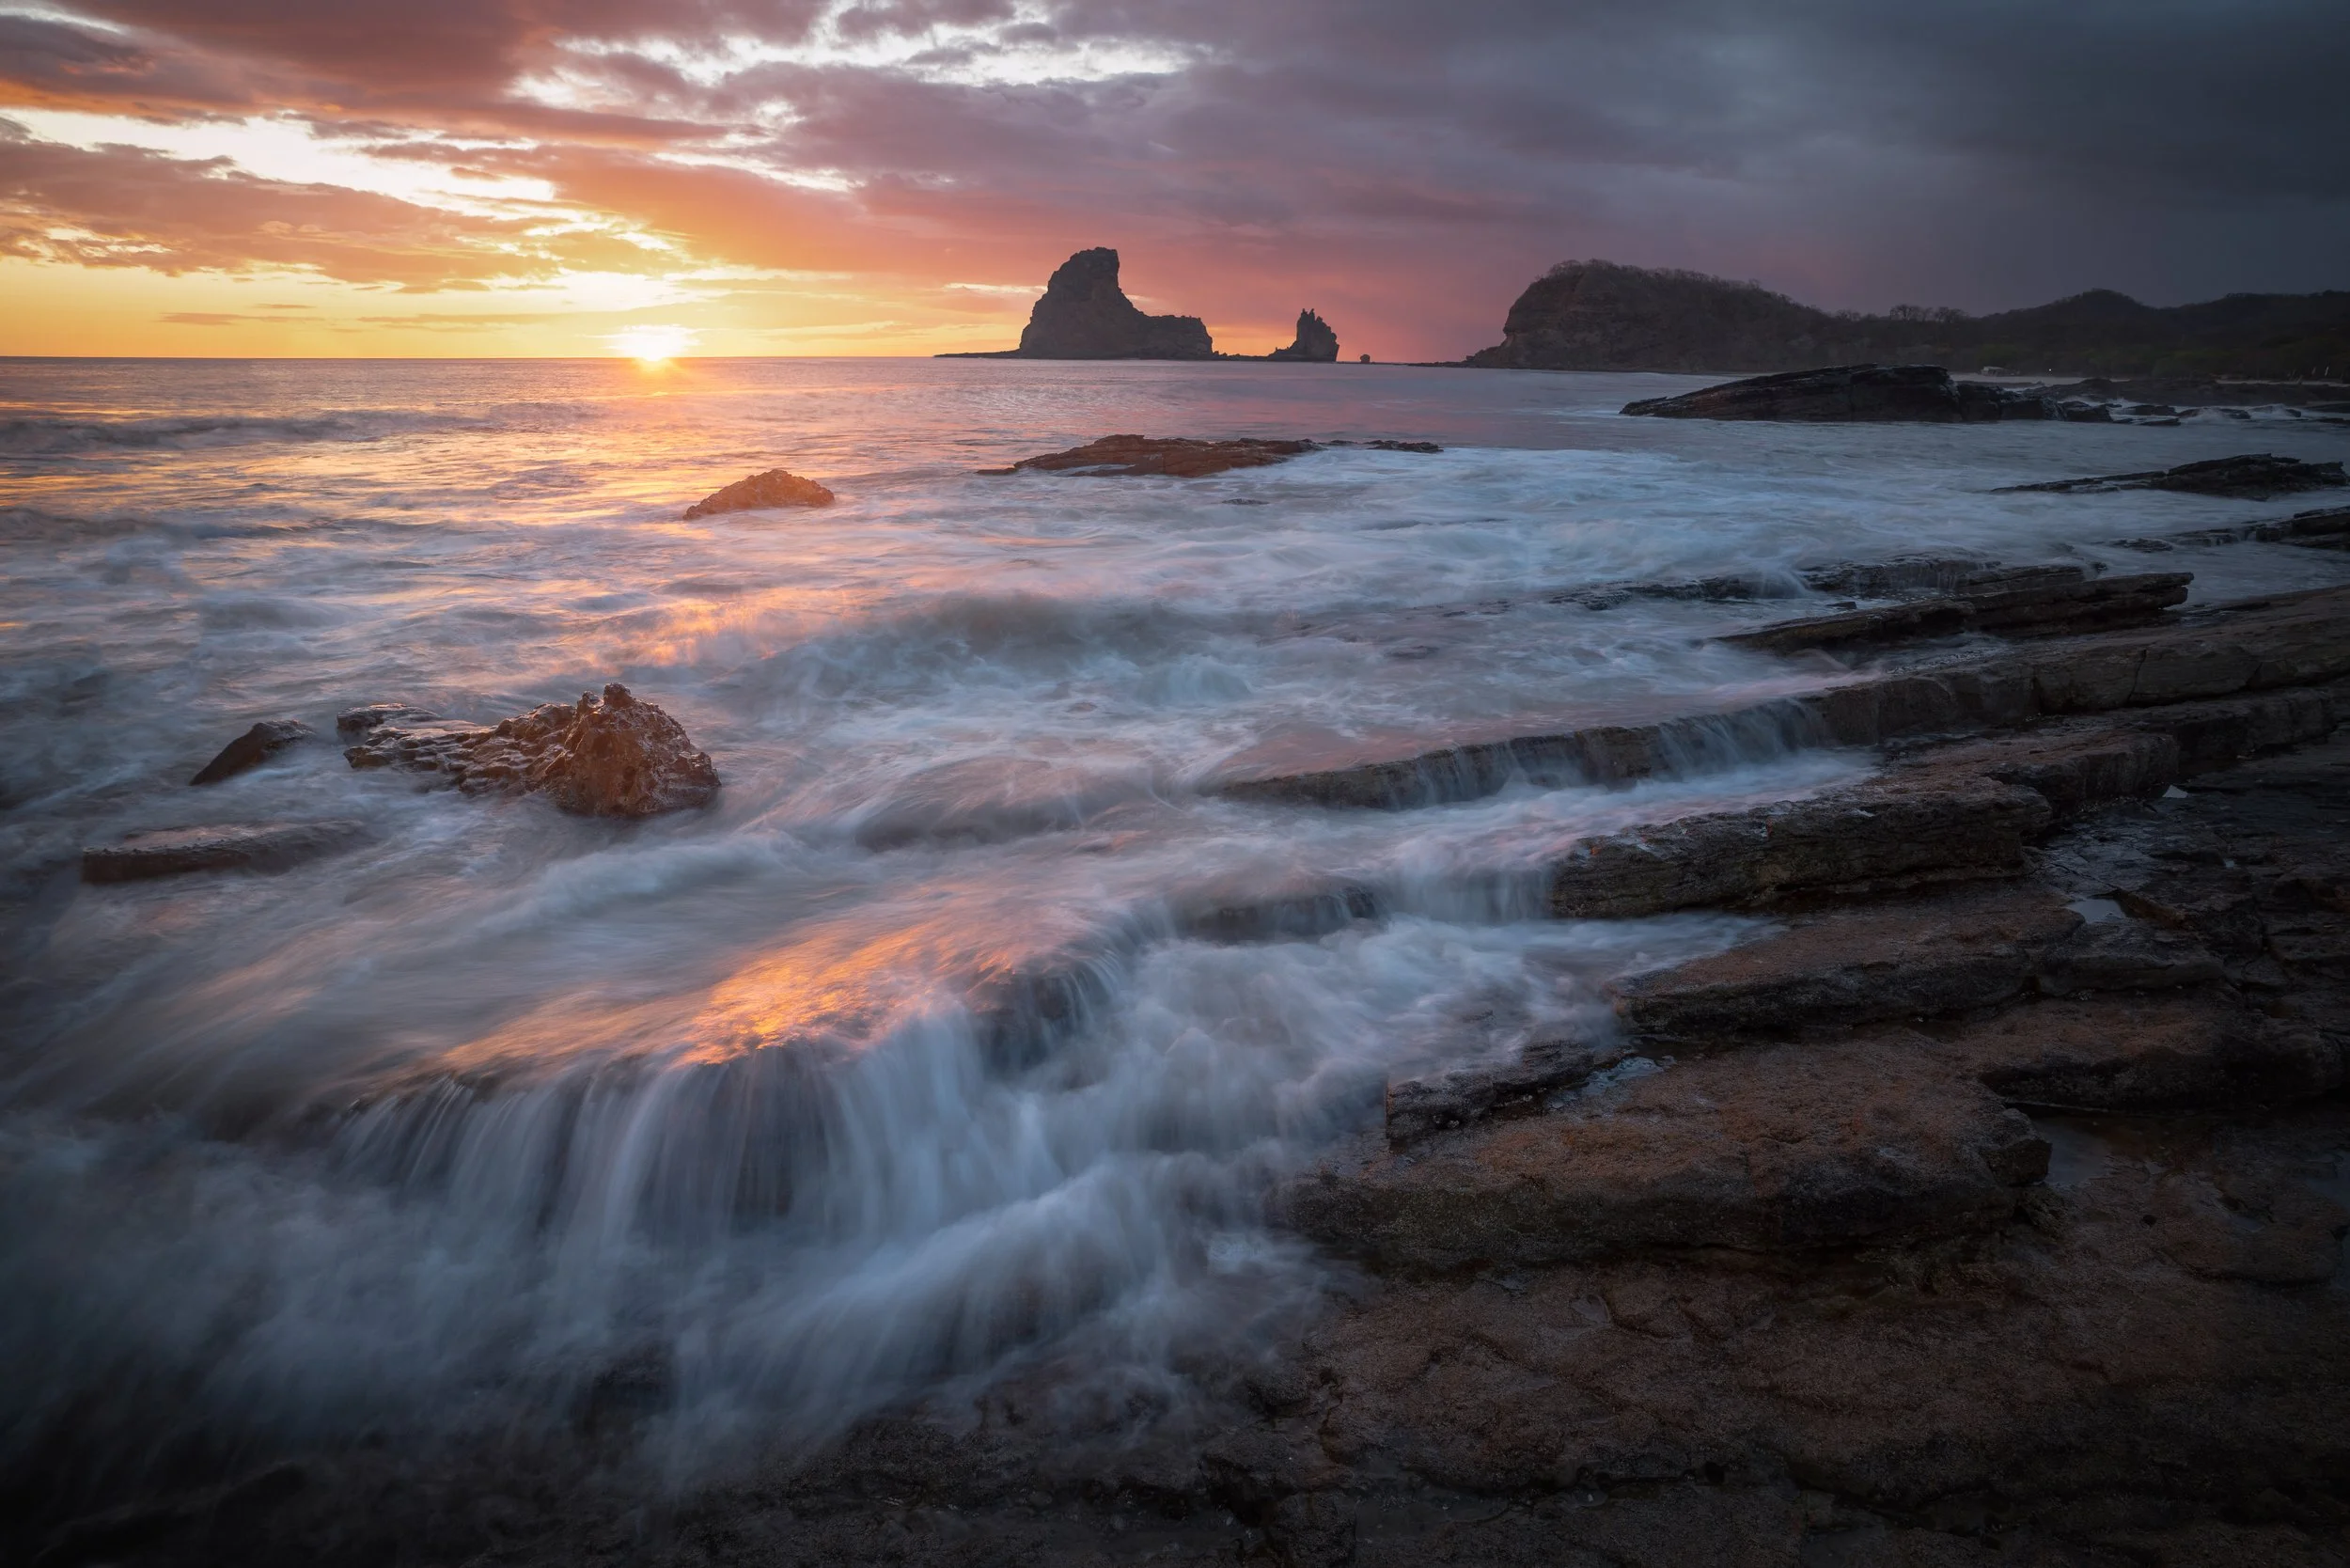
In order to capture this shot of the perfect wave going over the rock at Playa Maderas, I put my camera on timelapse mode until one finally hit.
Tip #2: Use Time Blends
The second tip I have is to use Time Blends. By this, I mean taking multiple photos of the same scene at different shutter speeds.
In the last tip, we talked about combining multiple water movements into one photo. Now, you can do that while adding shutter speed as a new variable.
For instance, in your foreground, you might want silky, smooth water from a one-second exposure. But in your background, you might want the mist spraying into the air from a crashing wave, with a pelican frozen in midair. You can take those two shots at different shutter speeds and mask them together in Photoshop.
Using time blends is one of the greatest hacks to gorgeous seascape photography.

This photo was taken at Funston Beach in California with a 25 second exposure. Notice how the water look dream-like and silky.
Tip #3: Try Different Shutter Speeds
My third tip is to experiment with various shutter speeds. Here’s a quick overview of what works best for different situations.
Anything above ten seconds will look abstract and surreal- the camera will almost “paint” the ocean, making it appear frozen like a lake. This is great when using elements like piers, logs, or rocks as subjects. You can even shoot these long exposures during midday light, convert them to black and white, and get a clean, minimal look with wooden piers or rocks in a white abyss.
If you shoot in the two to ten-second range, you’ll get more texture in the waves. This is great when you want to capture an exploding wave with jagged edges or movement in the water without freezing it completely.
Anything between two seconds and a half-second is ideal for most seascape photography. This gives you smooth, silky waves flowing through tide pools and around rocks. It’s a versatile range that adds character to your images without overdoing it.
Finally, once you get to 1/500 of a second or faster, you can freeze waves in midair. Use this when water is flying or crashing around you and you want every droplet to be frozen in time.

This photo was taken at 1/4s at Bass Harbor Head in Maine, which allowed me to get a variety of interesting textures in the water flow.
Tip #4: Use Tide Charts
The fourth tip is to keep an eye on tide charts to know when the tide is going to be in or out.
This can save you a lot of trouble. I’ve hiked out to many locations only to realize that the tide has risen on the way back. This has forced me to climb over wet rocks in less than ideal conditions just to get back. Always check tide charts beforehand, and keep your return route in mind.
You can easily find tide charts online by Googling “beach name” + “tide chart.” These timetables will tell you when the high and low tides occur, which is crucial not only for safety, but also for getting the shot you want.
For example, Thor’s Well, a famous sea cave in Oregon, only looks dramatic during high tide. The one time I went, I arrived during low tide and completely missed the intended effect.
You can also check swell charts, which estimate how big the waves will be on any given day. This helps you anticipate whether it will be a calm out or you’ll get dramatic, crashing waves. Surfers use swell charts all the time to find the best surf spots- but you can use them to find the best waves for photography.

This photo was taken at Cape Porpoise during low tide, when I was able to capture more texture and less water in the surrounding pool.
Tip #5: Don’t Be Afraid to Get Wet
The fifth tip is to not be afraid to get wet.
Whenever I go to the ocean, I always wear sandals and swim trunks, no matter what. Every time I haven’t, I always tell myself that I’m not going to get in the water, but I end up doing it anyway.
The more you shoot seascapes, the more you realize that many of the best compositions are among the rocks and tide pools, which requires stepping into the water or spray zones.

This photo of waves was taken at the Ghost Forest in Oregon, where I had to stand in constantly battering, freezing cold water in order to get this highly dynamic shot.
Tip #6: Go During Winter
The sixth tip is to go in the winter for the most dramatic storm conditions.
If you’ve ever seen photos of massive waves hitting cliffs with wild skies, those were probably taken in winter. That’s because that’s when all the behemoth beach storms roll in and the ocean looks most powerful.
The best part about winter is that there won’t be many people around, since most beachgoers prefer the warm. But as a photographer, you want drama- so winter is your season.
Tip #7: Look for the Water Apex
The seventh tip is to look for the water apex when shooting at high shutter speeds.
If water is flying through the air, wait until it reaches the very top of its motion, right before it starts to fall. That’s the apex. At that exact moment, the water looks frozen, calm, and balanced, with no motion blur.
This applies to blowholes, geysers, and waves, especially right at the crest right before the wave breaks. That’s the perfect moment to capture.

This photo was taken a Pfieffer Beach in California when a wave was misting at it’s apex.
Tip #8: Use Tide Pools For Macros
The eighth tip is to use tide pools for macro and abstract shots.
Out of all the environments for macro photography, tide pools are one of the best. You’ll find vibrant colors, tiny crabs, seashells, moss, and intricate rock formations. The mix of water and earth creates unique textures and patterns.
Even if your seascape destination isn’t as epic as you expected, tide pools can always give you great material to work with if you look closely enough.

This macro of a tide pool was taken at Bean Hallow in Southern California.
Tip #9: Watch Out for Sneaker Waves
The ninth tip is to watch out for sneaker waves.
Sneaker waves are large, unexpected waves that appear suddenly and have the potential to ruin your day. Oftentimes they come from far off cargo ships, or a plethora of strange weather conditions. If your tripod is set up near the shore, always keep an eye on the horizon. I wouldn’t recommend ever leaving your camera unattended near the ocean.
I like to always keep a hand near the tripod so I can grab it if a wave hits, even if I’m sitting back in time-lapse mode.
There’s nothing worse than a wave knocking over your gear, drenching you, or ruining your camera. Saltwater is terrible for electronics because it’ll erode long past being wet.

This photo was taken at Thor’s Well, where sneaker waves were coming in and out every couple seconds. You had to be completely aware of your environment at all times.
Tip #10: Wash Your Gear After
On that note, my tenth and final tip is to wash your gear.
If your camera or lens gets any seawater (or even mist) on it, wipe it down with a slightly damp cloth once you’re done, then dry it. Saltwater can corrode the metal and electronics fairly quickly, which eventually ruins the gear.
This applies to tripods too- if it gets splashed, rinse it off with freshwater once you’re done. Else you’ll be dealing with a hard-to-close tripod for years. I like to use a hose, water bottle, or even a gallon jug from the car. If it does end up getting stuck, a sly layer of WD-40 or similar oil can help get it functioning again.
Alright! Those are my 10 tips for seascape photography. Let’s go ahead and jump into the next tutorial, where I’m going to cover the nuances of Urban photography.