
10 Amazing Mountain Photography Trips
Learn 10 tips to improve your mountain photography.
Prefer to watch this tutorial in video format? 😏
In this tutorial, I’m going to walk you through ten tips to improve your mountain photography. Most of these tips are going to be specifically related to mountaineering techniques, so buckle up!
Tip #1: Know the Class System
My first tip is to know the class system for mountains. Every trail you’ll ever encounter on a mountain is divided into one of five categories:
Class One is the most basic type of trail. It’s essentially a dirt pathway with little to no obstacles. Most of the time, you can take bikes down class one trails without any problem.
Class Two trails are going to be a bit more technical. There may be a few boulders you have to step up, and you might have to use your hands in order to pull yourself up a small ledge. It’s very basic stuff, nothing advanced or life-threatening. However you must be prepared to exert yourself a bit more than walking.
Class Three is where things start to get a bit intense. In this category, you’ll face many of the same obstacles as class two, except now there’s going to be exposure involved. This means the dynamic of height is now involved, and you must be prepared to hike along trails along cliff-sides. The moves are also slightly more advanced than Class Two.
Class Four takes this to the next level. Class Four hikes involve fairly basic climbing moves, with intense exposure, and no rope. It’s as close as you can get to rope climbing without actually needing one. There will be small ledges to walk across, boulders to pull yourself up, and 20 to 30-foot sections of narrow rock along cliffsides. Basic rock climbing skills are highly recommended for these hikes.
Class Five is essentially technical rock climbing, and it’s the reason routes are labeled 5.9, 5.10, 5.11a, etc... You’re going to need climbing shoes, chalk, ropes, a harness, and all the gear that comes with it.
Now with these five classes in mind, you can better understand what type of trail you’re getting into before you go on a hike.

This photo of Myrtle Falls was taken at Mt. Rainier National Park in Washington.
Tip #2: Maintain Three Points of Contact
My second tip for mountain hiking is to maintain three points of contact on vertical trails at all times. This means that in any sketchier part of the trail, you should have three points touching the surface at all times. That could mean two feet and one hand, or two hands and one foot.
This is especially important if you’re carrying a camera with you. You’ll want to find a way to mount your camera on yourself, put it in your backpack, or have a friend carry it while you navigate trickier sections.
Worst-case scenario, you can always go down on your butt. There are countless times when I’ve been on very steep dirt sections and I’ve had to scoot down on my butt to make it down.

This photo was taken at Volcan Santiaguitio in Guatemala.
Tip #3: Start Early
Tip number three is to start early. The goal of most day-trip mountain ascents is to be at the peak by noon. This is because storms tend to roll in in the afternoon, and if one comes in while you’re at the top, you’re out of luck.
Imagine being at high elevation, with lightning, holding a giant metal tripod. If you’re above the treeline, this can be even more dangerous because there’s no cover.
I usually like to start hiking at the crack of dawn, depending on where I’m at. Usually this means camping at the base or lodging nearby for the night.

This photo of an Alpine Vista was taken near San Diego, California.
Tip #4: Dress Accordingly
My fourth tip is to dress correctly for mountaineering. A lot of mountains require more gear than people realize. You’ll want light, technical cargo pants- ideally the kind that can unzip around the knees if it gets hot, and a warm, lightweight jacket that you can store in your backpack.
Starting early usually means a cold start, especially at higher elevations. And as the day goes on, it can get progressively hotter, meaning you’ll want gear that you can wear comfortably early on and remove as the day warms up.
Personally, I bring a puffy jacket and an ultralight raincoat that folds up if there’s any chance of rain. For some trails I also bring climbing gloves too, because oftentimes it can be windy and cold near the peak, especially on more technical mountains where you’re grabbing chilly rocks.
Depending on the trail, you also might want to consider a helmet. I’d recommend this for Class Three and Four trails- especially if you’re in a region where rocks break easily.
Hikers that are above you can accidentally dislodge rocks, and since the terrain is so steep, even small pebbles can be extremely dangerous.
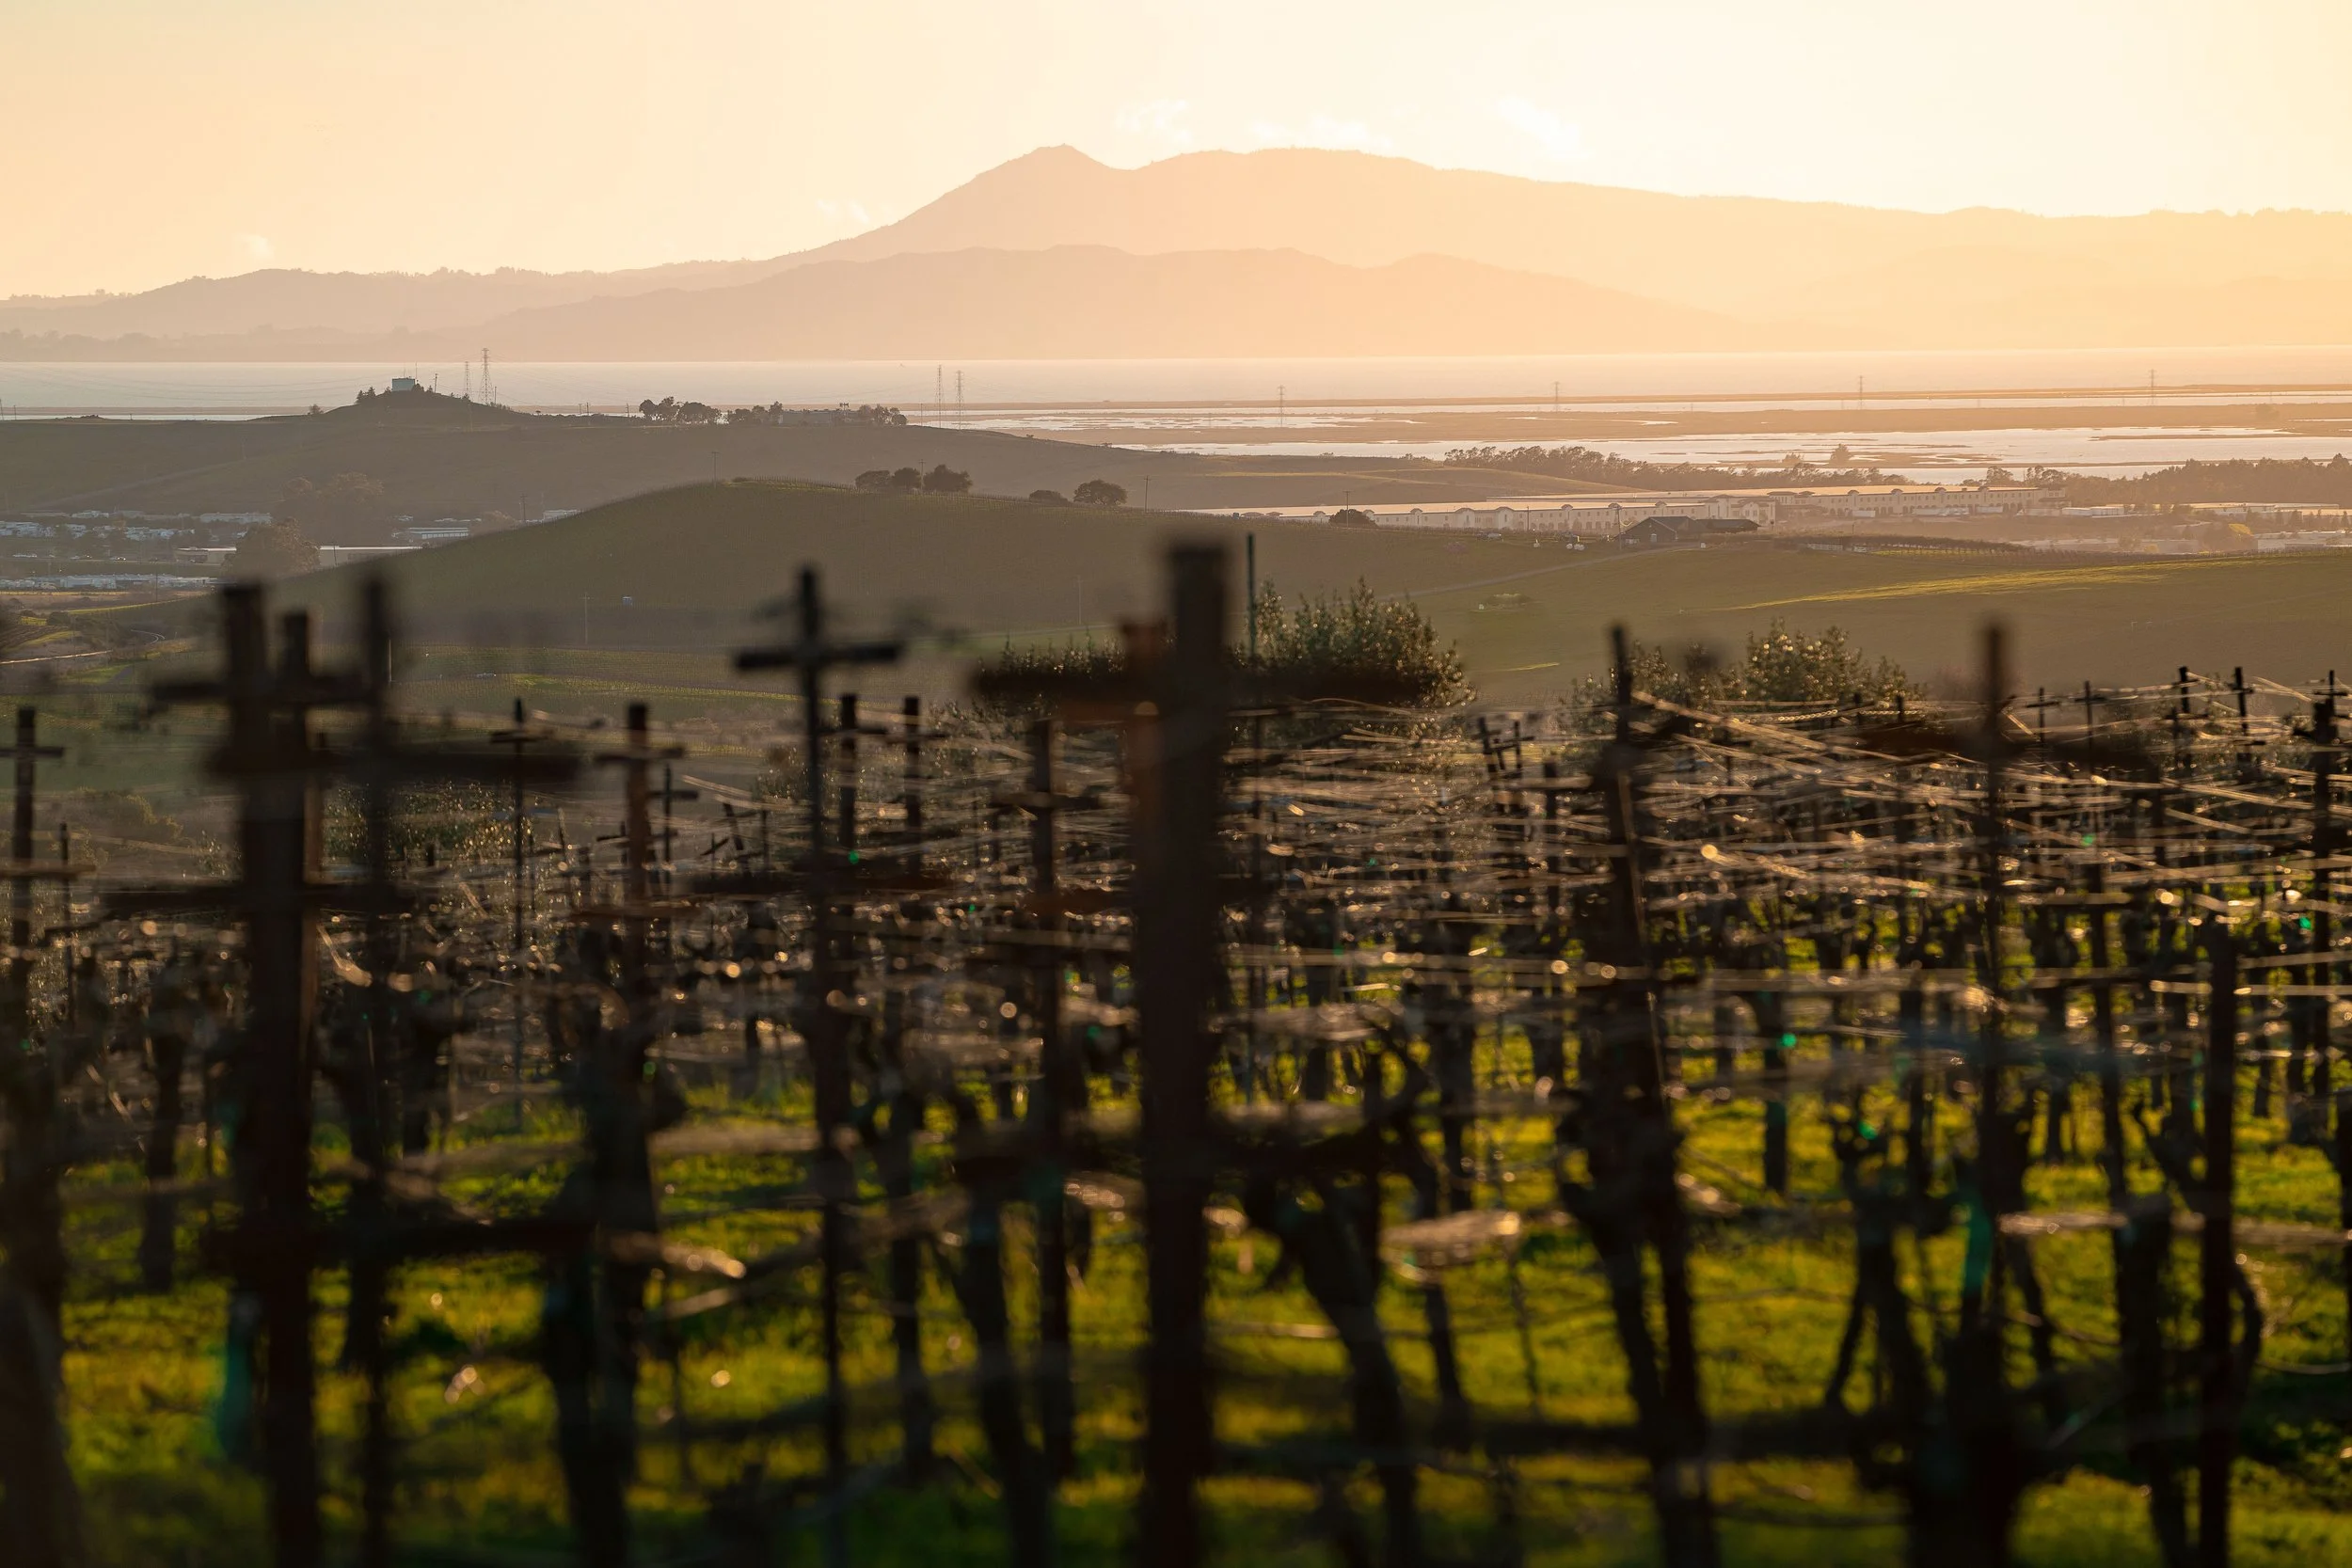
This photo of Mt. Tamalpais was taken from Canyon Hills Ranch in Napa Valley, California.
Tip #5: Shoot from Below
My fifth tip is to shoot mountains from below for maximum effect. Although we’ve been talking about hiking to the top of these mountains the entire tutorial, a lot of times the best photo is actually from the bottom.
It’s not until you’re at the top that you realize you’re standing on the best view. But that’s not to say there’s no photos on the top.
From above, I recommend bringing a telephoto lens that you can use to get zoomed in shots of the surrounding landscape. Also, if you plan to shoot from the top, make sure you’re there at sunrise. That usually means starting your hike around 2 or 3 a.m. with a headlamp.
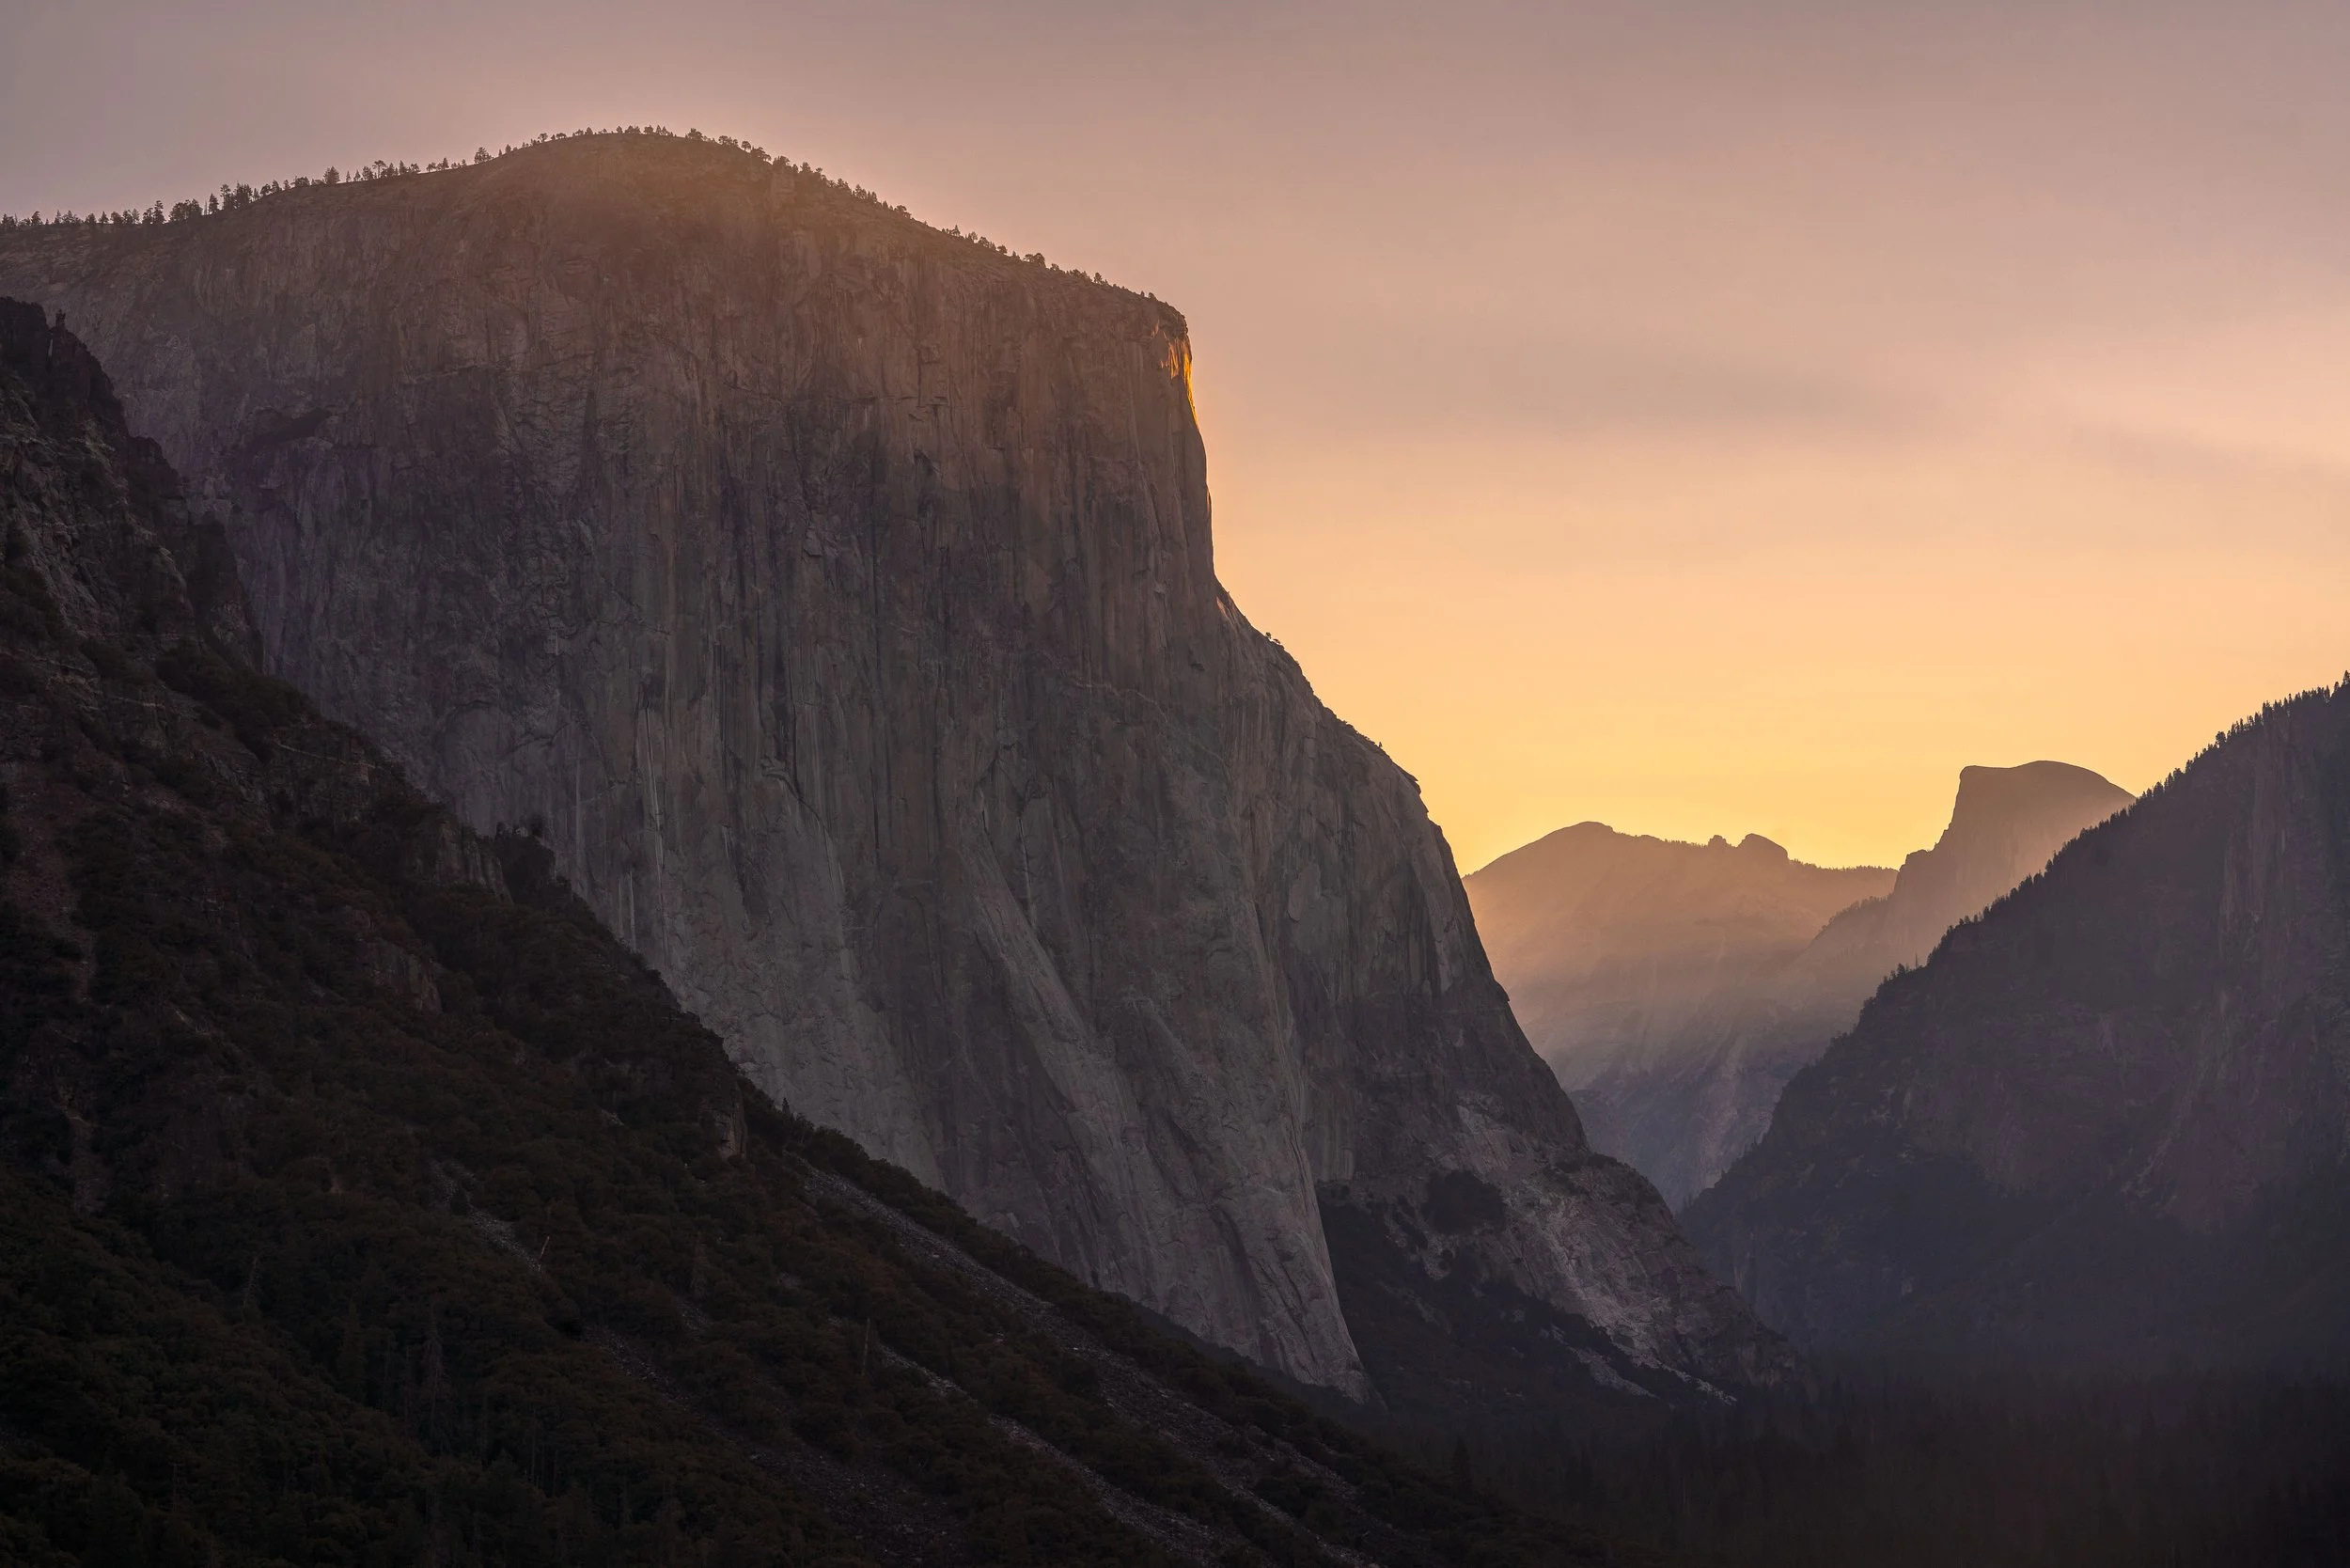
This shot of El Capitan was taken from the Tunnel View at sunrise in Yosemite National Park.
Tip #6: Bring Minimal Photo Gear
My sixth tip is about how much gear to bring to the top of the mountain. My general rule of thumb is that for any hike longer than five miles- which includes most mountain hikes- I bring no more than one camera and one lens. Carrying too much gear for long distances can slow you down significantly, especially if you’re also carrying food, water, snacks, and extra clothing.
I like to pick my most versatile lens, which is usually my 24–70mm. A telephoto lens isn’t a bad idea either if you’re planning on shooting from above.
Now, there are two main ways to carry your camera up that mountain. You can either use a camera clip that attaches it to your backpack strap, allowing you to keep your hands free, or you can carry it on your tripod like a walking stick. The cool thing about the tripod method is that you can use it to balance on the more sketchy sections.
There’s actually research showing that using walking sticks while hiking can save you energy because it engages your upper body and spreads out the effort!

This photo of The Windows with a mountain backdrop was taken in Arches National Park in Utah.
Tip #7: Avoid Altitude Sickness
My seventh tip is to make sure you acclimate to the altitude before hiking. I like to arrive at the base camp altitude usually a few days before the hike, just to ensure my body is properly adjusted.
Depending on the height of the mountain, anything above 13,000 feet can start to affect most people. It feels a bit like having a light buzz from a drink- your cognitive ability slows, and you need to be more careful on dangerous sections.
It also helps to drink plenty of water, and bring small oxygen canisters for the higher elevations. If you do start feeling dizzy, faint, or your heart is pounding, it’s most likely altitude sickness.
The best part about altitude sickness is that if it gets bad, the cure is simply to go down.
Tip #8: Be Patient
My eighth tip is to be patient with the mountains. If your buddy starts getting altitude sickness, or if a storm rolls in near the summit, it’s time to turn back. Even if you’re close to the top, it’s not worth the risk.
Hikers have coined the term “summit fever” for hikers who ignore danger because they’re so close to the top. But the mountains will always be there, you just gotta wait for your moment.
However, patience also applies to weather and clouds. Some peaks, like Mount Rainier, are notorious for having clouds cover their peaks. You might have traveled long and far just to have a hidden peak.
Sometimes waiting it out is your only option.
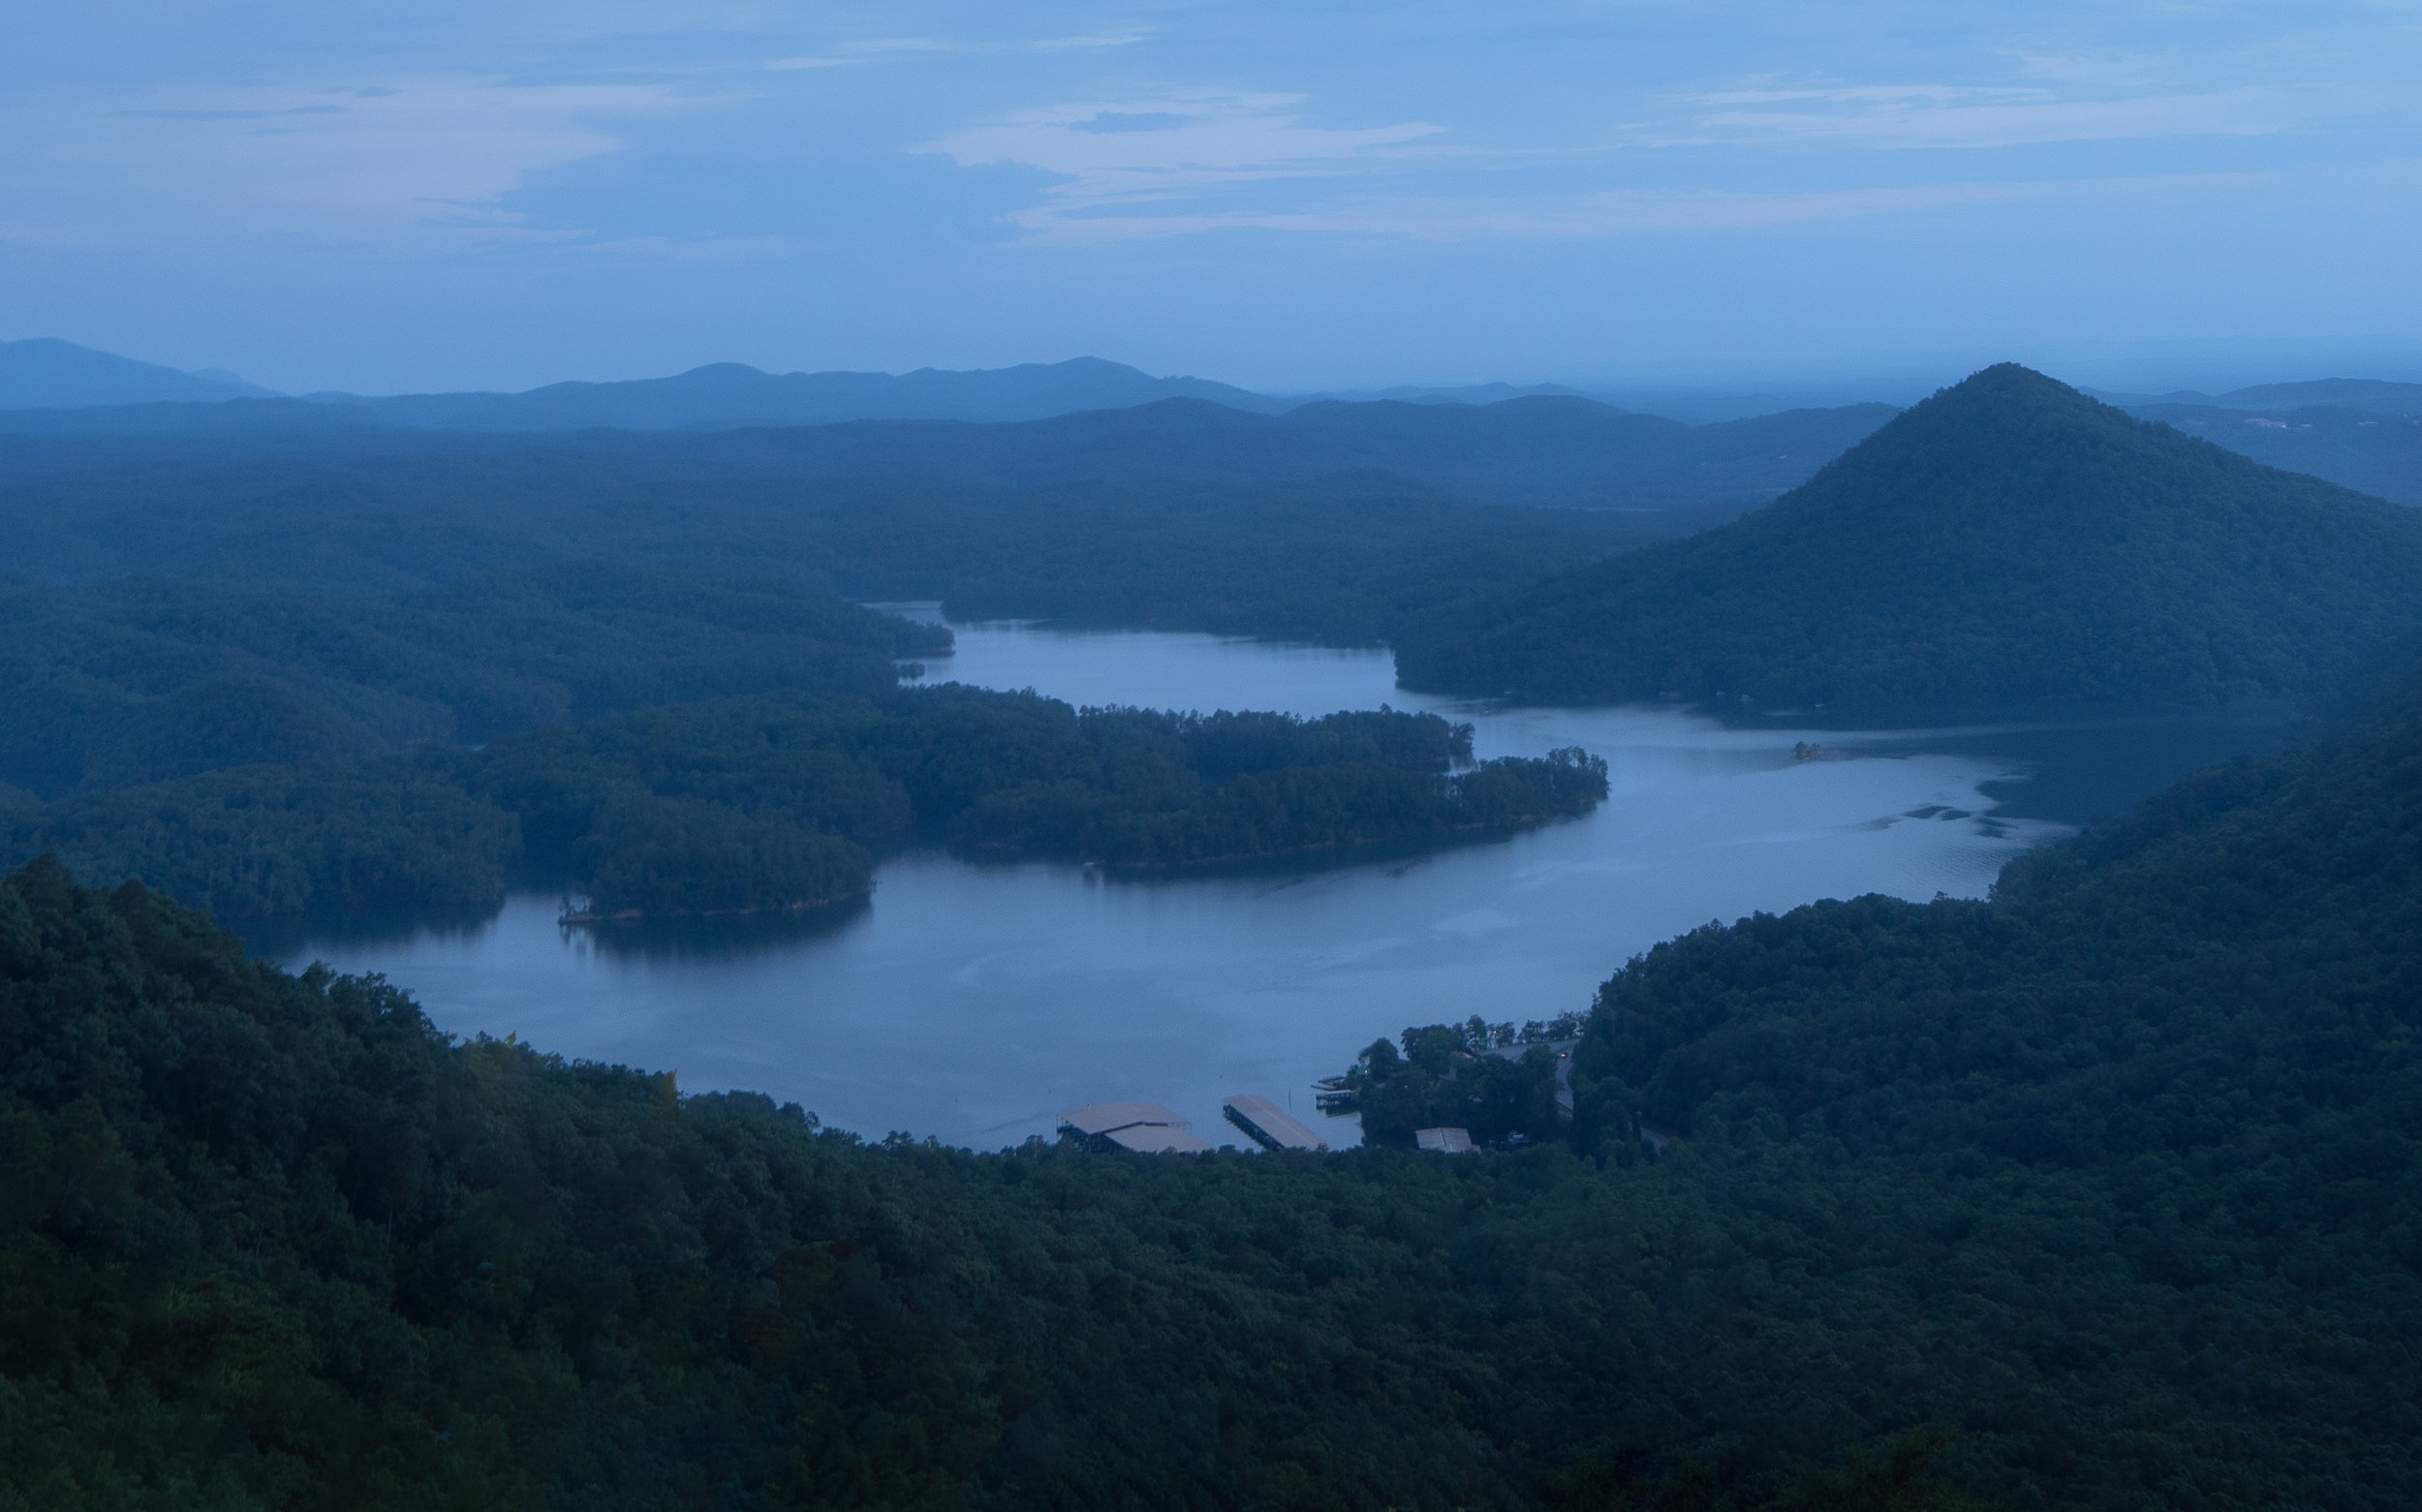
This photo of Sugarloaf Mountain was taken from a roadway in Tennessee.
Tip #9: Print Directions
Tip number nine is to print directions if you’re hiking intense or unfamiliar trails. While it’s smart to download maps to your phone, phones can break, die, or have unexpected problems. Printing physical directions, especially for Class Three and Four hikes, is a smart idea.
For less popular mountains, route finding can be tricky. Printed guides often include photos showing key turns or landmarks, which can help you avoid getting lost or stranded on a cliff.
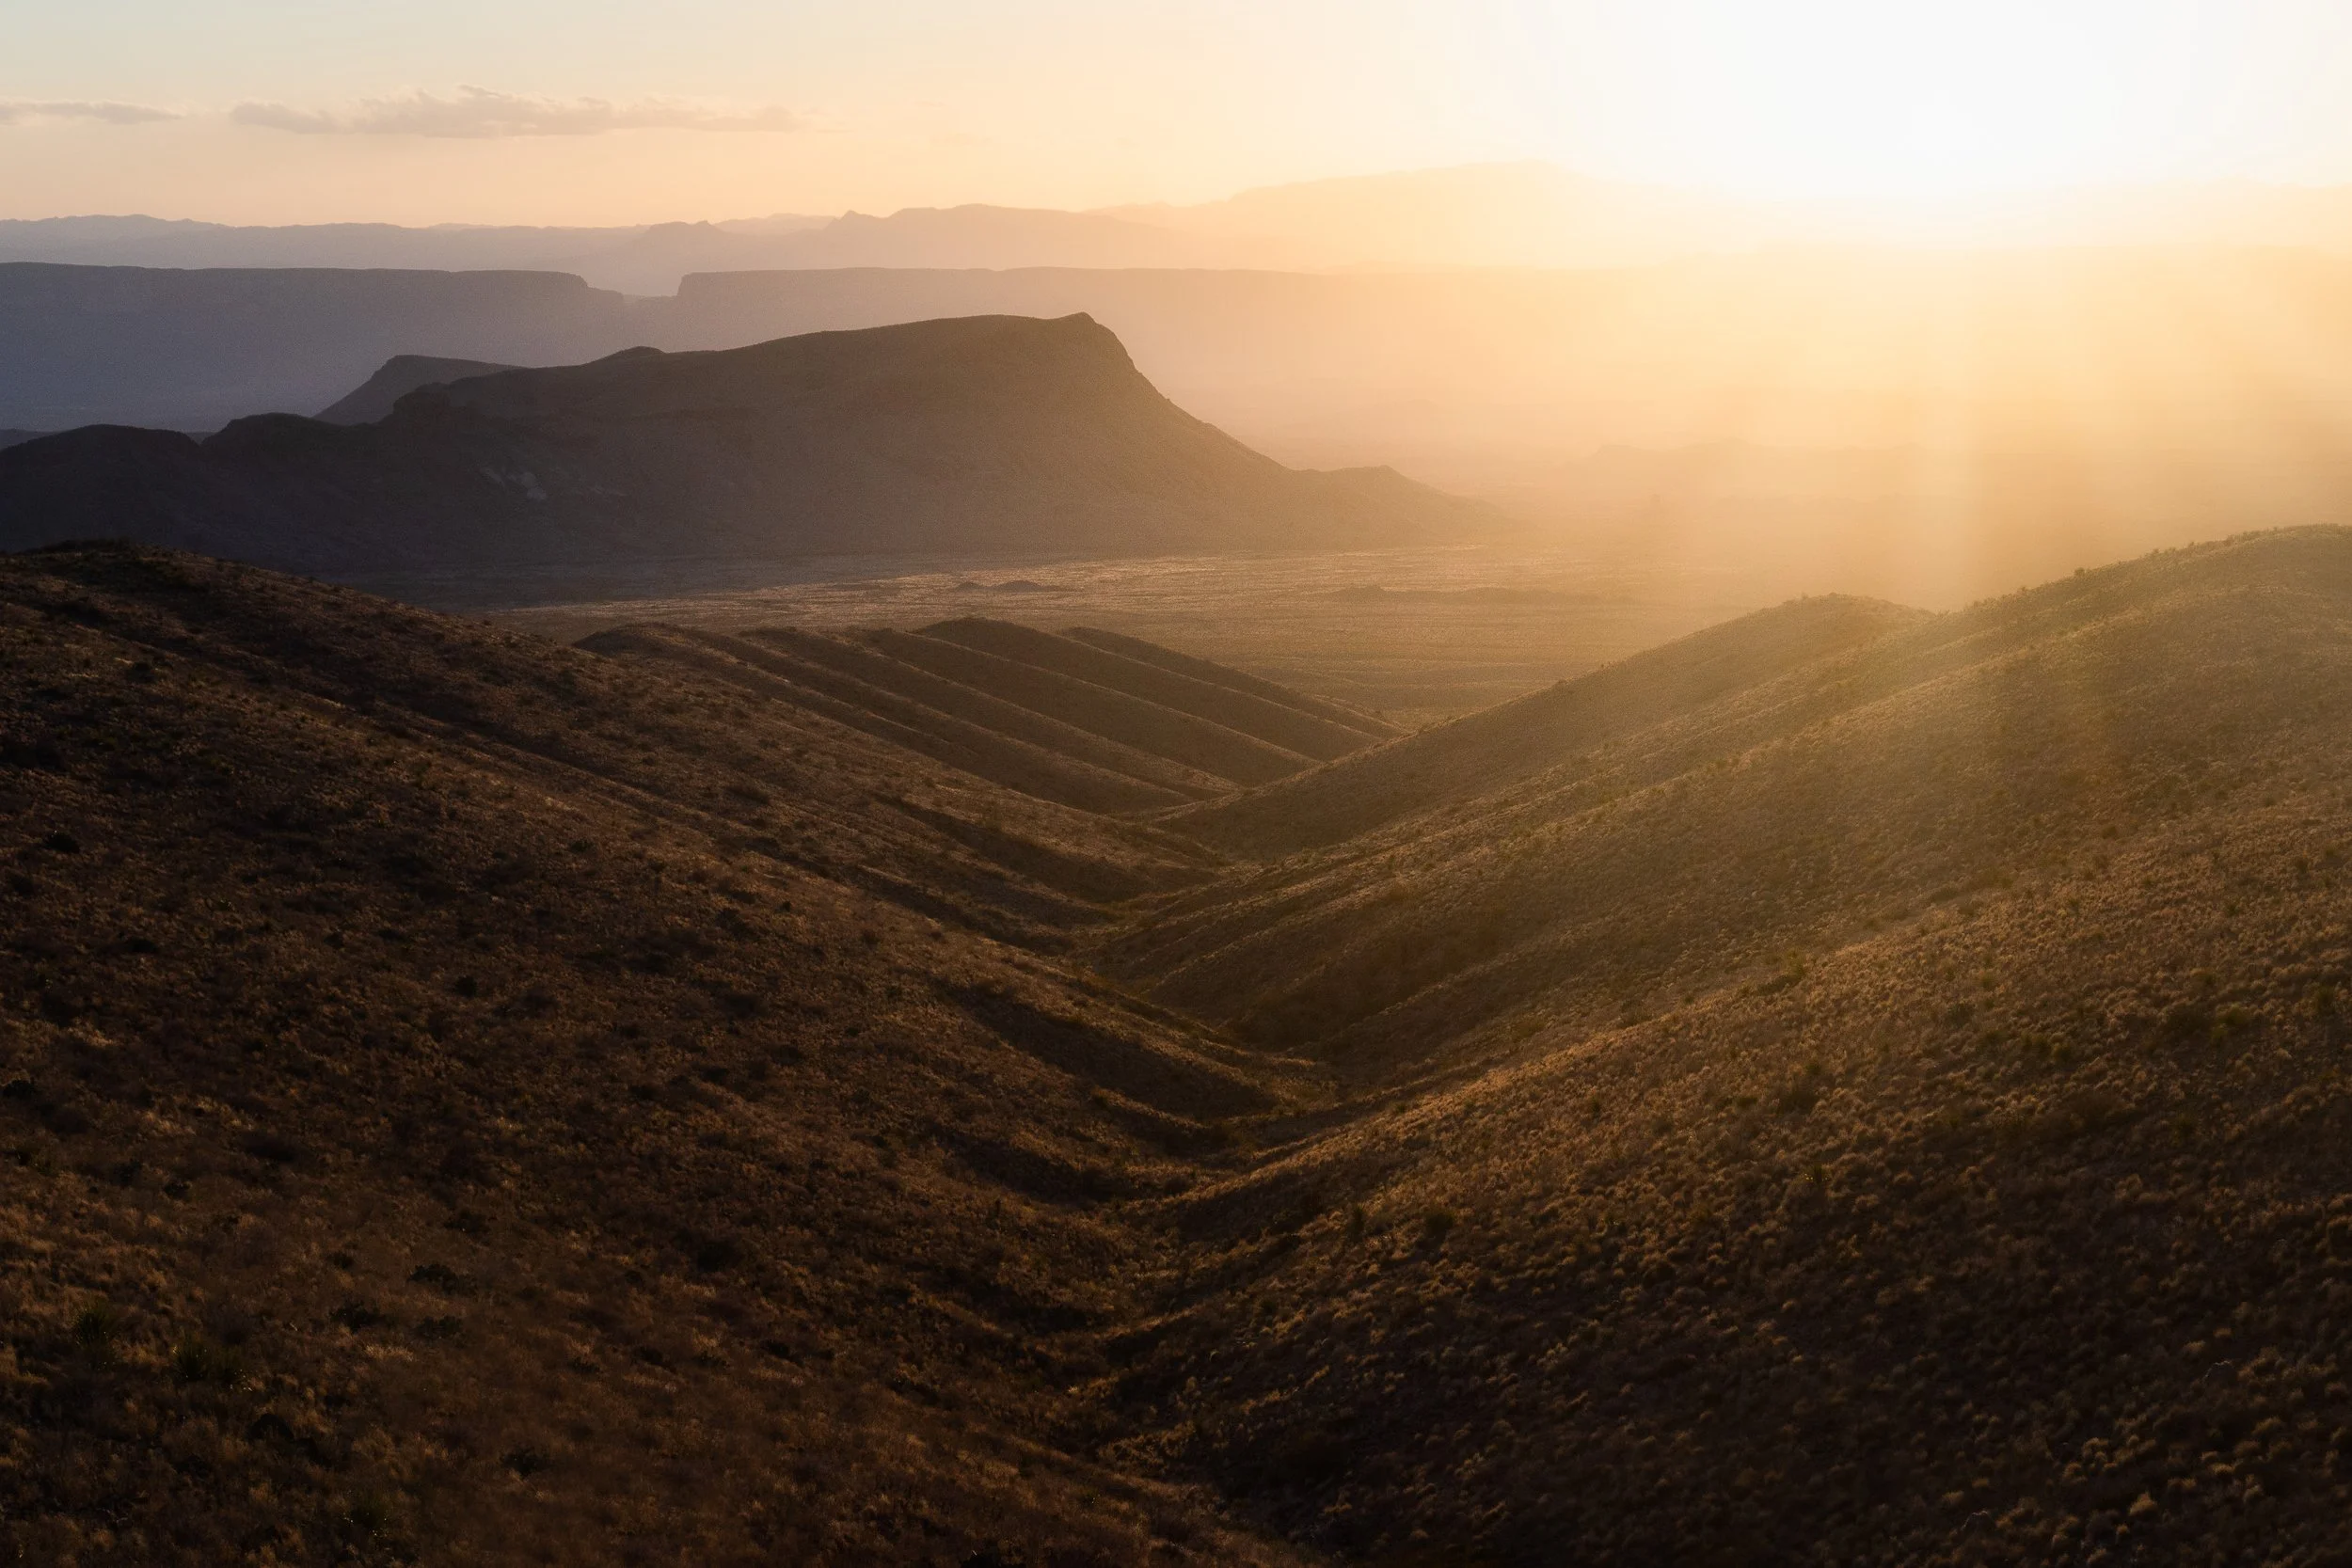
This photo of Sotol Vista was taken at Big Bend National Park in Texas.
Tip #10: Fuel Properly
My tenth and final tip is to fuel properly. Bring at least a couple of liters for a long hike, and more if it’s hot out. Hydration packs are great for this since you can sip while walking.
Bring snacks too. I usually pack a lunch and a drink for the top. My friends and I often enjoy a beer at the summit, as it makes the long hike down feel easier. If you don’t drink, consider bringing an electrolyte or sugary drink to boost your energy for the way back.
For me, the best part about mountain hikes is the meal afterward. After a 10-mile hike with thousands of feet of elevation gain, getting back to the bottom and inhaling a giant burger and fries is one of the best feelings in the world. Especially if you know you got a good photo. ;)
Alright! Those are my 10 tips for mountaineering and mountain photography. If you ever get a chance to visit Colorado and explore some of the 14ers I grew up around, I couldn’t recommend it enough!
Let’s go ahead and hop into the next tutorial, where I’m going to cover Rural photography.