
The Secret to 3D Looking Photos (That Most Photographers Miss)
Learn about the third Element of Design- Form. I’ll cover what form is, and seven ways to cultivate it in your photography.
Prefer to watch this tutorial in video format? 😏
What is Form?
In this tutorial, I'm going to walk through the third Element of Design, which is form. Form is similar to shapes, except now we're adding a third dimension to them- depth. Essentially, this means we’re looking for ways to make our shots look 3D.
As I was discussing in the Composition tutorial, stacking multiple Elements of Design can supercharge your shots to the next level. By combining form with something like shapes, we can start to get an image that’s less flat and closer to reality.
Therefore, I'm going to walk you through seven different ways to find form in your scenes, and how you create it on your own in the editing room.
Let’s dive in!

This photo of the Kuaffman Center in Missouri is a great example of form because of how the side lighting creates dimension in the building.
Seven Ways to Add Form to Photography
1. Use the Full Spectrum of Luminosity
The first way to find form in a shot is to look for images that have the full spectrum of luminosity. By this, I mean they contain highlights, mid-tones, and shadows. (Another word for luminosity is brightness, by the way!)
Let me show you an example. Check out this shot right here:

This photo, featuring strong form, was taken at Factory Butte in Utah.
As you can see, there are triangular shapes in all of those rocks. Since they have a strong variance in light and darkness, they have form to them.
One half is lit up with a nice orange glow, and the other half is in shadow. This full spectrum of luminosity, is allowing those triangles to look more 3D. This is what adds dimension to the shot and makes it feel more realistic.
Another example is this shot taken at a waterfall in Oregon:

This photo, featuring dodging and burning, was taken at Sahalie + Koosah Falls in Oregon.
If you look closely at the logs in the shot, you’ll see that one side has a brighter highlight and the other side is shadowed. By including that full tonal range, we’re effectively bringing out the form.
There are also ways to emphasize form in post-production. Shooting in soft light from an angle is a great start, but you can also enhance it with a technique called Dodging and Burning. I’ll walk you through how to do that in the editing section of this course.
2. Shoot During Golden Hour or with Side Light
A second way to add form to your shots is to shoot during golden hour or use side lighting. When light comes in from the side, it does a much better job of adding dimension which makes scenes more visually pleasing.
Midday light, on the other hand, comes from straight overhead, which leads to flat looking images that tend to be blown out. Golden hour is great because the side light helps emphasize the difference between highlights and shadows.
Here’s an example. This shot was shot in the middle of the day, and it has minimal side-lighting. Most of the light is coming from above:

This “flat” photo was taken at Wissahikon Creek in Pennsylvania.
The result is a relatively flat photo that relies on Color to stand out. It’s not a bad shot per say, but it doesn’t have much form to it. Compare that to this shot, where a soft side light is coming in from the side, illuminating the house:

This image, taken at the Pink House in Massachusetts, is a great example of side-lighting.
Notice how the house seems to “pop” in the image, making it feel almost 3D. Combine that with the color theory, and the result is a more dimensional photograph.
3. Use Depth of Field
The third method for adding form is by using depth of field, which we talked about when discussing aperture in the Exposure tutorial.
Shooting at a lower f-stop, like f/1.8, f/2.8, or f/4, helps isolate your subject and blur the foreground or background. This creates depth and helps the viewer understand what’s in the front, middle, and back of the image.
For example, check out this shot:
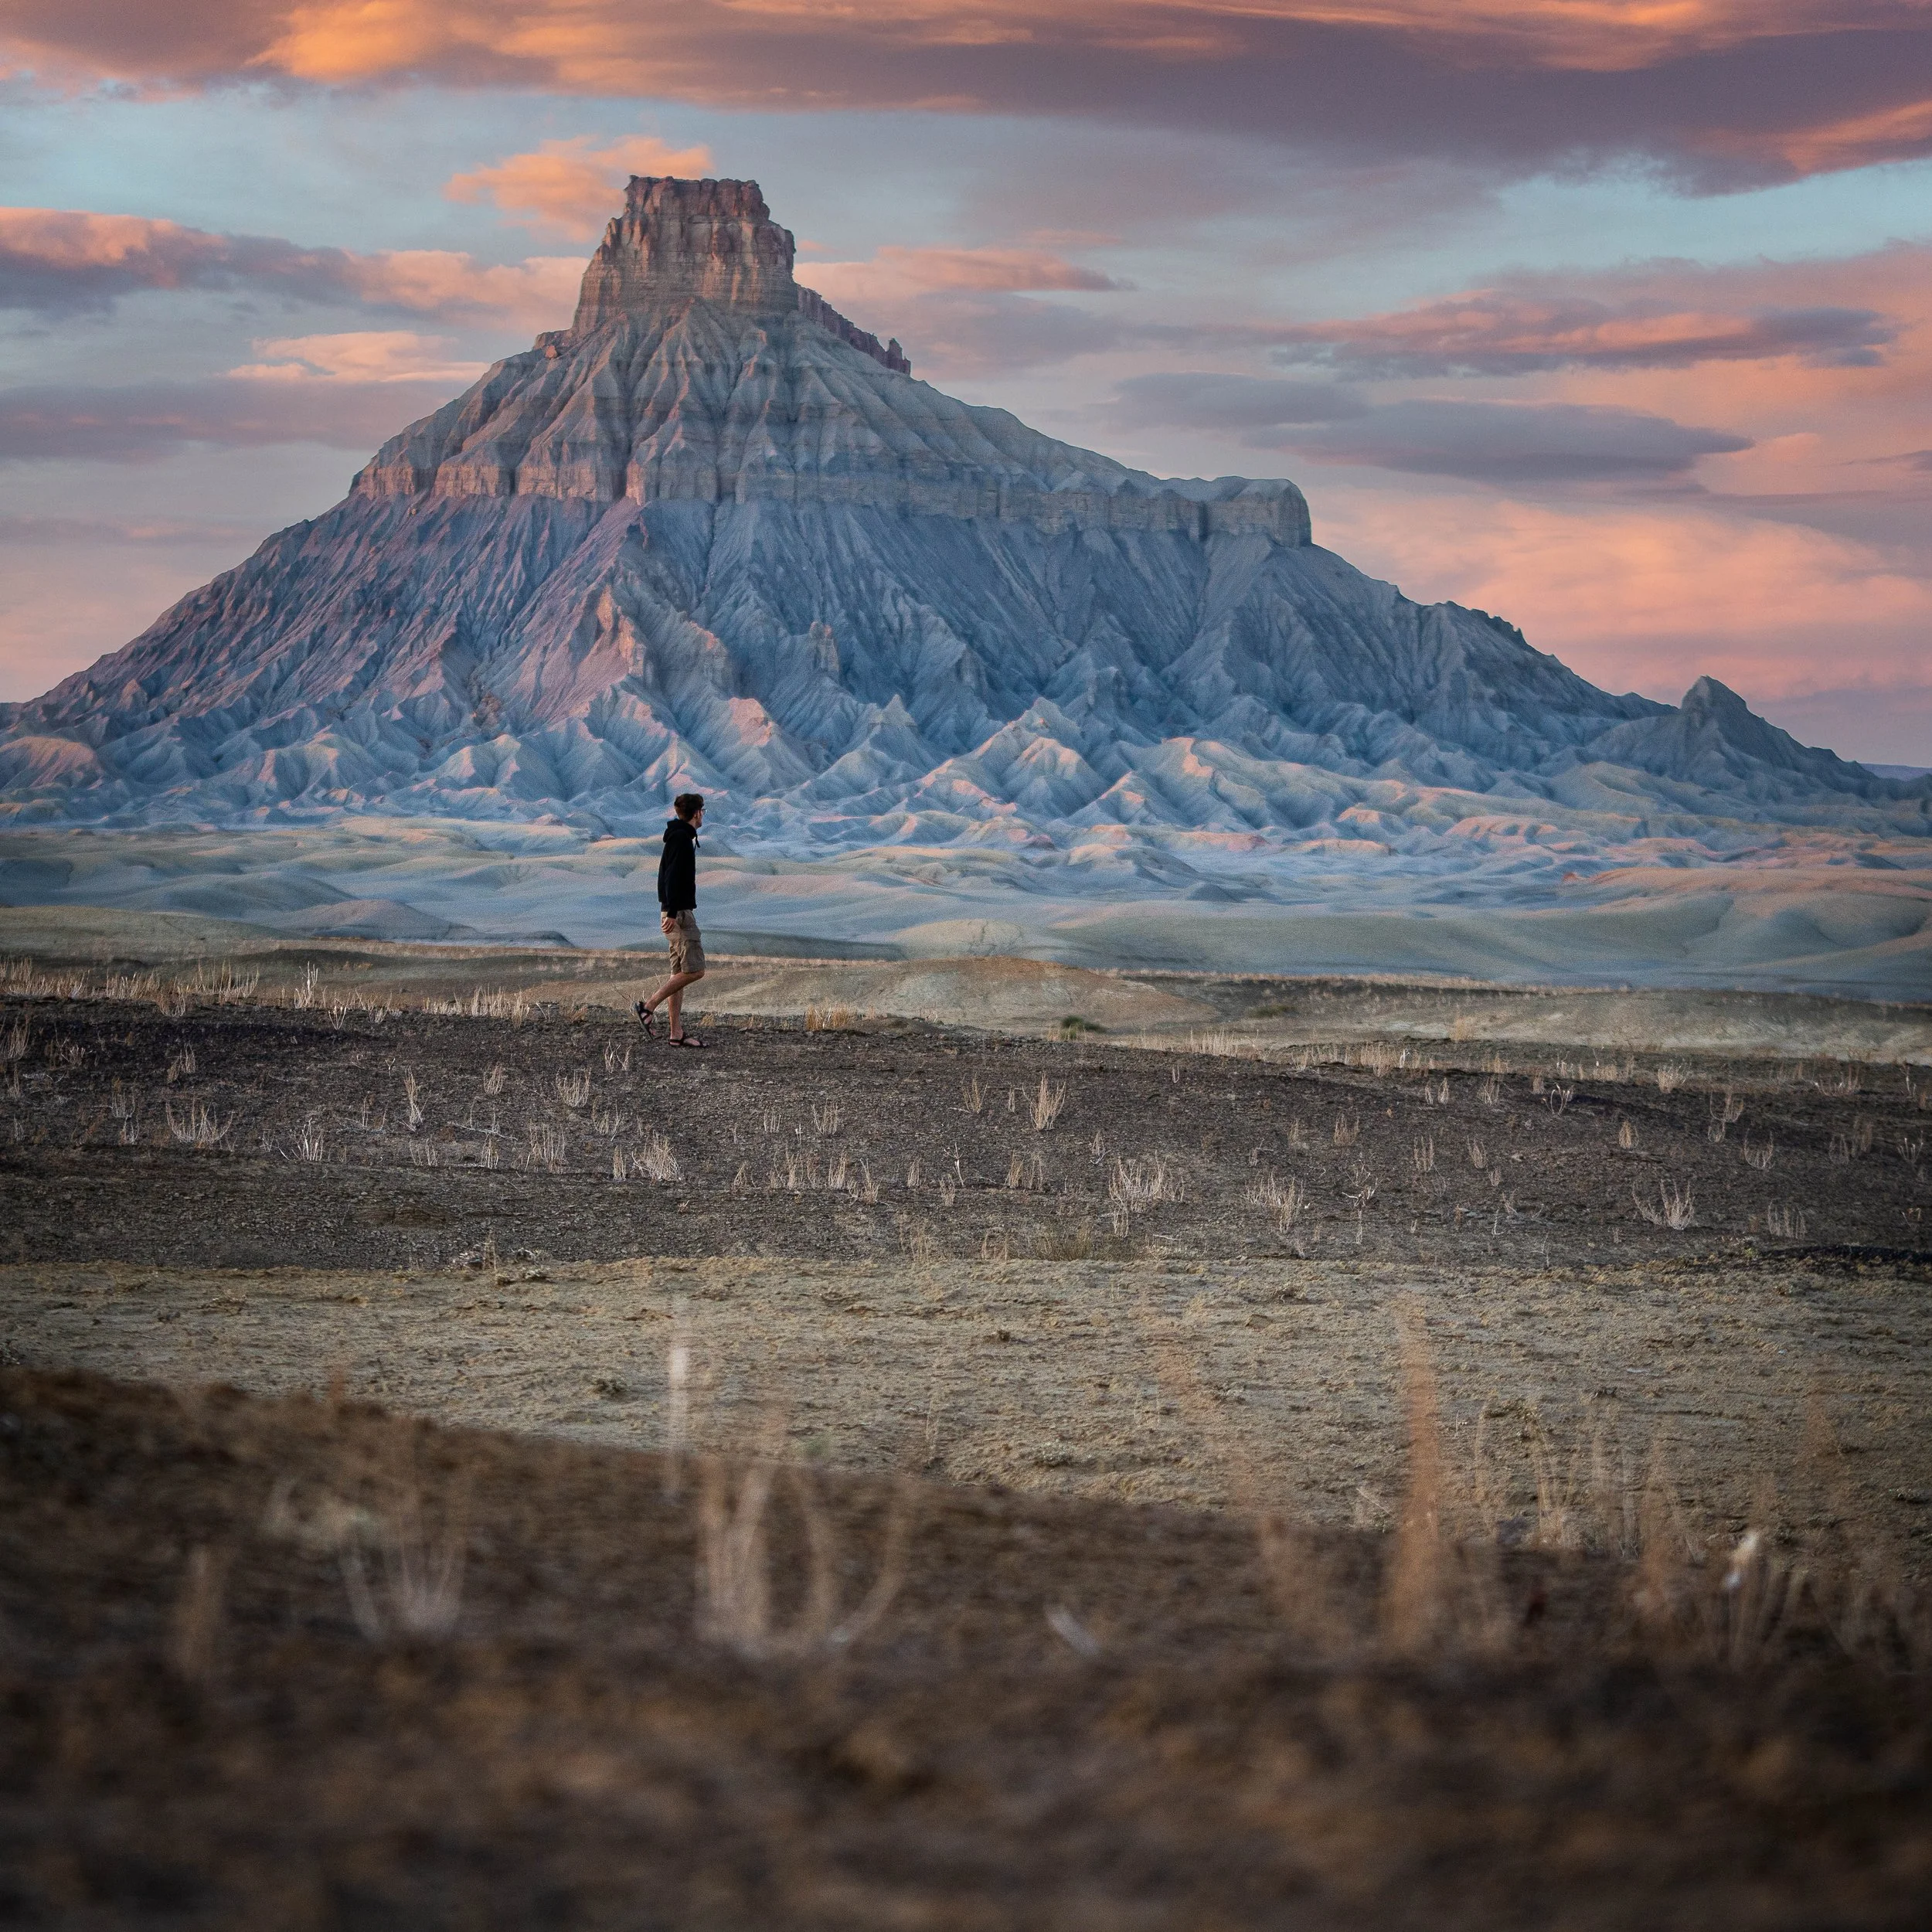
This photo, featuring depth of focus, was taken at Factory Butte in Utah.
In the foreground, we have blurred weeds. In the center is me, which is the subject of the shots, and behind me is Factory Butte. So we have a foreground, a subject, and a background, which, when combined, help add dimension to the shot.
Another example is this shot taken in a wheat field in Colorado:

This photo, featuring depth of field, was taken on a hill in Niwot, Colorado.
The wheat in front is slightly blurred, the subject (me) is walking next to a tree in focus, while the blue sky in the background rounds out the image. Those three layers work together to create form.
4. Use Layers and Atmosphere
Speaking of layers, they’re another excellent way to create form without relying too heavily on aperture.
Check out this shot:

This photo was taken near the Baja Rocks park in Baja California, Mexico.
There's a saguaro cactus on a hill in the middle of the image, and layers of hills in the background. These stacked elements tell the viewer there are multiple depths to the image.
Atmosphere, such as fog, rain, smog, or smoke can also be great for adding form to an image. These types of conditions make objects far away look hazy and less defined, which naturally adds depth.
For example, in this shot, I’m standing in an archway:

This photo was taken on a foggy day in Realto Beach, Washington.
Through the arch, you can see a hazy sea stack in the background. That extra layer adds form to what would otherwise be a simple silhouette.
In editing, this is where dark points come into play. The theory is that anything closer to the camera should have darker shadows, while objects farther away should be lighter and have less contrast. This technique can be used while editing to really bring out that sense of depth.
5. Use Framing
Another way to add form is through framing- a composition technique where you use shapes in your environment to surround (or highlight) your subject.
For instance, here’s a shot which I took early in my photography journey (on a Google phone):
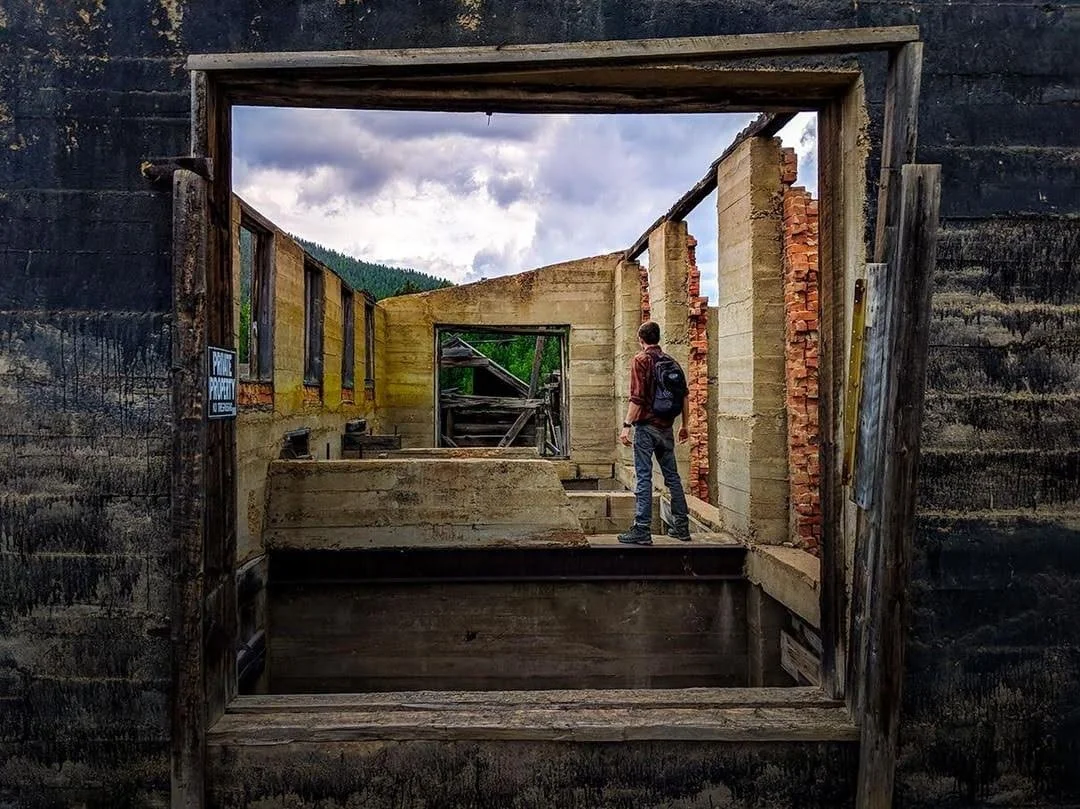
This photo was taken at the Russell Gulch Ghost Town in Colorado.
It shows me framed by a rectangular opening in an abandoned building. By using natural frames in your scene, I’m creating layers and emphasizing the depth of a scene.
6. Use Diagonal Lines
The sixth way to add form is by using diagonal lines. We talked about this in the Lines and Shapes tutorials, especially in relation to triangles.
Diagonals add energy and depth to an image and can pull the viewer inward.
Take this shot, for example:

This photo was taken at the Manchester Farm in Kentucky.
Two diagonal fence lines point toward the center of the farm. If those lines were straight, the image would feel much flatter. Diagonals create perspective, which enhances the 3D look of your image.
7. Use Black and White
Finally, one last way to create form is to convert your image to black and white.
Sometimes, color can be distracting. Black and white simplifies everything down to highlights, mid-tones, and shadows, which can make the form more apparent.
For example, here’s a shot I took at a church in El Salvador:

This black and white photo was taken at Catedral de Nuestra Señora Santa Ana in El Salvador.
I struggled to make it work in color, as it just felt too chaotic. But once I converted it to black and white, the pigeons flying in front of the white church stood out more clearly. They added the dimension the color version was lacking.
If you’re ever editing a shot and can’t figure out how to make it work in color, try converting it to black and white and playing with the shadows and mid-tones to bring out the depth.
Summary
Overall, there are seven main ways to add form to your photography:
Use the full spectrum of luminosity.
Shoot during golden hour, or use artificial side lighting.
Create depth of field in your shots using aperture.
Look for layers in nature and atmospheric conditions.
Frame your subjects using shapes.
Utilize diagonal lines to pull the viewer in.
Convert the image to black and white to emphasize the tones.
Really, you're just looking for ways to add dimension and depth, which is what pulls people into your photos. This will enhance the sense of realism in your photography. We always want to strive to maintain the illusion that they’re looking at something real, not simply a photograph.
Let’s go ahead and jump into the next tutorial, where I’m going to cover everything you need to know about Color.