
10 Tips for Phenomenal Forest Photography
Learn 10 tips to improve your photography in the forest.
Prefer to watch this tutorial in video format? 😏
In this tutorial, I'm going to be walking you through 10 tips to improve your forest photography. Forests can be intimidating if you’re not used to shooting them, because of the sheer number of composition choices available. But I’m going to show you how to hone in on the best scenes.
Let’s dive in.
Tip #1: Squint Your Eyes
The first thing you’re going to notice when you enter a forest is that there are a million and one subjects to choose from. Squinting your eyes can help you channel out the unnecessary noise.
Take a look around. What pops out in this blurry mess? If you see a massive object, or a color that stands out, make that your subject. From there, try to isolate that subject from the rest of the chaos to the best of your ability. Remember in photography, and especially a forest, minimalism is key.
Don’t be afraid to move around, get off the trail, and go higher or lower to figure out the best angle to capture it from.

This photo, taken in the Hoh Rainforest, features a subject that looks like a claw hanging from above. Squinting my eyes helped me see this shape in isolation.
Tip #2: It’s Gonna Get Dark
Keep in mind that forests get dark early due to the high tree cover. This means that forests aren’t great right at sunset, and are actually better a few hours before sunset. It took me a few goes to realize that golden hour doesn’t apply to every kind of environment out there.
As a general rule of thumb, I like to arrive in forests ~ 3 hours before sunset. This gives me approximately 2 hours of time where the light is coming in at the lowest possible angle before disappearing.
If you’re hiking deep into the forest near sunset, make sure you have a flashlight, extra batteries, and a trail map ready so you can easily navigate back once you’re done. Believe me when I say that being in a forest after sunset can be very disorienting if you’re not ready.

This photo, featuring three rocks against a pattern of aspens, was taken near Bear Creek in Telluride, Colorado.
Tip #3: Check Foliage Maps
My third tip is for capturing fall colors. How do you find spots to shoot those brilliant yellow and red tones? Well, my best advice is to check foliage maps as fall approaches.
The timing of peak colors varies heavily depending on where you are in the world. In the United States, for example, some regions can experience fall colors several months apart from each other- and it’s inconsistent from year to year due to weather conditions.
The good thing is that most regions that are famous for fall colors use foliage maps to provide real-time updates on when they predict the fall colors will be at their peak. You can also call local park rangers for advice, or look on online forums.

This photo of fall foliage was taken at Keebler Pass in Colorado, a popular destination for fall colors.
Tip #4: Look for Plants that Stand Out
When looking for a subject, look for plants that stand out against the usual fare. There’s always one- be it the dead plant, the out of place plant, or the plant that has some sort of growth defect. These make for the most unique subjects.
Alternatively, go to the other side of the spectrum. Look for similar plants in excess to the point where they’d make a good pattern shot. It’s the extremes that work well in forests.

I immediately noticed this plant when walking through a rainforest in Guatemala because it stood out against all the plants around it, and was aligned near perfectly.
Tip #5: Absorb Moisture
My fifth tip is for how to absorb moisture in humid climates- like a rainforest or jungle, for example. Your gear will likely get damp, and so will you. The best way I’ve found to deal with this is to use small silica gel packets.
You can buy them online and place them throughout your camera bag to absorb excess moisture overnight. The next day, when you grab your camera to take a quick shot, you won’t have fog or condensation on your lens.
Another tip is to try to keep your camera and lenses at a constant weather temperature. If you’re sleeping in a cold car with AC overnight, then step outside into intense humidity first thing in the morning, your lens will fog up. Keep this in mind as you’ll need to wait for the lens to reach the outside temperature before it stops fogging.
Tip #6: Look for Balanced Lighting
When in a forest, look for areas where the lighting is balanced. One of the hardest parts about forest photography is dealing with bright pockets of sunlight mixed with deep shadows. This is particularly relevant on cloudless days. Capturing that full dynamic range can be difficult, even if you try blending exposures.
To counter this, I’d recommend shooting in areas with more tree coverage, where you can isolate subjects in complete shadows. Foggy or misty days are especially great, as the diffused light makes forest photography much easier.

This photo, taken in the Muir Woods, didn’t have any particularly powerful lighting- but it was balanced. This allowed me highlight the strange branch as a primary subject.
Tip #7: Bring a Small Beanbag
If you’re trying to shoot small macro scenes, a bean bag is a great alternative to a tripod. The bean bag allows you to get your camera close to the ground and make micro adjustments without having to mess with the clips on a small tripod.
The best part about a beanbag is that it’s lightweight and easy to pack for any moment that arises. You can effortlessly bring them on every adventure to be ready for bugs, mushrooms, and small flowers on the forest floor.
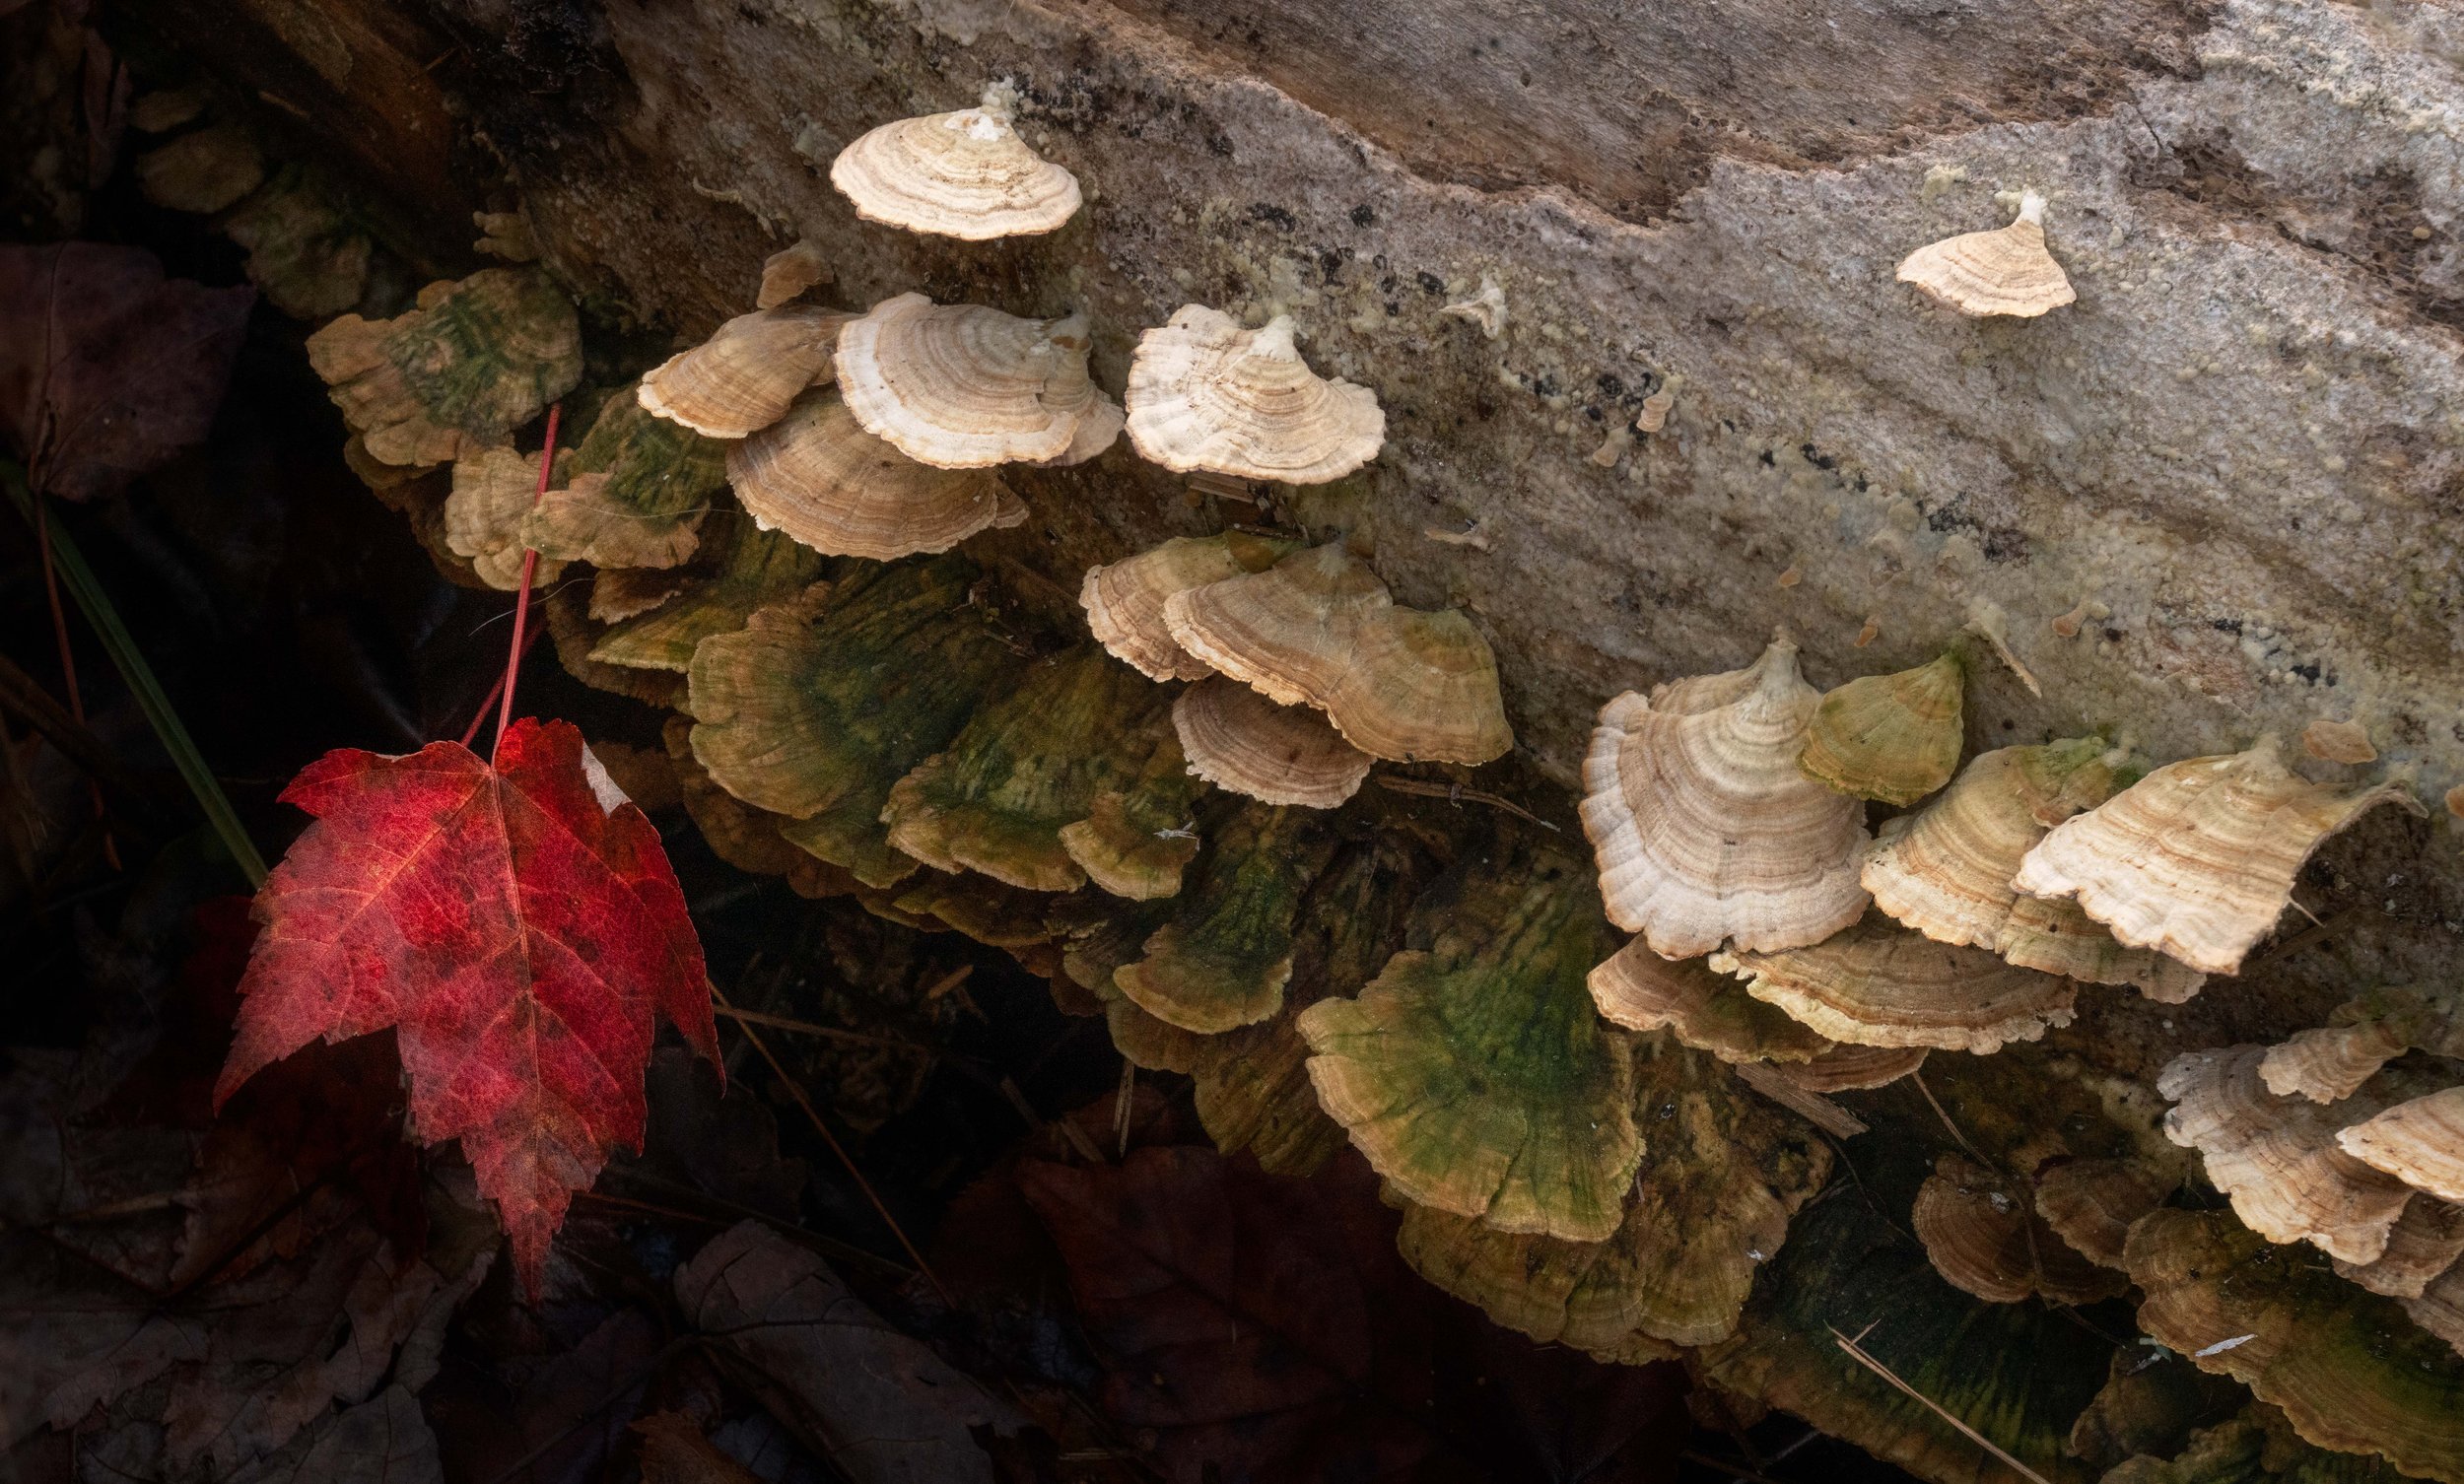
In the drab environment of the forest floor, this red leaf stood out, which made it a great subject against the mushroom backdrop. This photo was taken in the Wild Gardens of Acadia in Maine.
Tip #8: Use Pathways as Subjects
A good hack for forest shots is to look for pathways in the forest. They make great subjects because they create natural leading lines. This can guide a viewer’s eye into the distance or toward a main subject.
Look for stone trails, carved-out paths, or even game trails, which are small tracks made by animals like foxes or deer. These pathways can help you compose interesting shots or simply make it easier to reach otherwise overgrown areas.

This photo of an ominous forest walkway was taken at Tikal in Guatemala.
Tip #9: Bring a Wide Angles Lens
The ninth tip is to always pack a wide-angle lens in the forest- especially in places with overarching trees like the Redwoods. They’re perfect for upward-looking shots that show the breadth of tall trees.
One of my favorite things to do in a forest is to lie on the ground with a 12mm or 14mm lens and shoot straight up. You can capture the trees stretching above you and the canopy of leaves overhead. It’s especially powerful if you shoot next to a large tree that can act as a leading line in your composition.
Here’s one more tip for wide-angle lenses that has saved me many times: if you can’t find a composition that works, take a photo with your phone, then use your wide-angle lens to photograph your phone displaying that shot.
This creates a “photo of a photo” effect that works great for Instagram-esque shots. The composition on your phone doesn’t have to be perfect- just make sure your hand and the phone are framed nicely in your wide shot.

This photo of sap dripping down was taken at the Redwoods in California.
Tip #10: Bring a Travel Umbrella
The tenth and final tip is for rainforest photography. If you’re somewhere where it rains constantly, or where the leaves are always dripping from humidity, buy a small travel umbrella that can fit in your pocket.
You can pop it open over your camera or tripod while shooting to keep everything dry. It’s much easier than trying to shoot under a bag or dealing with a soaked towel from constantly wiping down your gear.
Alright folks! Those are my 10 tips for forest photography. Let’s go ahead and jump into the next tutorial, where I’m going to cover 10 tips for Freshwater photography.