
The Only Lens Filters You Need
Learn about the five most common lens filters you’ll encounter in adventure photography.
Prefer to watch this tutorial in video format? 😏
Introduction
In this tutorial I am going to be going over everything you need to know what lens filters. We’re going to start by covering what a lens filter is specifically, and then dive into the differences between single, variable, and gradient filters.
From there I’m going to talk about the different filter sizes you might come across, and then dive into the five types of filters you’ll encounter.
Let’s start from the top!
What is a Lens Filter?
Lens filters are small pieces of glass (or plastic if you’re cheap) that you screw onto the end of your lens to achieve a variety of effects. The most popular use for filters is to reduce the intensity of light coming into the camera, but they can also be used for protection or to add something unique to the scene.
Personally, I recommend only using lens filters if absolutely necessary, because the general rule of thumb with lens filters is that adding more glass in front of your lens decreases its quality. By this, I mean that lens filters reduce the sharpness, add unnecessary lens flare, and create another layer susceptible to dust/spots. And if you just paid hundreds (or thousands) of dollars for a lens, why would you do that?
Well, there are several instances where lens filters are required to achieve a certain shot. Let’s find out what these use cases are- right after we understand the differences between single, variable, and gradient filters.
Single, Variable, and Gradient Filters
As we take our dive into the lens filter world, you’re going to hear three terms in frequency- single, variable, and gradient filters. These are the three different ways that lens filters are built.
A singular filter is essentially exactly what it sounds like: it’s a single filter that fits over the entire lens and achieves one specific effect.
A variable filter, on the other hand, can achieve a variety of different effects. For example, if you turn a variable filter, you can change the darkness of the filter. This is super handy because you don’t have to carry around a bunch of different filters if you want to experiment with different exposures and different levels of darkness over the front of your lens.
The third term is a gradient or graduated filter. These are filters where either the top or bottom is lighter or darker than the other. Generally, people use these for horizon shots. For example, if your sky is very bright and the landscape is much darker, you can put the darker part of the filter over the sky. That way, your image can be more evenly exposed overall.
However, graduated or gradient filters aren’t necessarily needed as much in today’s world because many professional cameras have such great dynamic range that you often don’t need to do this. In addition, you could simply use exposure blending, which is a technique I’ll go over later in the editing portion of this course, to achieve the same effect without having to carry around another clunky filter in your camera bag.
So, keep in mind those three terms as we go through the different types of filters in this video.

This photo, taken at Solomon’s Island in Maryland, involves a Photoshop exposure blend of the sky and the water below. If you had a gradient filter, you would not have to do the post-processing as both the sky and water would be exposed properly.
Filter Sizes
The first thing you are going to want to do is look for the specific size of the filter that will fit your lens. You’ll find this by looking for a number on your lens that has a zero with a line through it (Ø). This is called the thread size.
Different lenses have different thread sizes, so you can’t just buy one filter and expect it to fit all your lenses. For example, you might need a bigger filter for a zoom lens and a smaller filter for a 50mm f/1.8 lens. Keep in mind what types of shots you’ll be taking with which lenses when you’re shopping for your next filter.
Five Types of Lens Filters
Alright, now that we’ve gone over the basics, let’s dive into the five main types of filters you’re going to encounter.
ND Filters
The first, and most popular filter is called an ND filter, which stands for neutral density. Essentially, this filter reduces the brightness of light entering your camera.
This type of filter is great for shooting waterfalls or any scene where you want to use a long exposure, meaning you leave your camera’s shutter open longer to let in more light. The ND filter allows you to achieve that smooth, blurred water effect without overexposing your shot.
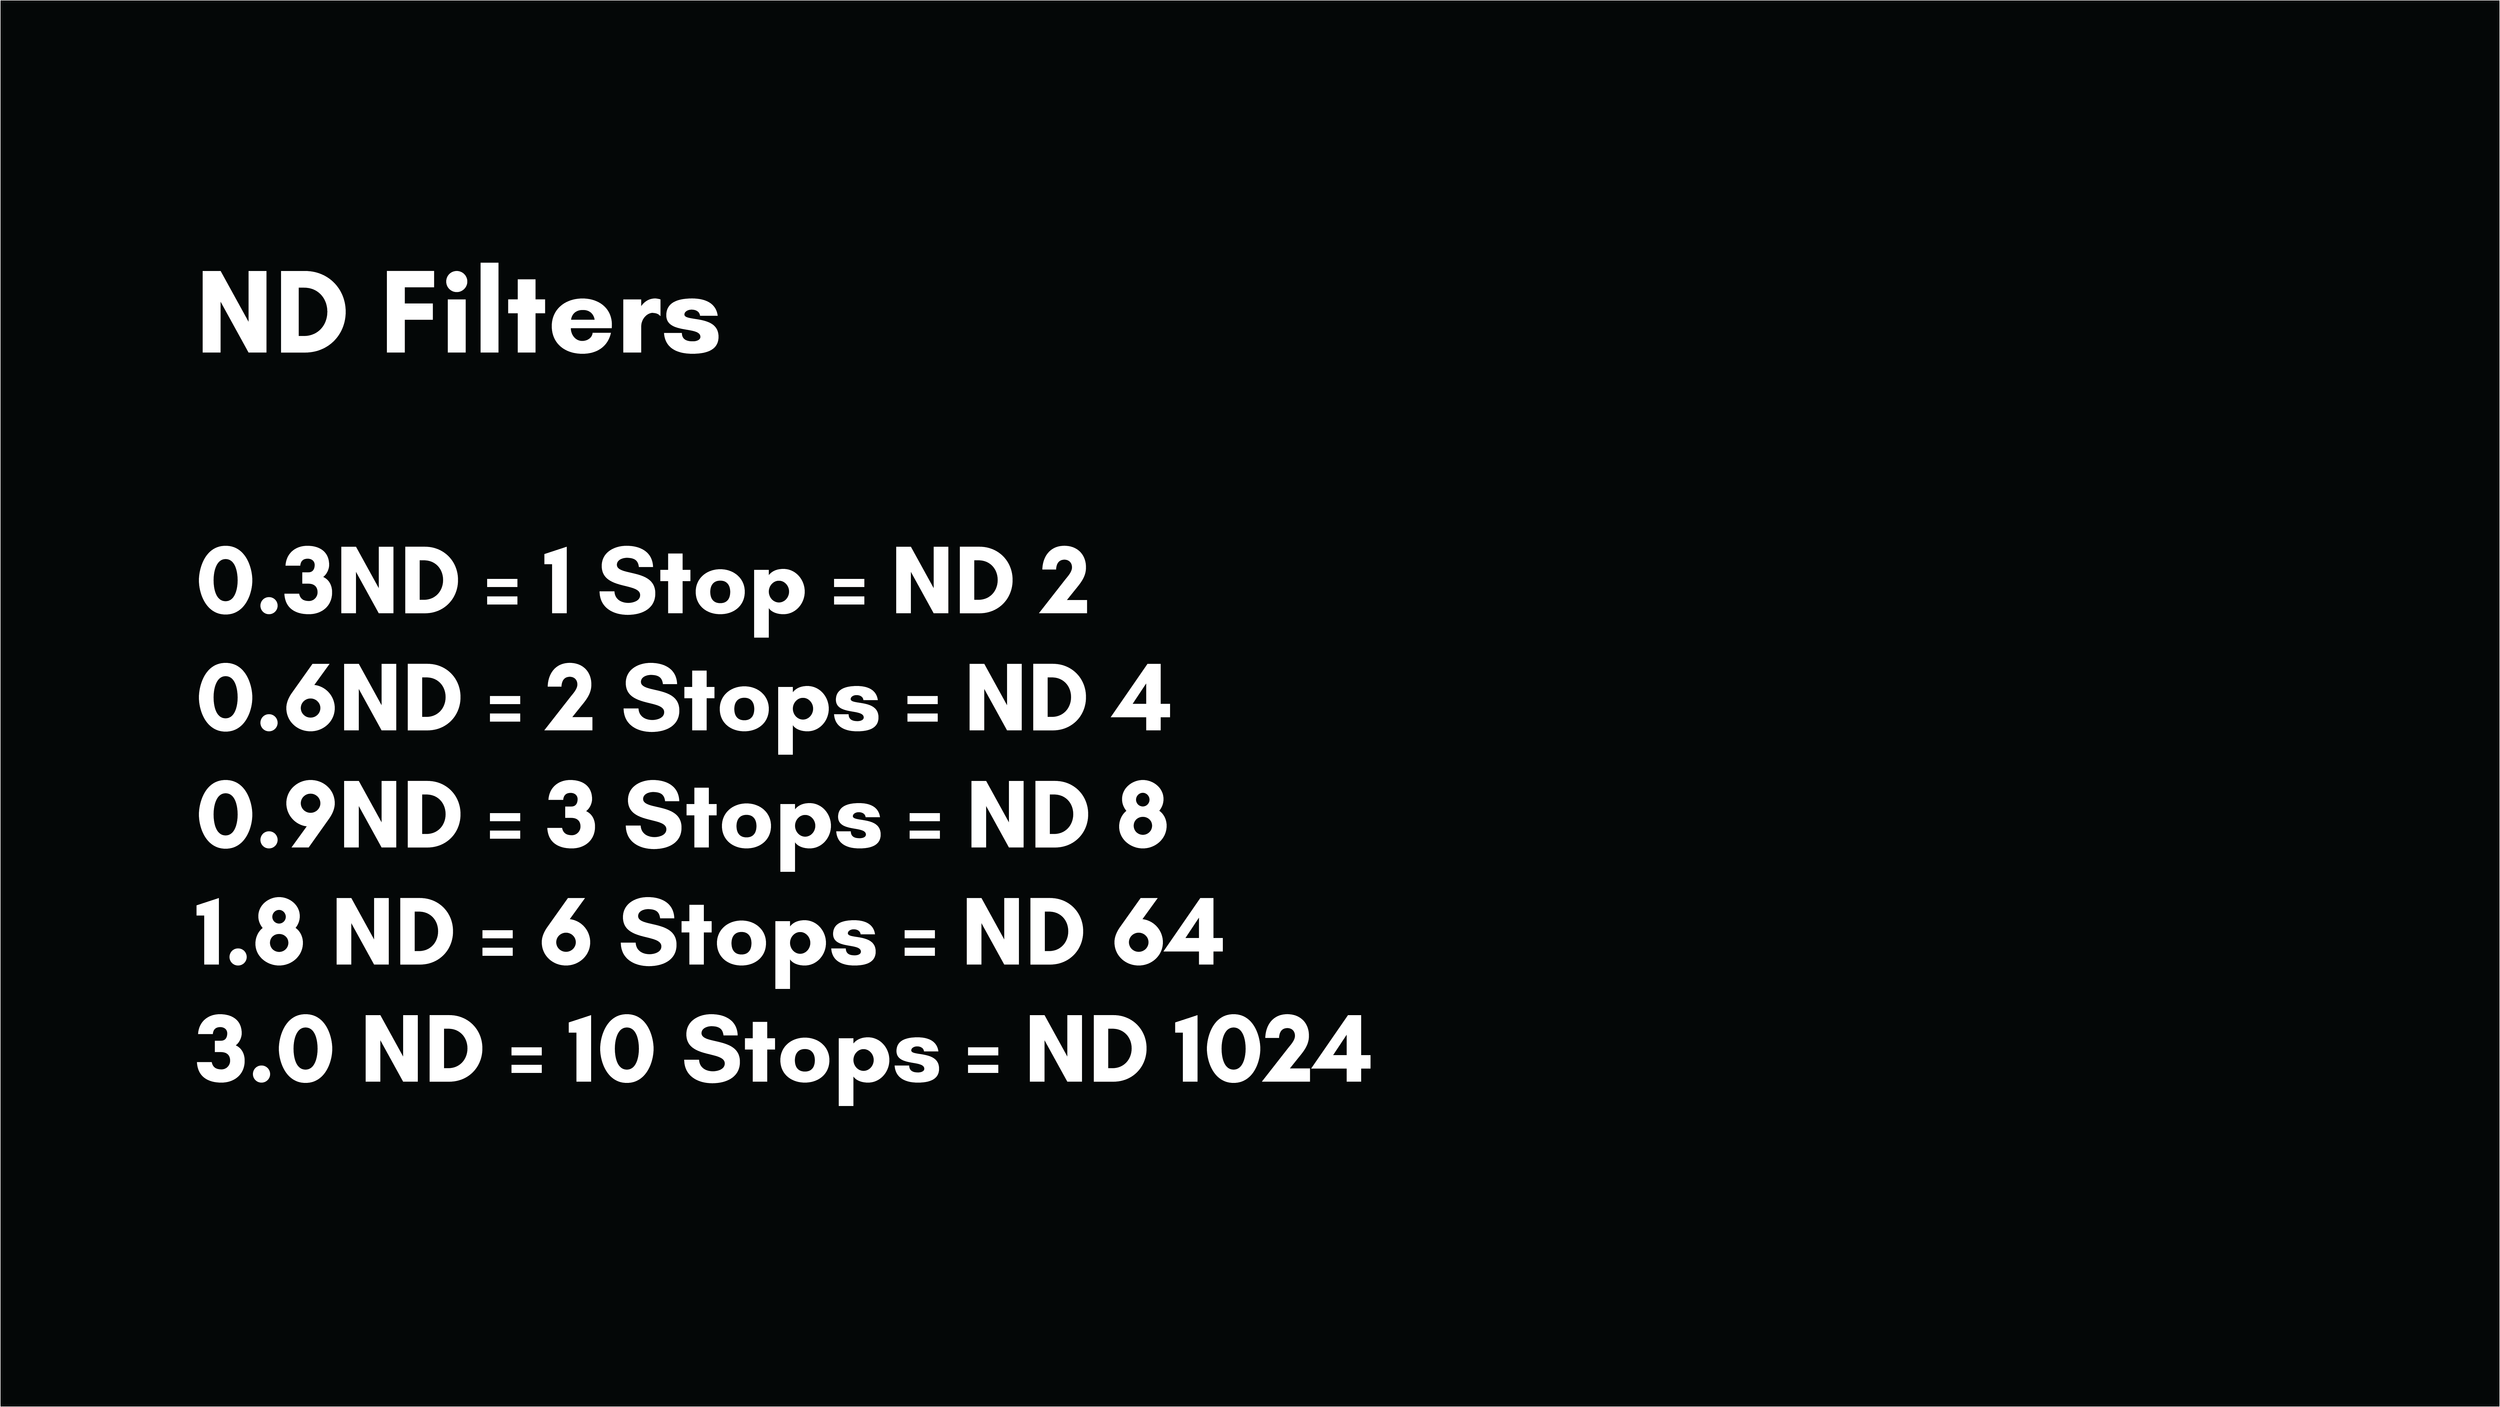
ND filters come in a variety of densities. For example, I’ll put up this chart here showing the different levels of ND filters and their stops, which essentially means how dark each filter is.
Personally, I recommend getting a variable ND filter. As we discussed earlier, this is a single filter you can turn to adjust its darkness. It saves you from carrying around a whole set of ND filters. You just put one on your lens and adjust it based on the lighting situation. This will save you time and more importantly, space in your camera bag.

This photo was taken at Cummins Falls in Kentucky with an ND filter to blur the water.

This photo was taken at Drift Creek Falls in Oregon without using an ND filter- hence the choppiness in the water.
Polarizing Filter
The next type of filter is a polarizing filter. These are used in situations involving water, glass, or glare.
For example, if you’re shooting a lake and there’s glare on the water, a polarizing filter can help reduce it. Or, if you’re at an aquarium shooting fish through glass, this filter can minimize reflections and give you cleaner images.
I personally don’t use polarizing filters very often, mainly because the extra weight isn’t worth the very specific situations within which I’d need it. Most of the time, I position my camera to avoid glare rather than rely on a filter. However, I do recommend owning one especially when you’re first starting out to experiment and see if it fits into your workflow.
A lot of people also use polarizing filters because they can slightly increase saturation and clarity, and even reduce haze on bright, hazy days. If this is a look you’re into, it might make this filter worth considering.
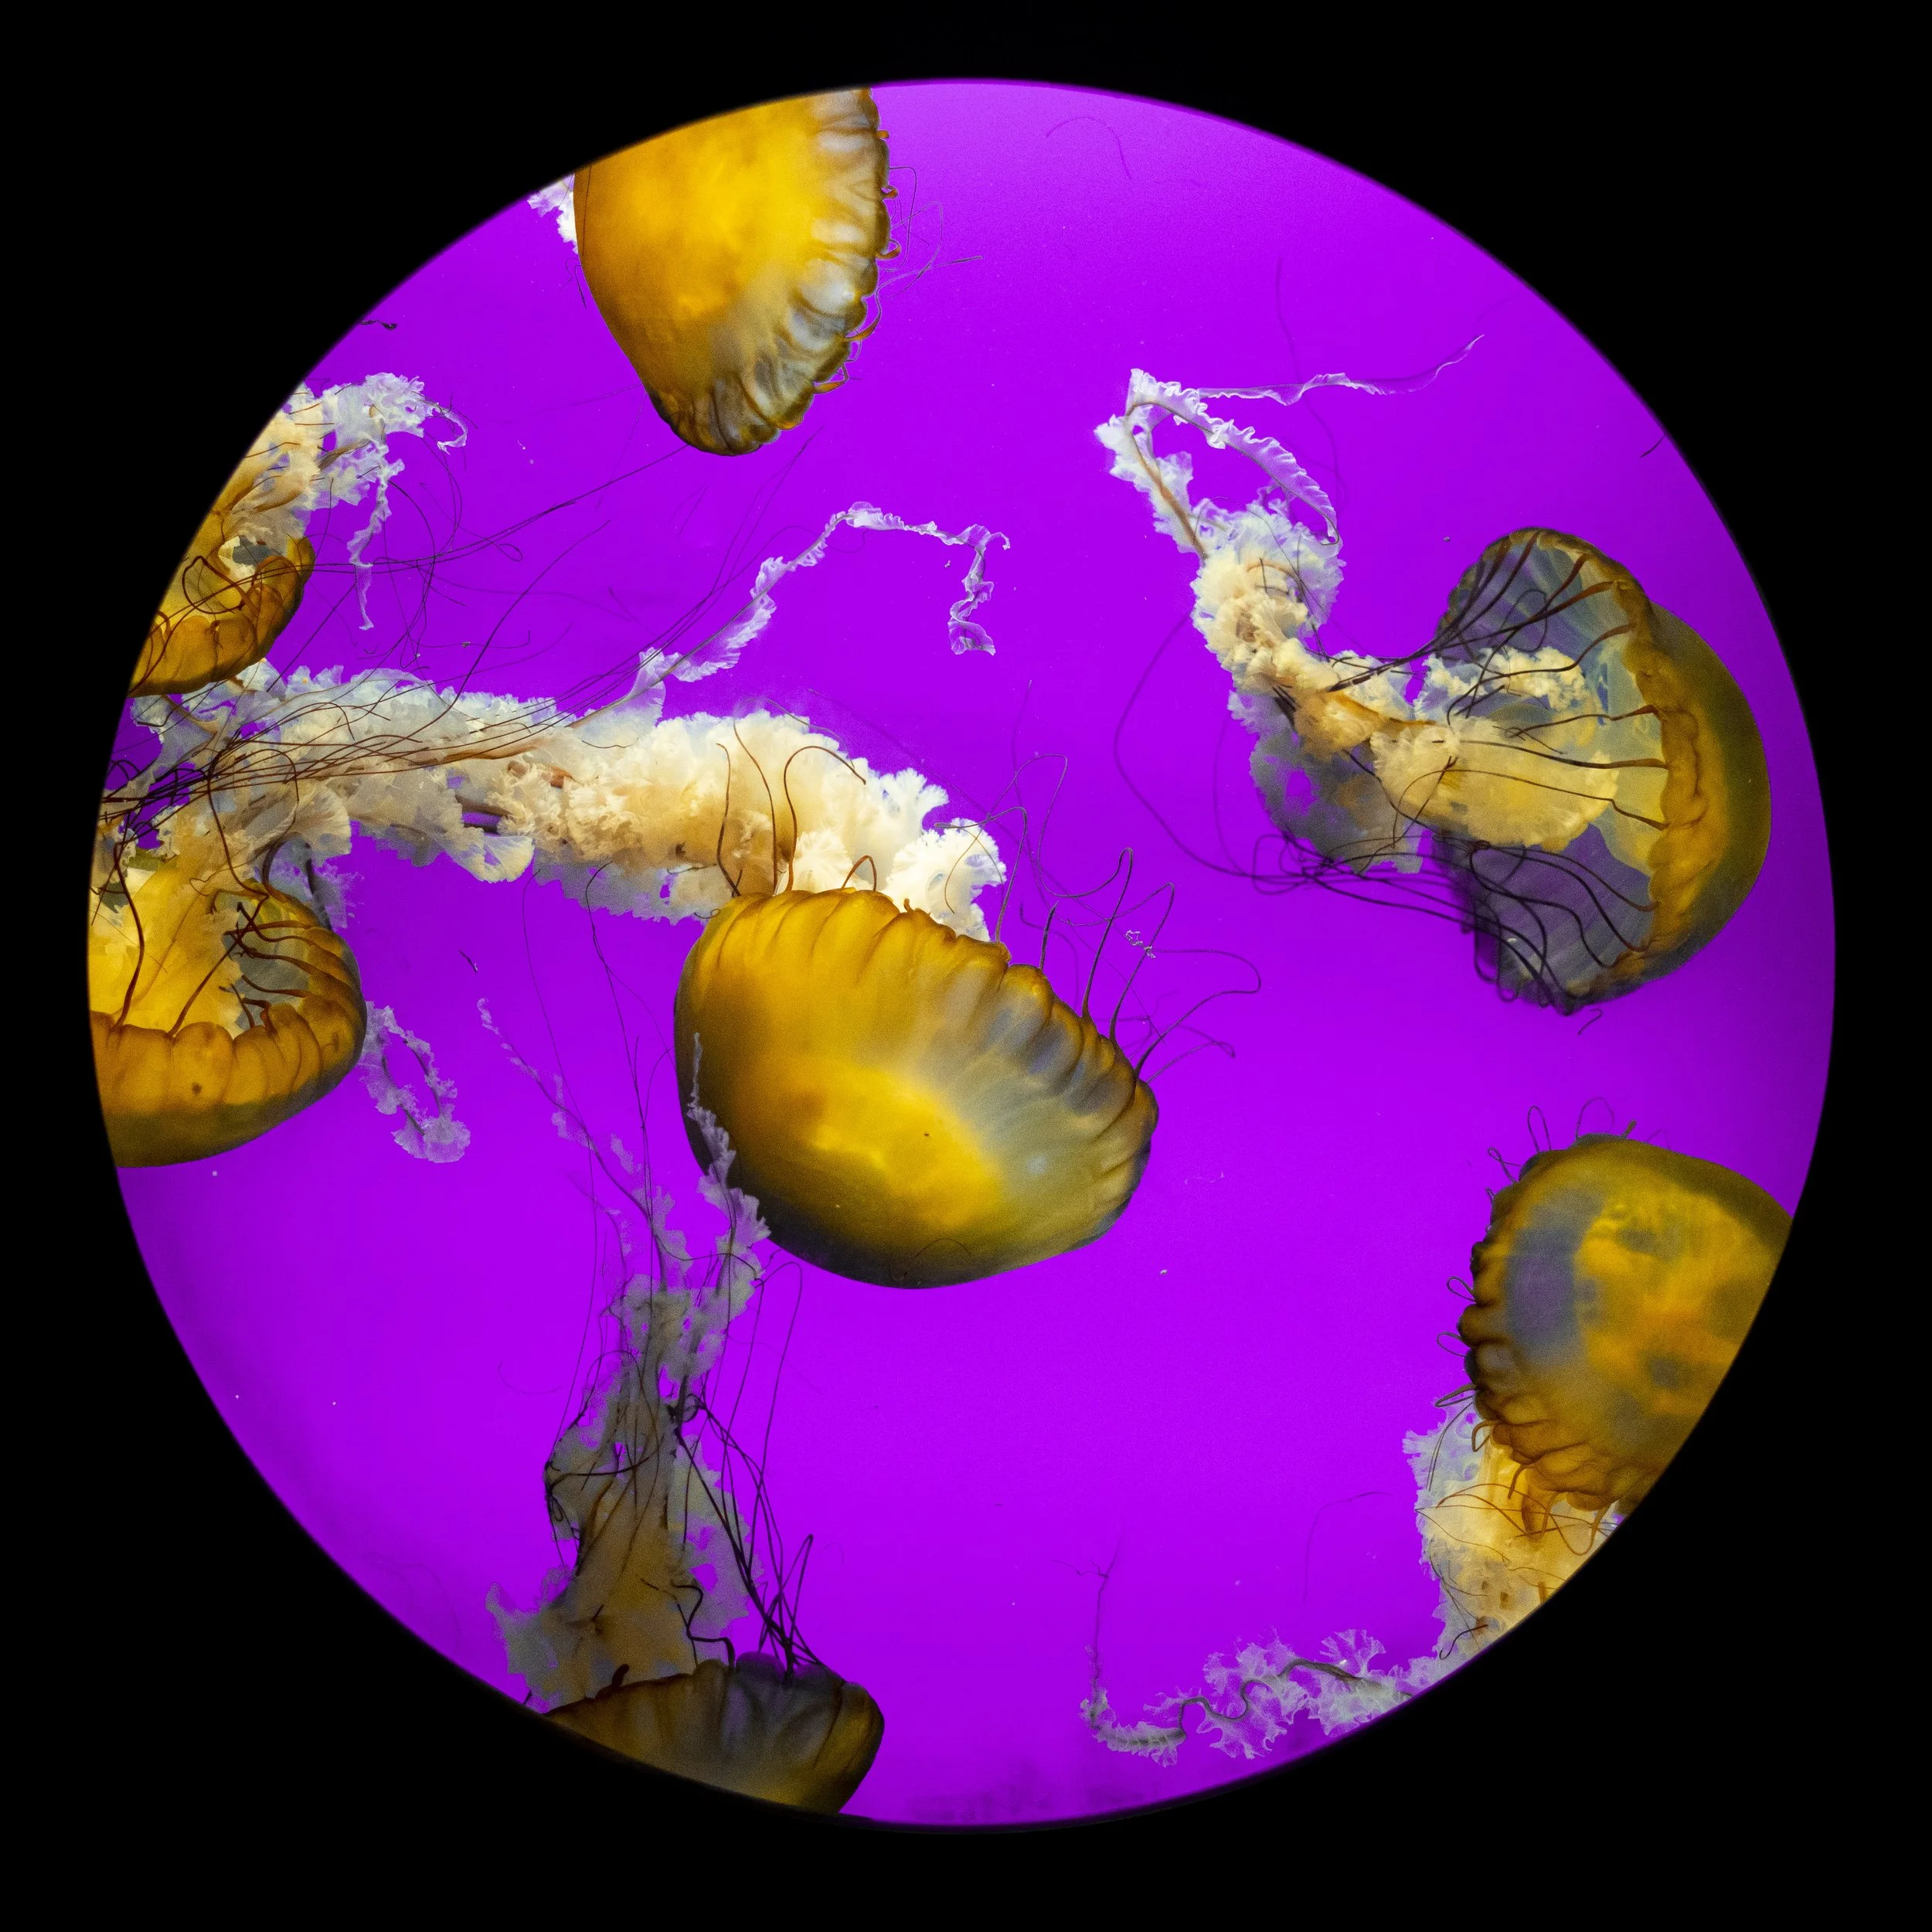
This photo of jellyfish was taken at the Denver Aquarium with a polarizing filter to avoid glare from the glass.
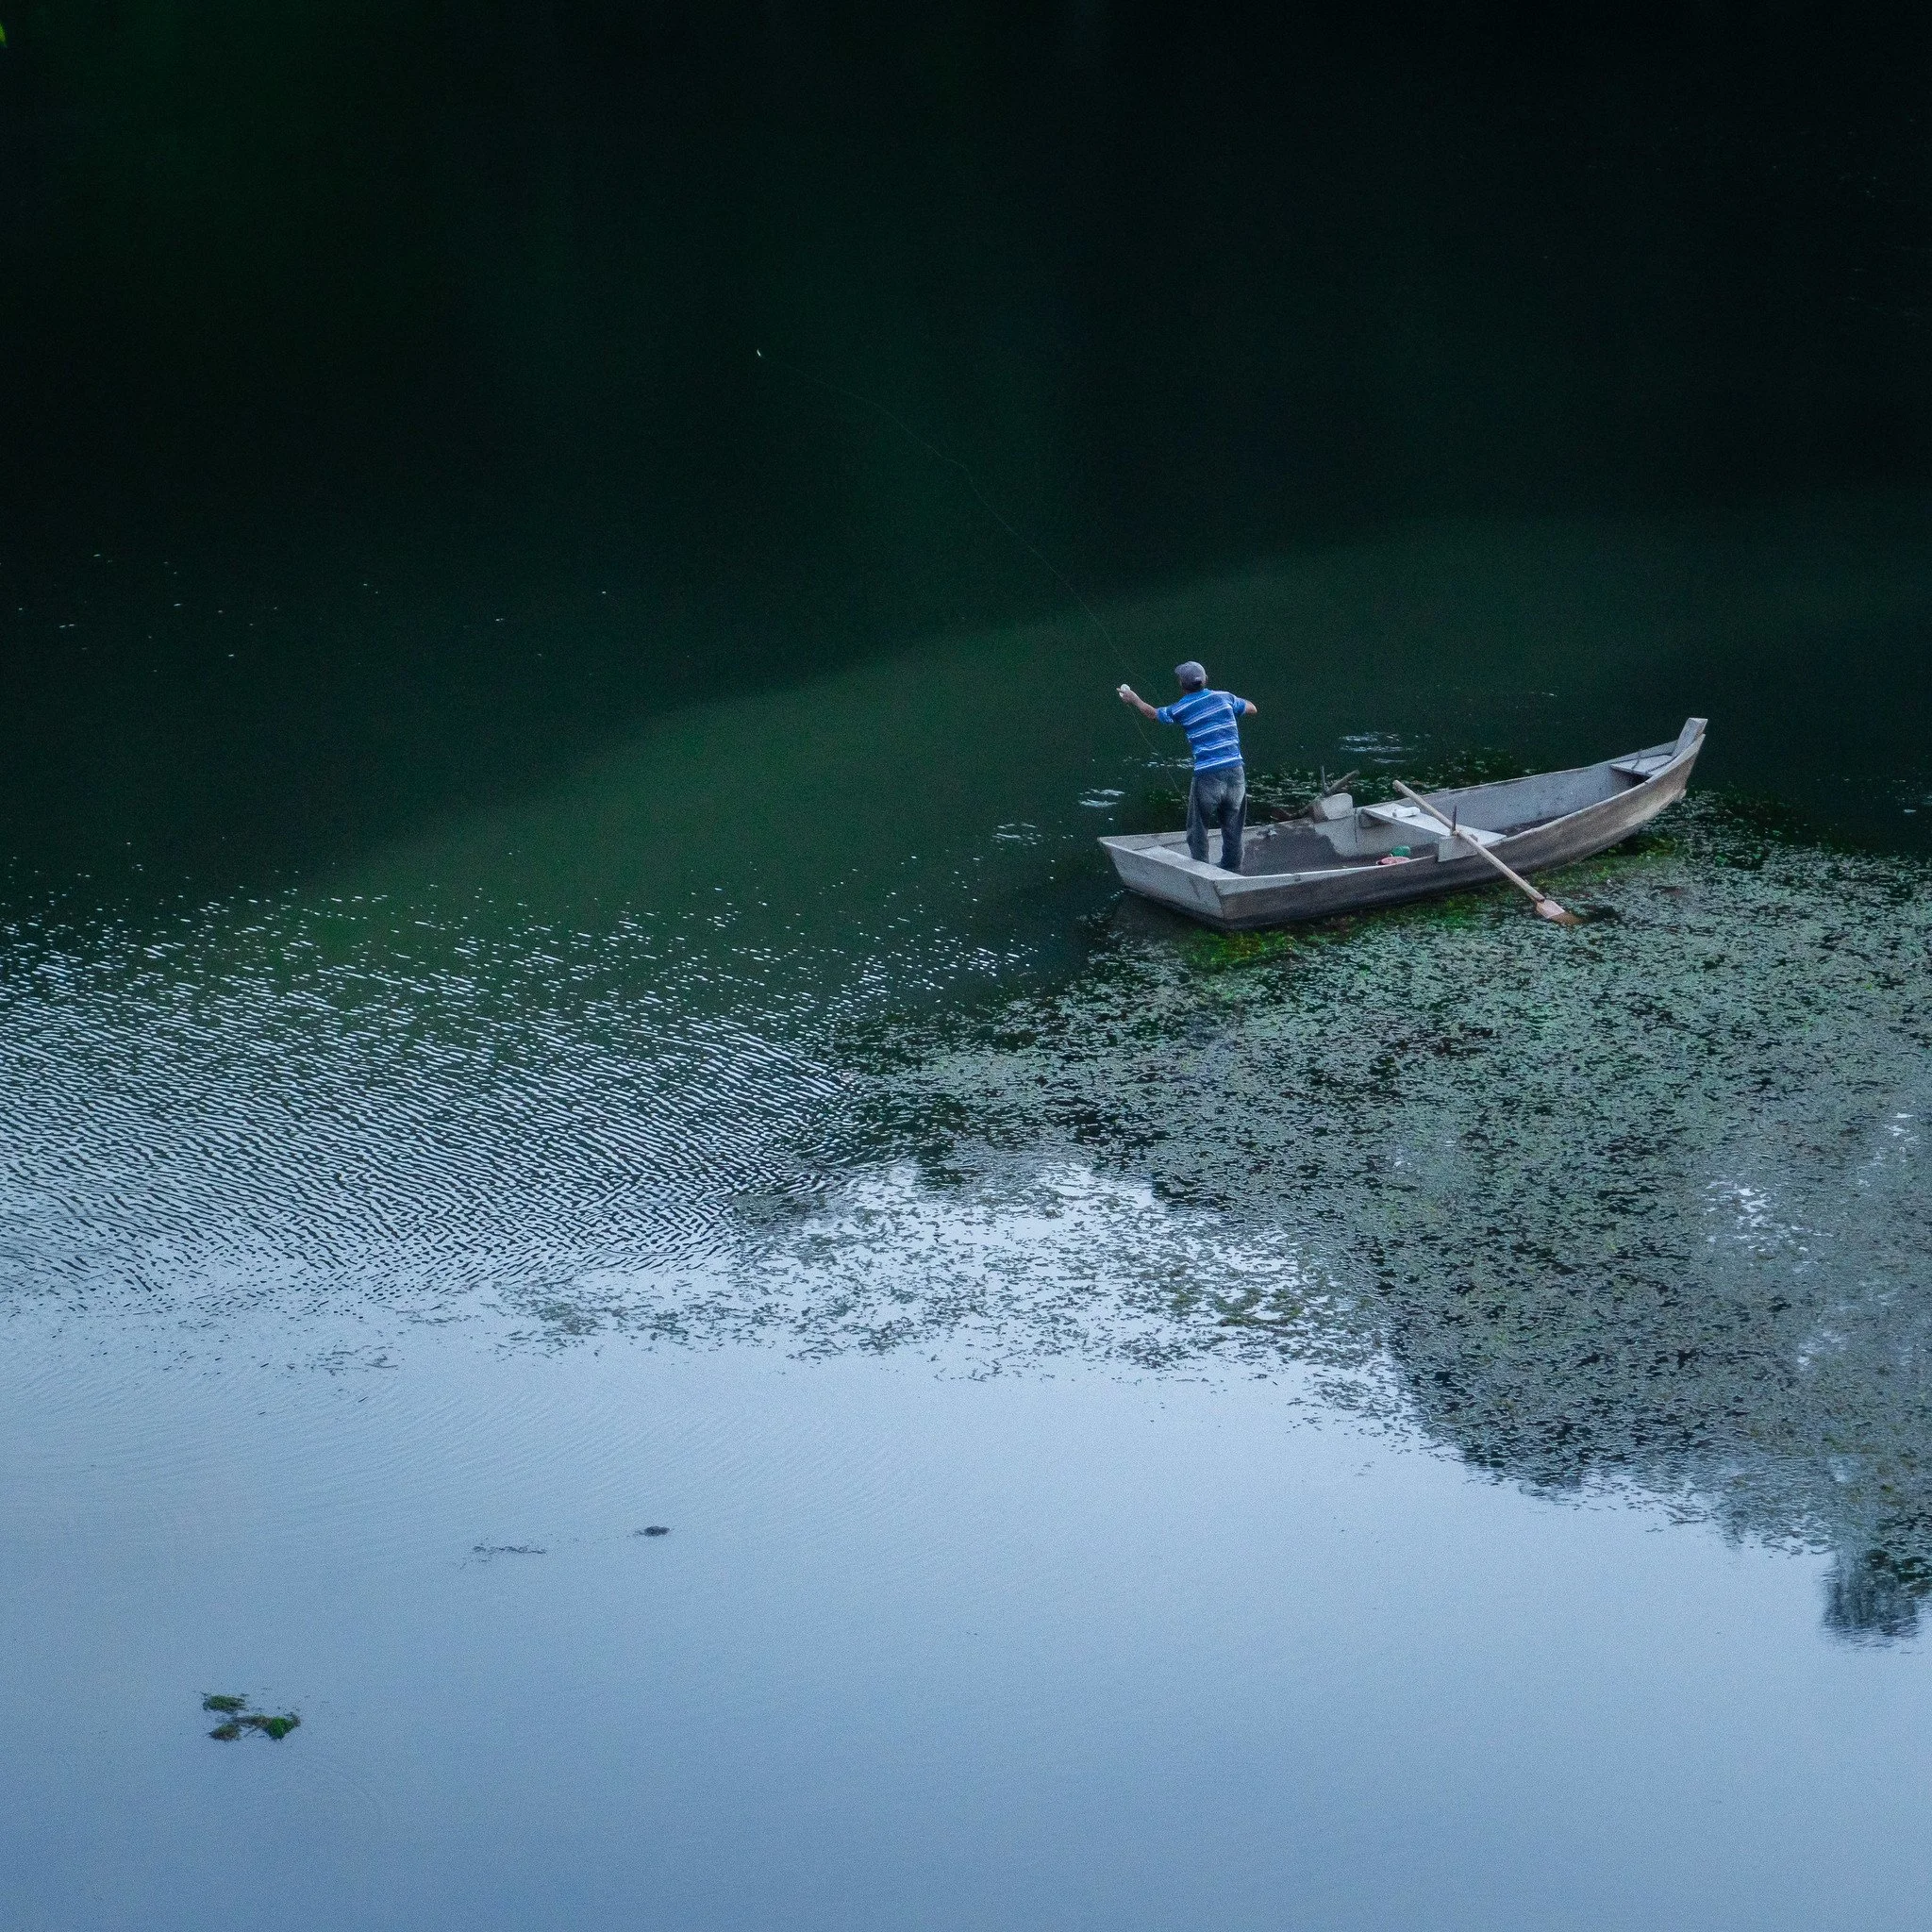
This photo was taken at Laguna Yure in Honduras, without a polarizing filter. You can see how the water has a decent amount of glare in it- however it doesn’t effect the overall image too much.
UV Filters
The third type is the UV filter, and in my opinion, it’s the biggest scam in the photography world.
You don’t need one, despite what blogs or camera companies might say. They’re marketed to reduce the intensity of UV light coming into your lens, but modern lenses already block UV light pretty effectively.
One possible use case for UV filters for lens protection. They can be a good barrier to shield against weather, water, or sand. But honestly, I recommend just being careful with your gear. Adding an extra piece of glass to your lens can slightly reduce image quality, especially with lower-end lenses.
Macro Filters
The fourth type is a macro filter, which allows your lens to focus on objects much closer than it normally could.
For example, if you want to photograph a bug or water droplets but your lens can’t focus that close, you can use a macro filter to get the shot. They basically screw onto the end of your lens like any other filter, except they increase its magnification by various amounts.
Macro filters are a great way to experiment with macro photography without investing in a dedicated macro lens. But keep in mind that if you want to get serious about macro photography, a proper macro lens will give you much better image quality. Start with a macro filter to try it out, and if you enjoy it, consider upgrading to the real macro lenses.
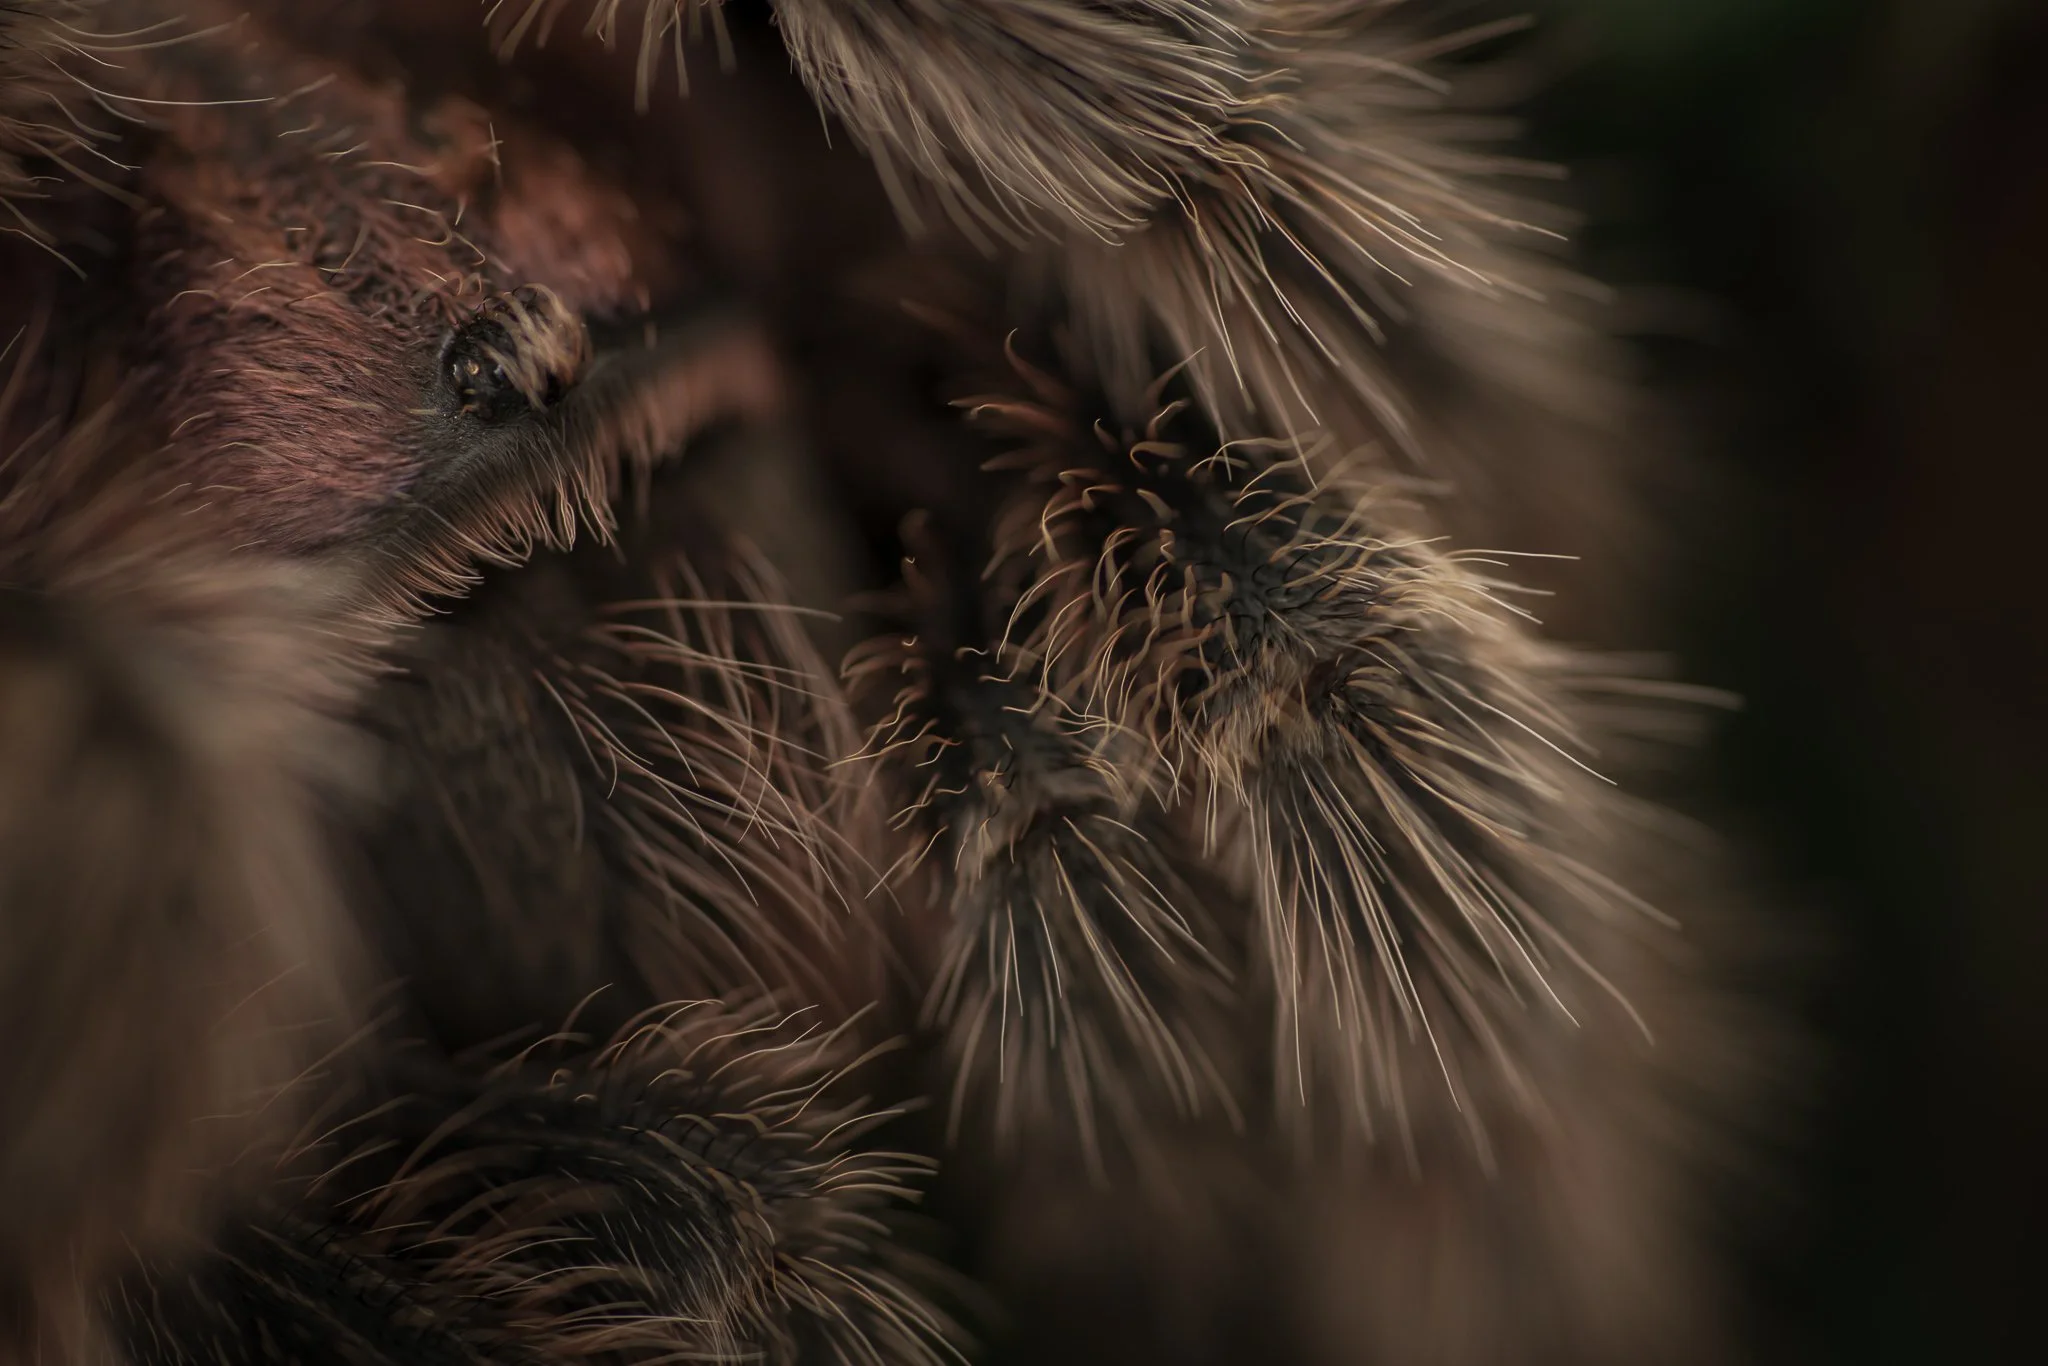
This photo of a tarantula was taken using a macro lens. I’ve never used a macro filter.
Gimmick Filters
The fifth type is what I call gimmick filters. These are novelty filters that add fun effects to your photos, like rainbow flares, starbursts, sepia tones, or color tints.
They’re great for creative portraits or just having fun on a photo session. For example, if you want to throw stars on all the lights in the background, or if you want to give your photos a hazy look, they could be a good option. But for more serious photography, they’re not very practical, especially since most of these effects can be recreated in Photoshop with more control and precision.
Conclusion
Alright! That’s everything you need to know about filters for your adventure photography. To wrap up:
ND Filter – Highly recommended and probably the most essential filter to own.
Polarizing Filter – Good to have for specific situations, like water reflections.
UV Filter – Skip it. You don’t need one unless you want extra protection on your lenses.
Macro Filter – Great for experimenting; upgrade to a macro lens if you get serious.
Gimmick Filters – Fun for creative shots, but not necessary.
Now let’s go ahead and hop into the next tutorial, where I’m going to cover everything you need to know about adventure photography Drones.